Homemade Tart Cherry Pie
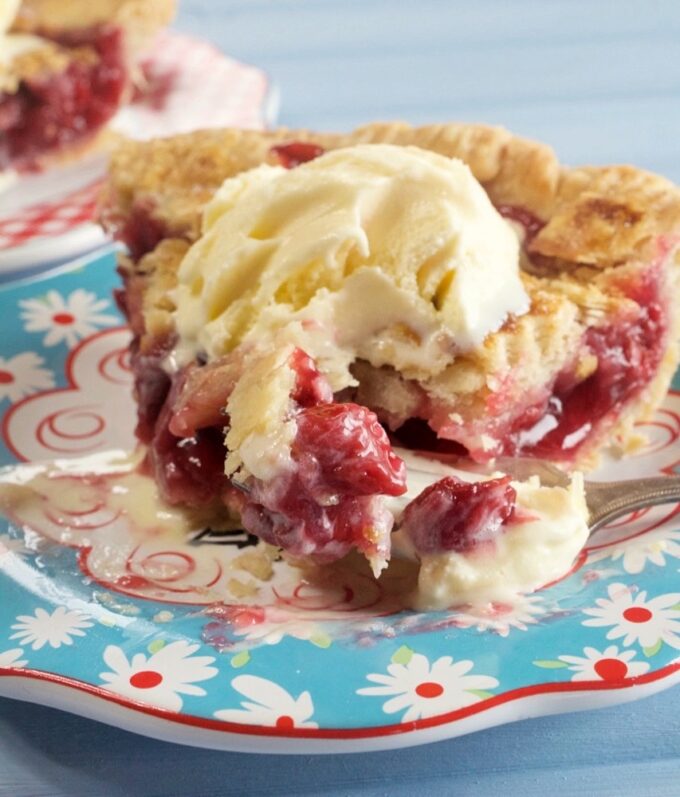
This Homemade Tart Cherry Pie is made with luscious red tart cherries and it’s filled with a perfect sweet-tart pie filling. A large scoop of vanilla ice cream totally complements this scrumptious pie!
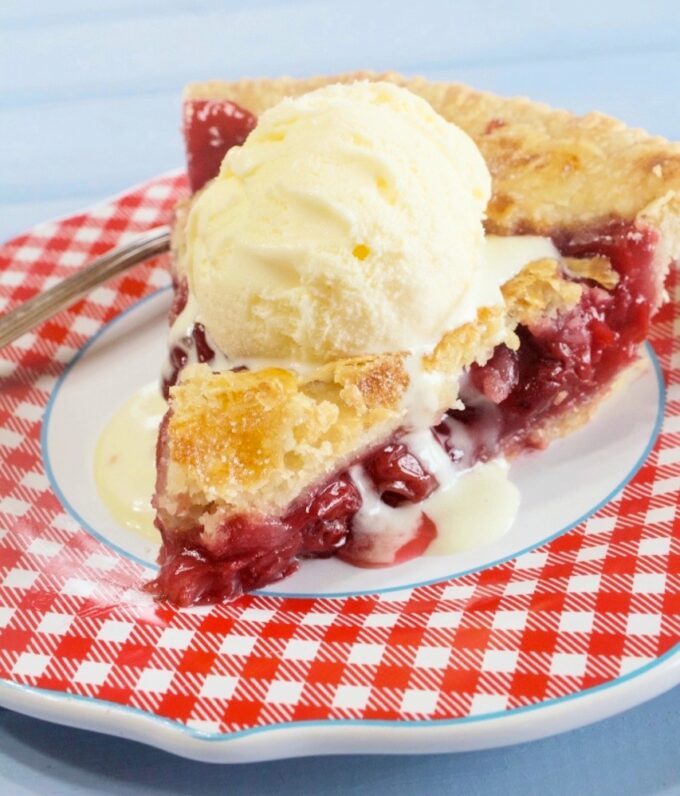
The other day I was craving a juicy tart cherry pie, so I went straight to the kitchen and searched my freezer for frozen tart cherries. I got busy making a pie and called my husband Don to bring home some vanilla ice cream. That evening we enjoyed warm juicy cherry pie with a scoop of vanilla ice cream and some hot coffee. Well…I think Don enjoyed at least 3 slices.
Ingredients For This Recipe
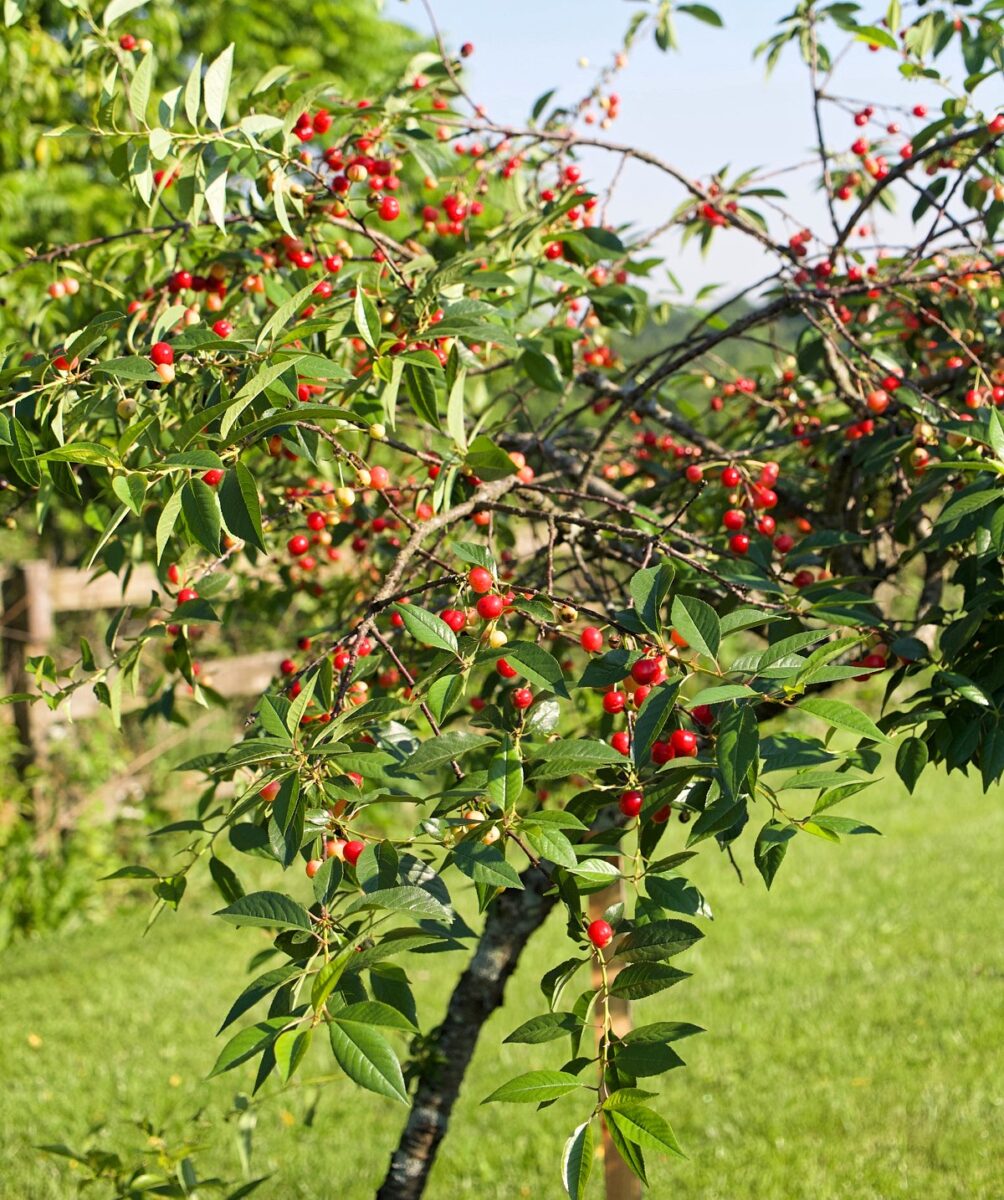
Red Tart Cherries – You can use frozen or fresh cherries for this pie. Fresh tart cherries are hard to find, unless you have your own cherry tree. I use frozen. Whether you use fresh or frozen, don’t drain any of the juice off.
Granulated Sugar – Used to sweeten and balance out the tartness of the cherries.
Cornstarch – The thickening agent for this recipe. In this pie recipe, the sugar, cornstarch and cherries are cooked on a stove top first, until thickened, then added to the pie crust.
Pure Vanilla Extract – Added for flavor enhancement.
Pure Almond Extract – Added for flavor enhancement to the cherries, with a slight nutty flavor. If you don’t have it, don’t worry. Simply use the vanilla.
Butter – Adds a tiny bit of richness to the filling.
Pie Crust – You’ll need a double pie crust recipe for this pie. You can use store bought, your own, or my recipe. I use the measurements for a deep dish on my recipe to make sure I have plenty of top crust to work with. If you have extra dough, you can cut out leaves or other decorations to place on top of the pie.
Egg Wash – The egg wash, made of egg and water or egg and milk, gives the crust a semi-shiny golden sheen.
Coarse Sugar – You can use coarse sparkling or turbinado sugar on top for a slight crunch and sweetness. If you don’t have them, feel free to use sanding sugar or regular granulated sugar.
How To Make This Pie
Make the pie dough
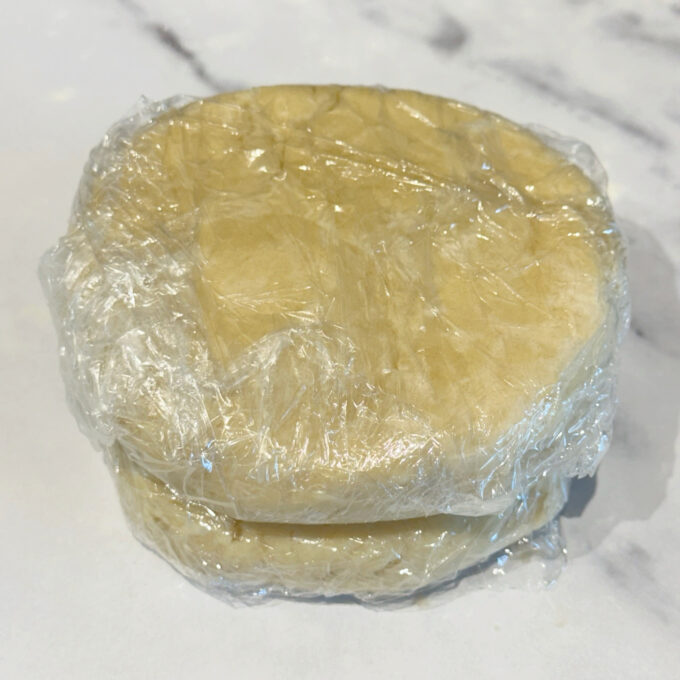
Make the pie dough first or use store bought. If you’re making homemade, make the dough and wrap in plastic wrap. Refrigerate for about an hour. Use your favorite recipe. I use my Aunt Elsie’s Flaky Pie Crust for all my pies.
Make the pie filling
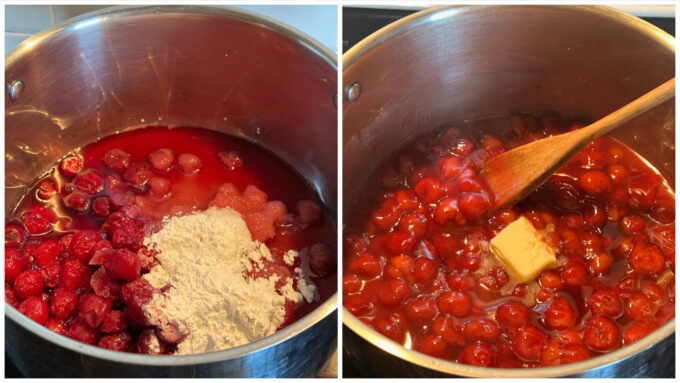
Add the thawed cherries, sugar, and cornstarch to a medium saucepan. Mix and bring to a boil over medium heat.
Stir constantly and mix until the mixture begins to slightly thicken. This will take about 8 to 10 minutes. Add the vanilla, almond extract, and butter and mix until the butter is melted and mixed in. Set aside while you roll out the bottom pie crust.
*If you’re planning to freeze the unbaked pie, place the filling in the freezer for a few minutes while rolling out the pie crust. This will ensure the bottom crust doesn’t become soggy from the heat before the unbaked pie has time to freeze.
Roll crust and assemble
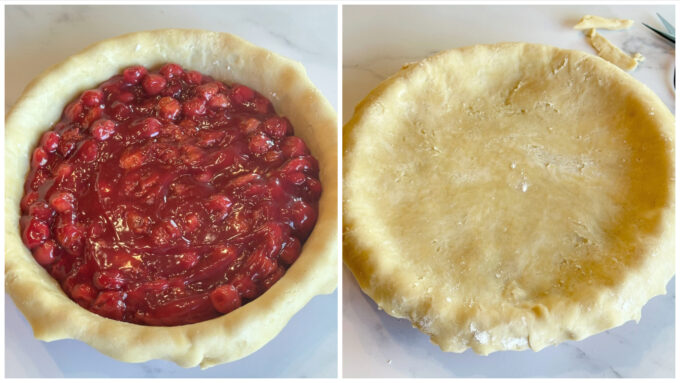
Roll out the bottom pie crust. Trim edges of crust, leaving a 1/2-inch overhang. Transfer the pie filing to the crust.
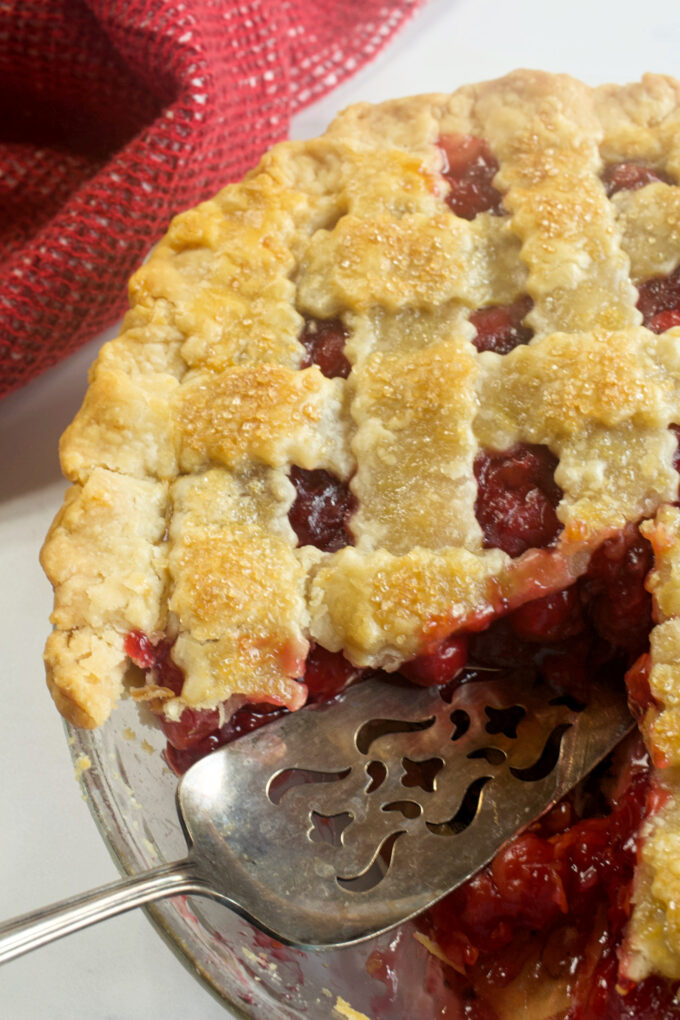
Roll out the top crust, and place it over the pie filling. Trim edges, leaving a 1/2-inch overhang. Press the top and bottom edges together. This ensures no leakage from juices. Then either fork the edge, trimming off any excess dough or flute it as you desire.
Cut a few slits in the top and brush with egg wash. Then sprinkle coarse sugar over the top, if desired.
If you prefer to make a lattice top, here are the specific directions for making it.
Pro Tips For Making This Recipe
- Use fresh tart red cherries if they are in season or use frozen tart red cherries. They have just as much flavor as the freshly picked ones. Frozen tart cherries can be hard to find. I find them at my local Meijer store. Whether you use fresh or frozen, don’t drain the cherries. Keep all of the juice.
- The amount of sugar in this recipe is adjusted for tart red cherries. If you substitute sweeter cherries, you will need to reduce the amount of sugar.
- Don’t use canned cherry pie filling.
- Don’t skip step #1 for the filling. Heat the cherries, sugar, and cornstarch in a saucepan until the cornstarch thickens the cherry juice. This helps keep the cherry pie filling from boiling over in the oven.
- This recipe calls for 2 tablespoons of cornstarch resulting in a juicy pie. If you prefer a thick filling without juices, you can double the cornstarch. This will result in a almost jelled filling.
- To ensure the bottom pie crust gets done, bake your pie on the lowest baking rack in your oven. I also place mine on a pizza stone that I preheat with the oven. This helps to brown the bottom.
- Use a glass pie dish. This way you can see when the bottom crust gets done.
Frequently Asked Questions
Can I freeze the unbaked pie and bake later?
Yes. If you’re going to freeze the unbaked pie, do not brush it with egg wash. This will make for a soggy crust. Apply the egg wash right before baking it later. Make sure you’re using a freezer safe pie dish, such as Pyrex or Corning Ware. Place the finished pie uncovered, in a freezer for about one hour, until it’s very firm. This keeps the edges form being mashed once you wrap it. Wrap the pie with two layers of plastic wrap, followed by one layer of heavy foil. Freeze for up to 2 months. When you’re ready to bake the pie, transfer the pie from the freezer to a counter and allow it to warm some while preheating the oven. Don’t place the pie straight from the freezer to the oven. This can cause some pie dishes to crack and break. You will need to increase the baking time by 10 to 15 minutes on a frozen pie.
Can I freeze the baked pie?
You can, but I don’t recommend. Freezing an already baked pie, results in a less stable and flaky pie crust, and a crust that is leaning towards being soggy. The pie doesn’t have that freshly made taste. Whereas, a frozen unbaked pie tastes like a freshly made pie.
You might also like these tart cherry recipes…
Easy Puff Pastry Cherry Turnovers
Buttermilk Pancakes with Cherry Compote
If you make this recipe, please rate it and leave a comment below on how you liked it. I love getting your feedback! 🙂
For different recipes each day, feel free to follow me on Facebook, Pinterest, & Instagram.
Print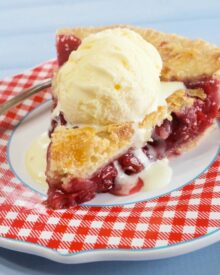
Homemade Tart Cherry Pie
- Prep Time: 30
- Cook Time: 90
- Total Time: 120
- Yield: 8 Servings 1x
- Category: Pies
- Method: Bake
- Cuisine: American
Description
This Homemade Tart Cherry Pie is made with luscious red tart cherries and it’s filled with a perfect sweet-tart pie filling. A large scoop of vanilla ice cream totally complements this scrumptious pie!
Ingredients
For the Pie Dough
- 1 double crust pie crust, homemade or store-bought
For the Pie Filling
- 2 bags frozen tart cherries, 12 ounces each, thawed (approximately 4 1/2 cups)*
- 1 cup sugar
- 2 tablespoons cornstarch
- 1 teaspoon pure vanilla extract
- 1/4 teaspoon pure almond extract
- 1 tablespoon butter
For the Egg Wash
- 1 egg
- 1 tablespoon heavy cream or half & half
- Regular or coarse sugar for sprinkling
Instructions
Preheat oven to 400 degrees.
For the Pie Dough
- Make the dough (unless using store-bought). Form the dough into two disks. Cover with plastic wrap, and refrigerate for about one hour.
For the Pie Filling
- Add the thawed cherries, sugar, and cornstarch to a medium saucepan. Stir constantly and mix until the mixture begins to slightly thicken. This will take about 8 to 10 minutes. Add the vanilla, almond extract, and butter and mix until the butter is melted and mixed in. Set aside while you roll out the bottom pie crust.
- Roll out the pie dough for the bottom crust, big enough to fit a 9-inch pie dish. Trim the edges, leaving a 1/2-inch overhang. Spread the filling over the bottom crust.
- Roll out the top pie crust. Place it over the top, and trim to about a 1/2-inch overhang. Pinch the edges of the top and bottom crust together, (to ensure the pie filling doesn’t leak through). Then crimp the edges with a fork or flute them. Trim a little more off the edges if needed.
- Egg Wash: Whisk together the egg and cream in a tiny bowl. Brush the egg wash over the pie crust. Sprinkle the top with coarse sugar. If you don’t have coarse sugar, feel free to use sanding or granulated sugar.
- Wrap foil around the edges of the pie. Place pie on an old cookie sheet and bake for 20 minutes. Reduce heat to 375 degrees. Bake the pie until the center is bubbly and the top is a light golden brown. This will take about an additional 30 to 35 minutes, depending on your oven. I uncover the edges the last 15 minutes or so. Also, if the top starts getting to brown, place a loose piece of foil over it.
- Transfer pie to a wire rack to cool.
- Serve warm with ice cream or cold.
- The pie can be stored covered on a counter for up to 2 days, then refrigerated for 2.
Notes
- The purpose of cooking the pie filling before baking it is to thicken it ahead of time so it won’t bubble over in the oven. You’re really not cooking it, just thickening the filling. The reason a lot of fruit pies bubble up and over the sides while in the oven is that the juices don’t have time to thicken up before getting hot. Another good thing about pre-thickening the filling, is you don’t have to worry about whether or not your filling is going to become thick enough in the oven.
- * You can use frozen or fresh cherries. Make sure to not drain any of the juice from the cherries whether you use frozen or fresh.
This looks so good! I never see fresh tart cherries in the grocery store, and I don’t think I’ve seen frozen either…Where do you buy the frozen tart cherries?
Hi Amy,
As a matter of fact, I just bought frozen red tart cherries today. I find them at my local Meijer store. That’s the only store I can find them at, although I haven’t checked Costco. When I find them I buy a few bags and freeze them.
Wegmans has Cahoon Farm delicious tart cherries from Wolcott, NY in their freezer section
How many fresh cherries should I use? It looks so yummy!
Hi Mary Ann,
I suggest using at least 4 cups. My recipe originally called for two 16-ounce bags of frozen tart cherries, before packages of frozen cherries were reduced to 12-ounce bags. Therefore, I adjusted the recipe.
Aldi’s has 24 oz of dark Morello cherries (tart). Not always available so I buy 2 to3 jars when I find them. Drain juice. My recipe uses 3/4 cup of the juice I think. I drink the rest of the juice.
Best tart cherry pie I’ve ever had! So flavorful and the crunchy top, I used lattice and turbanado sugar over egg wash, was scrumptious! Easy to make too. Thanks
Hi Kim, I’m so glad you liked it. It’s my favorite fruit pie.
How long do you bake i
Hi Allyson, It takes about 45 minutes, depending on your oven of course. Just make sure the crust is baked through and golden on top and the filling is bubbly.
I also use a combination of frozen tart and sweet
cherries with almond extract.
The tip about removing the cherries with a slotted spoon so you can thicken the juice is a great idea..
i usually remove some of the juice and before I fill the pie shell so now I will just cook the juice until thickened!