Pumpkin Chess Pie
This delicious Pumpkin Chess Pie is a cross between a chess and pumpkin pie. Don’t set your palate up for the taste and texture of a pumpkin pie here. This is a chess pie with pumpkin and spices added to the mix. The result is the richness and texture of a chess pie, with a delicious combination of both chess and pumpkin pie flavors.
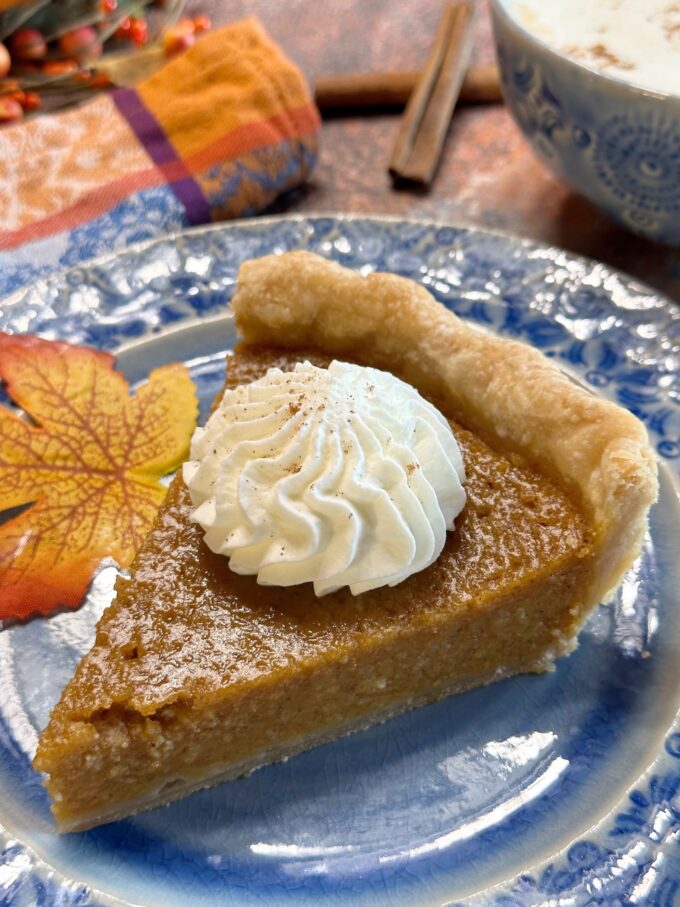
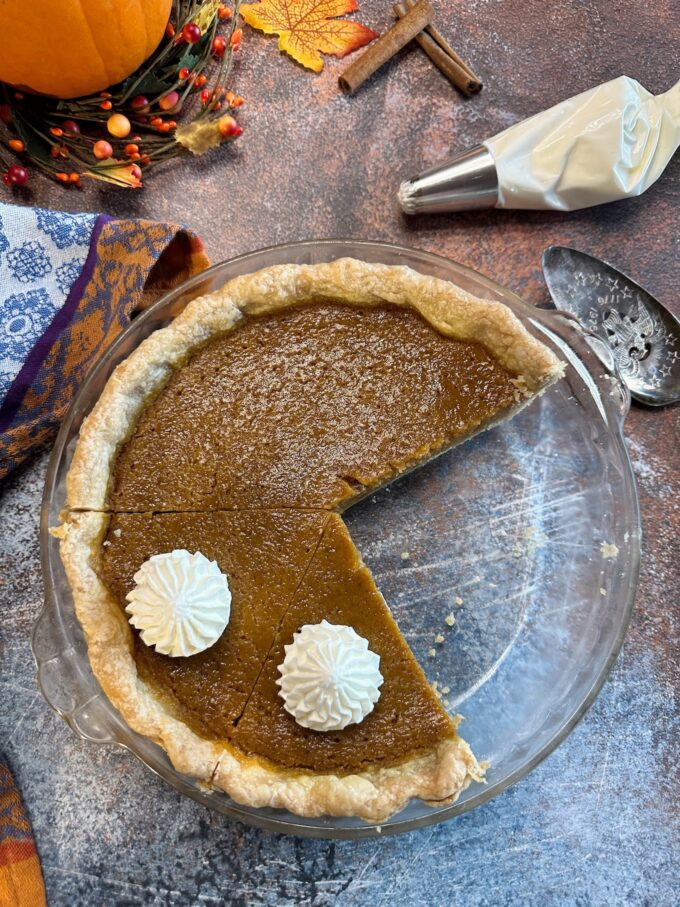
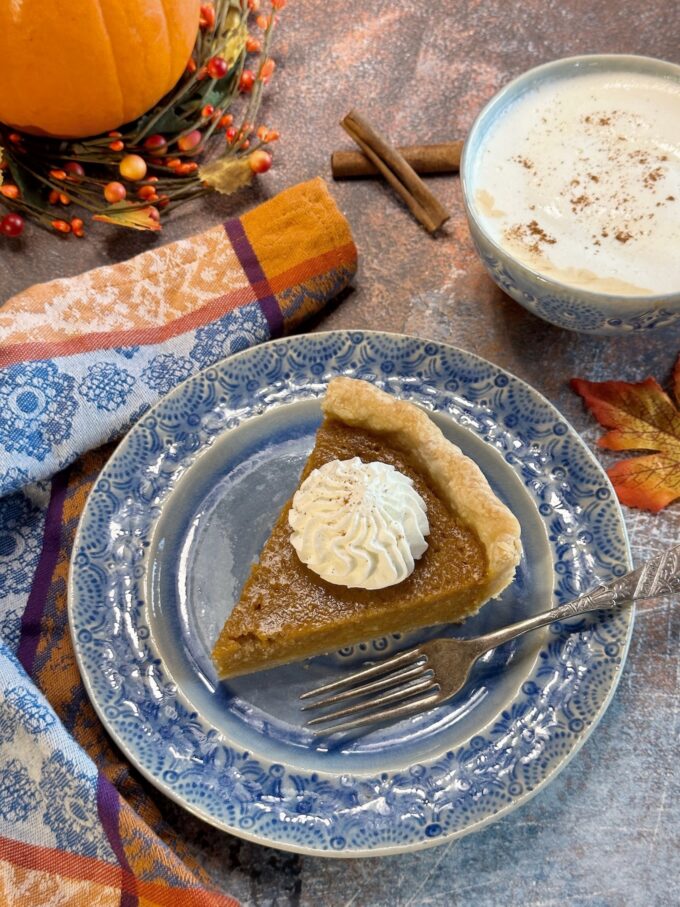
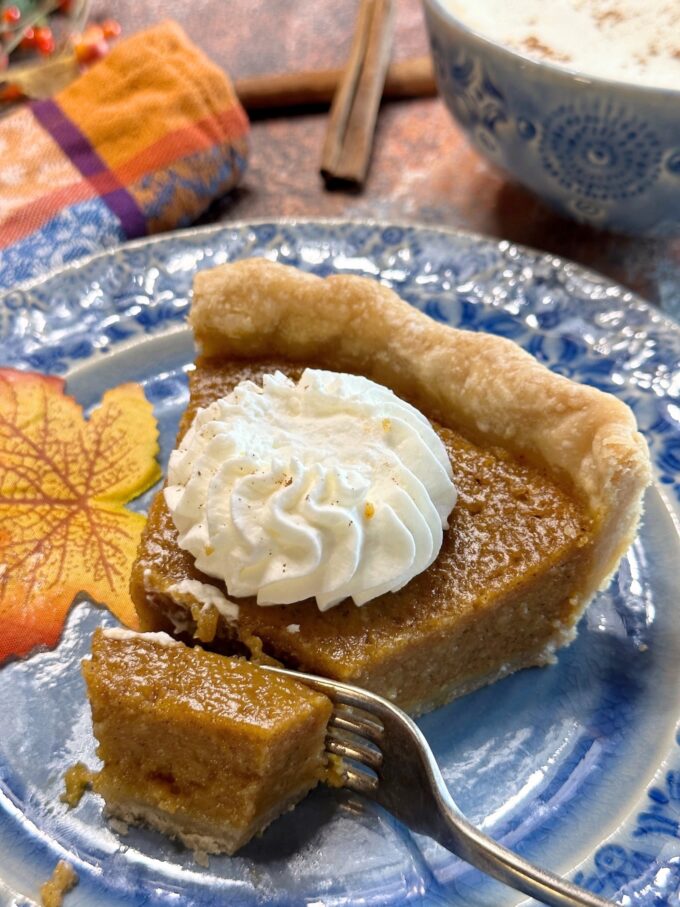
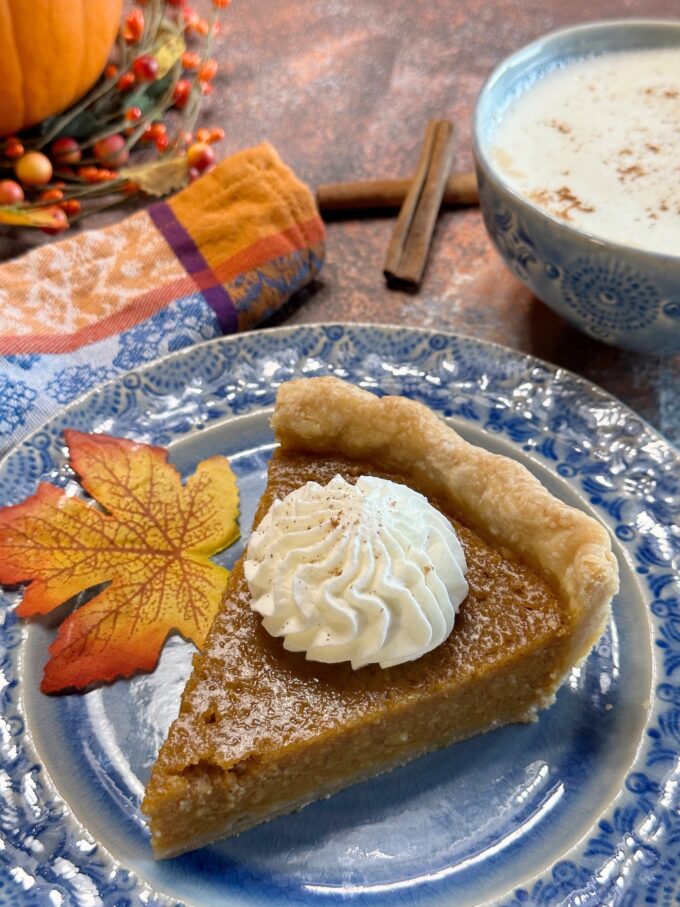
You might think you’re looking at a piece of pumpkin pie here but trust me you’re not. This pie is actually a combination of chess and pumpkin pie and it’s absolutely my new favorite. If you love pumpkin pie you’ll love this pie! If you love chess pie you’ll love this pie! You’ll love this pie anyway!!
You probably already know by all the pumpkin recipes on this site that I love pumpkin!! I already have a Pumpkin Pie and a Pumpkin Chiffon Pie recipe on MCT. I also happen to love chess pie. So when I came across this recipe from Midwest Living for Pumpkin Chess Pie, I instantly knew I was going to make it. Well…let me tell ya, this pie certainly did not disappoint! It tastes like a rich sweet chess pie with the addition of pumpkin puree and warm spices. My husband said it was his new favorite pumpkin pie recipe. I had to remind him that it wasn’t just pumpkin pie but two pies combined.
Prepping the pie shell
- Make your favorite pie dough recipe. I used my Aunt Elsie’s Flaky Pie Crust recipe.
- Form the pie dough into a flat round disc. If using a double crust recipe, such as the one above, divide the dough in half and form into 2 round discs. Wrap the disc in plastic wrap and refrigerate for 30 minutes.
- Roll the dough out into a circle roughly about 13-inches in diameter. It doesn’t have to be perfect.
- Roll the dough up around your rolling pin and transfer it to a 9-inch pie dish. It doesn’t need to be a deep dish pie dish.
- Fit the dough into the dish and trim the edges, leaving a 1-inch overhang. Fold the edges under and crimp or flute them in the way you desire.
- Place the pie shell in the freezer for at 30 minutes.
- Remove the pie shell from the freezer and use a fork to prick the bottom of the pie shell. This is called docking and it will prevent the pie dough from puffing up in the oven.
- Crumple up a piece of parchment paper, unfold it and place it in the pie shell. Fill the pie shell with beans or ceramic pie weights. I’ve always used beans, and I’ve used the same beans for years. Simply allow them to cool and place them in a mason jar, and use them over and over again.

Partially Blind Baking the pie shell
You’re probably wondering why you should need to partially bake a pie shell prior to filling it and placing it back in the oven to bake again. The reason is because with many pies, once they’re baked the bottom crust is sometimes soggy or not baked through all the way. This especially happens with pies that don’t require a long bake time.
Blind baking, also known as par-baking, is the simple process of baking or partially baking the crust before adding the filling. Then you’ll add the filling and bake the pie as usual. This recipe for Pumpkin Chess Pie requires baking the filling, therefore, we need to partially bake the empty pie shell first.
FYI: Pies such as cream pies, that don’t require the filling to be baked, require fully baking the empty pie shell before filling it. The filling in most cases gets cooked on the stove top. Some refrigerator pie fillings don’t need to be cooked at all.
Preheat oven to 425 degrees. Bake the pie shell on the bottom oven rack for about 12 minutes, then remove the paper and weights, dock with a fork again and bake another 10 minutes or until the bottom is dried out. Remove the pie shell from the oven and reduce the oven temperature to 350F.
Baking the pie
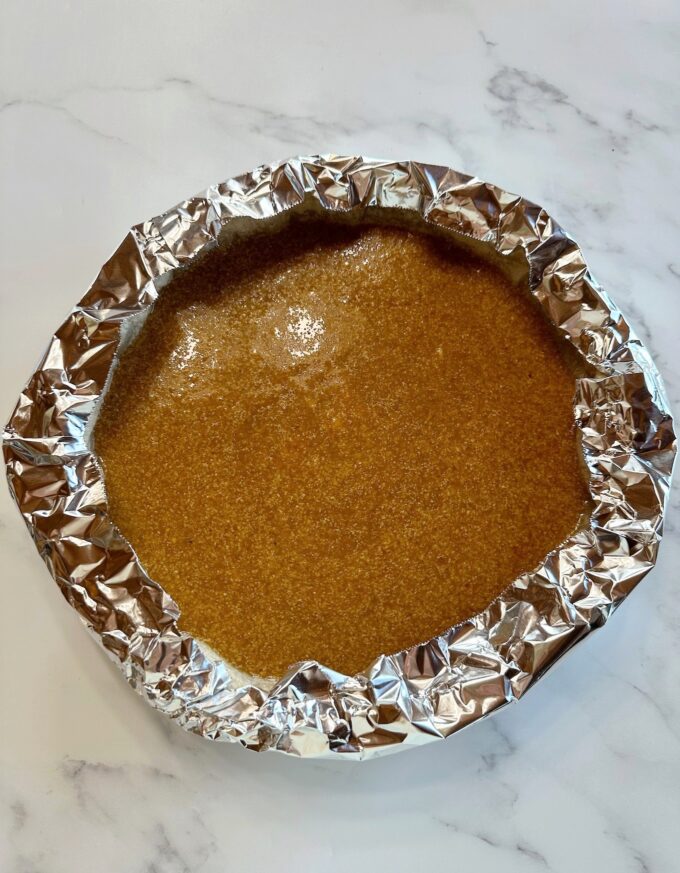
- Pour the filling into the pre-baked pie shell. Brush the edges of the pie crust with an egg wash if desired. Cover the edges of the pie crust with foil, to prevent over-browning. Carefully place the pie on the bottom oven rack. Bake the pie for approximately 40 minutes and remove the foil from around the edges. Bake for an additional 20 minutes or until a knife inserted in the center comes out clean. The pie should not be jiggly when you gently shake it. If you see cracks appearing on top, you’ve over baked it.
- Transfer pie to a cooling rack and allow it to cool to room temperature. Refrigerate the pie for a few minutes until it’s chilled, then securely wrap it.
Can I make this pie in advance?
Pumpkin Chess Pie can be made up to 2 days in advance. I don’t suggest making it any sooner or the bottom crust could begin to get soggy. It tastes delicious cold or slightly warmed. I suggest serving it with a dollop of whipped cream on top.
How do i know when the pie is done?
This pie isn’t like your usual pumpkin pie where you remove it from the oven when it’s still slightly jiggly in the center. For this pie, make sure that it is no longer jiggly in the center and immediately remove it from the oven. A knife test in the center should come out clean.
Can I freeze Pumpkin Chess Pie?
Pumpkin Chess Pie can be frozen for up to 3 months. Bake and completely cool the pie. Wrap securely with plastic wrap and 2 heavy layers of foil, or place in a freezer safe pie container. Make sure the pie is placed level in the freezer until frozen. Thaw overnight in the refrigerator and serve at room temperature or slightly warmed.
Tips
- Use an egg wash on the crust when doing the final bake. It will give your crust an extra sheen, shine or golden color, depending on the egg wash you use. Believe it or not, I forgot to brush the one in these pictures. It’s still a nice golden color but an egg wash can enhance it.
- Tent the edges with foil for the final bake. I cut a long piece of foil about 4-inches wide and fold it in half. If all I have on hand is the short box of foil, I tear off three pieces, fold them, and YES… I staple them together around the pie. Works perfect! Then I fold the foil inward over the pie shell edges. U uncover the pie the last 15 minutes or so to allow the crust to brown. See the picture in the post above.
- Don’t wrap the baked and cooled pie until you’ve totally chilled it first in the refrigerator. Wrapping it sooner will cause the pie to sweat and form condensation on the top of the pie.
- Don’t over bake the pie. If you see cracks forming on your pie, you’ve over baked it. Unlike a regular pumpkin pie, this pie should no longer be slightly jiggly, but the minute it’s not, take it out of the oven. A knife test should come out clean.
- Bake your pie on the lowest oven rack. This will also help the bottom crust get baked until it’s done.
- Use a glass pie dish. Pie crusts brown easier in glass pie dishes.
Can I use canned pumpkin pie filling in this pie?
No! Pumpkin pie filling already has spices and sugar added to it. Make to use pure pumpkin puree from a can, not pumpkin pie filling. If you uses your own fresh pumpkin puree, make sure to drain off the excess water before adding it to the filling.
Click here to see all my pumpkin recipes!
Recipe adapted from Midwest Living!
If you make this recipe please rate it, and leave a comment below on how you liked it. I love hearing from you!
Wanna see different recipes each day? Feel free to follow me on Facebook, Pinterest, & Instagram.
Print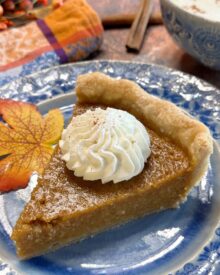
Pumpkin Chess Pie
- Prep Time: 15 minutes
- Cook Time: 60 minutes
- Total Time: 1 hour 15 minutes
- Yield: 8 servings 1x
- Category: pie
- Method: bake
- Cuisine: American
Description
This delicious Pumpkin Chess Pie is a cross between a chess and pumpkin pie. Don’t set your palate up for the taste and texture of a pumpkin pie here. This is a chess pie with pumpkin and spices added to the mix. The result is a true chess pie texture, with a delicious combination of both chess and pumpkin pie flavors.
Ingredients
- 1 single-crust pie pastry for a 9-inch pie plate. Hers’s a good one…Aunt Elsie’s Flaky Pie Crust.
- 6 tablespoons unsalted butter, softened
- 1 1/3 cups granulated sugar
- 4 teaspoons cornmeal
- 1 cup canned pumpkin puree (not pumpkin pie filling)*
- 1/3 cup half & half
- 2 large eggs, lightly beaten
- 1 teaspoon pure vanilla extract
- 1/2 teaspoon salt
- 1/4 teaspoon ginger
- 1 teaspoon cinnamon
- 1/8 teaspoon cloves
- 1/4 teaspoon nutmeg
Instructions
- Preheat oven to 450 degrees.
- Prepare the pastry: Roll out big enough for about a 1-inch overhang and transfer to the pie dish. Here”s a good recipe, Aunt Elsie’s Flaky Pie Crust, or use your favorite. Fold the edges under and crimp or flute as desired. Place the pie shell in the freezer for 30 minutes.
- Remove the pie shell from the freezer and prick the bottom all over with a fork. This keeps the crust from puffing up in the oven. Crumple up a large piece of parchment paper, unfold it, and line the pastry with it. Fill the pastry with either pie weights or dried beans. I use beans. You can save and reuse them over and over.
- Partially pre-bake the pie shell: Bake at 450 degrees on a bottom oven rack for about 12 minutes. Remove the paper and pie weights and bake for an additional 10 minutes until the crust is dried out. I like to see the top just slightly have some color change.
- In the bowl of a stand mixer or using a hand mixer, mix the butter on medium-high speed until it’s light and creamy, about 45 seconds. Add the sugar and cornmeal and mix on medium-high speed until all ingredients are combined, about 30 seconds. Scrape down the sides of the bowl with a spatula and mix for an additional 30 seconds. Add the pumpkin, half & half, eggs, vanilla, salt, ginger, cinnamon, cloves, and nutmeg. Mix until well combined.
- Pour the filling into the pre-baked pie shell. Cover the edges of the pie crust with foil, to prevent over-browning. Carefully place the pie on the bottom oven rack. Reduce the oven temperature to 350 degrees. Bake the pie for approximately 40 minutes and remove the foil from around the edges. Bake for an additional 20 minutes or until a knife inserted in the center comes out clean. The pie should not be jiggly when you gently shake it. If you see cracks appearing on top, you’ve over baked it.
- Transfer pie to a cooling rack and allow it to cool to room temperature. Refrigerate until chilled and wrap securely. Don’t refrigerate the pie warm or it will sweat, causing condensation on top of the pie.
Notes
- *Make sure you use pumpkin puree, not pumpkin pie filling. Pumpkin pie filling already has the spices added in. Also, if you choose to use homemade pumpkin puree, make sure you drain it good before using it.
- ** Many custard type pies call for partially pre-baking the pie crust. If you don’t the pie shell will usually not be baked through when the pie is done, resulting in a doughy pie crust. Using a glass pie dish and the bottom oven rack, helps the pastry to bake evenly and quicker. I sometimes also brush my pastry with egg white before pre-baking it. This seals the crust from the pie filling, and custard pie fillings can also result in a soggy crust.
Hello Cindy
Thanks for all your amazing recipes
can you tell me what is 1/3 cup of half and half?
regards
MB
Hi Michael, Half & half is half milk and half cream. It’s sold with the coffee creamers. If you can’t find it, you can use whole milk or heavy whipping cream. Happy baking! 🙂
Hi, Cindy! I’m wondering about blind baking. I’ll take your word for it, but I’m just curious…When I make a lemon chess pie, I bake it for about 40-45 minutes and I don’t need to blind bake it. Does this need blind baking because the custard is so liquid? Thanks! I think my boyfriend will love this.
Hi Lara, I believe so. It seems to be with pumpkin and custard type pies that contain milk more so than others.
Hello! What size of can of pumpkin puree does this recipe call for?
Hi Holly, It’s the small 15 ounce can. You only need a cup of it.
Hi Cindy! In the Pumpkin Chess Pie recipe it calls for cornmeal, do you use yellow or white cornmeal?
Thank you,
Karen
Hi Karen,
I used white, but either one will work. Happy baking! 🙂