Peppermint Meringue Cookies
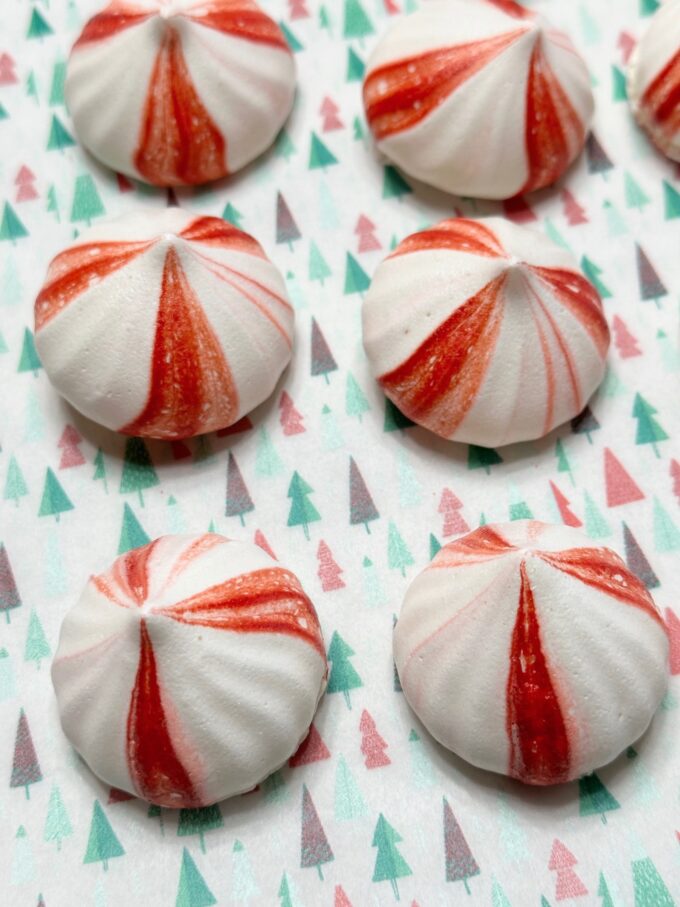
These Peppermint Meringue Cookies are light and airy, with a delicious peppermint flavor, and they are perfect with a cup of coffee or hot chocolate. They also look so pretty added to a tray of Christmas cookies!
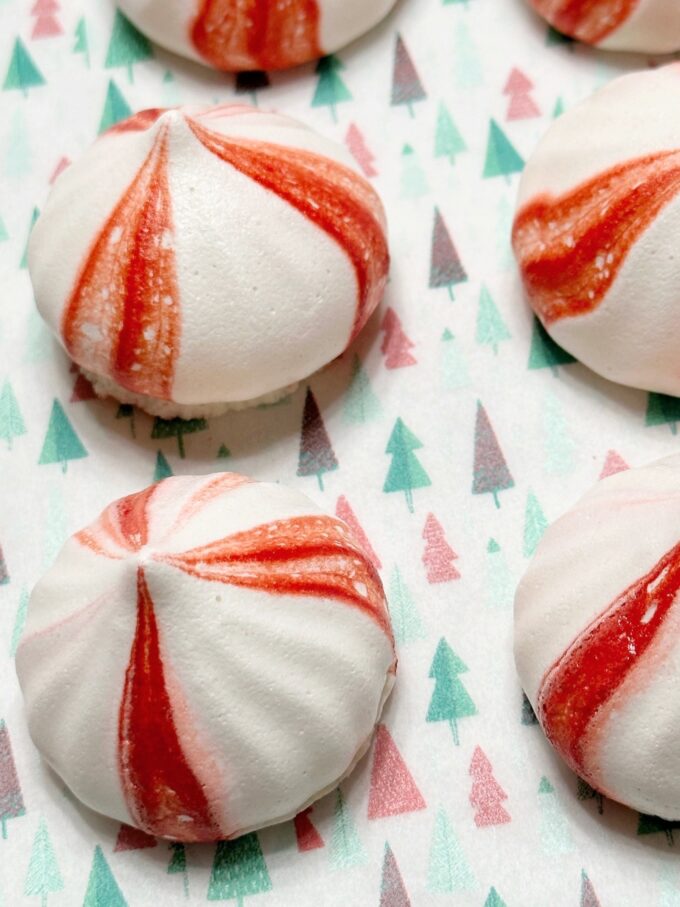
Meringue cookies are so versatile. They can be made in so many shapes and flavors, and they always stand out on any cookie tray, especially these pretty striped peppermint meringue cookies. They’re also very easy to make.
Tips for food coloring and prepping the pastry bag
First things first. Start by prepping the piping bag first. That way, once you make the meringue, it doesn’t have to sit for too long once it’s whipped. If it sits too long it will start to lose its fluffy marshmallowy texture and not pipe as nicely. I also don’t suggest refrigerating the meringue once it’s whipped.
Tips
- I strongly recommend using gel food coloring. It doesn’t matter if you use it from a jar or a squeeze tube. In the pictures below you’ll see I’ve used both.
- Use an 18-inch pastry bag if possible. The amount of meringue in this recipe will easily fit in an 18-inch pastry bag without having to refill the bag again. If you use a smaller 12-inch bag, you can only fit about 2/3 of the meringue in the bag. Therefore, when you get ready to use the remaining meringue, you’ll have to prep a new bag with food coloring. Don’t use the same bag or you won’t have the pretty stripes you had the first time. Using an 18-inch bag also helps when you’re trying to transfer the meringue to the inside of the bag without touching the sides where the food coloring is brushed.
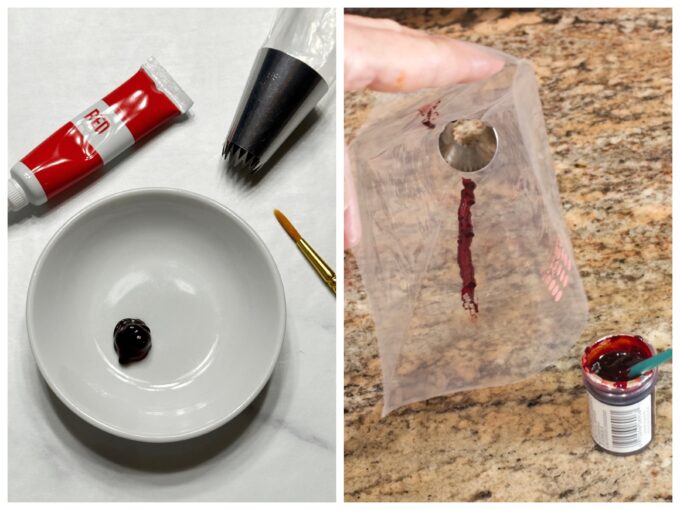
Prepping the bag
Fit an 18-inch disposable pastry bag with a large open star tip. I used Wilton #8B. It’s 1/2-inch. You can also use Ateco #867. It’s important to use the 18-inch size bag if you can. Fold the top of the bag over about 3 inches. Using a small paintbrush with a pointed tip, dip the paintbrush in the food coloring and carefully paint a stripe of food coloring starting from right above the piping tip and ending at the cuffed part of the bag. Make two more lines inside of the bag, spacing them evenly apart as possible. Go over each line 2 to 3 times if necessary. Set the bag aside and make the meringue.
Making the meringue
- Add the egg whites, cream of tartar, and salt to the bowl of a stand mixer fitted with the whisk attachment. Whisk the egg whites on medium speed until foamy (a few seconds).
- Increase speed to medium-high and start adding the sugar, one tablespoon at a time, mixing well after each addition so that the sugar is incorporated and dissolves.
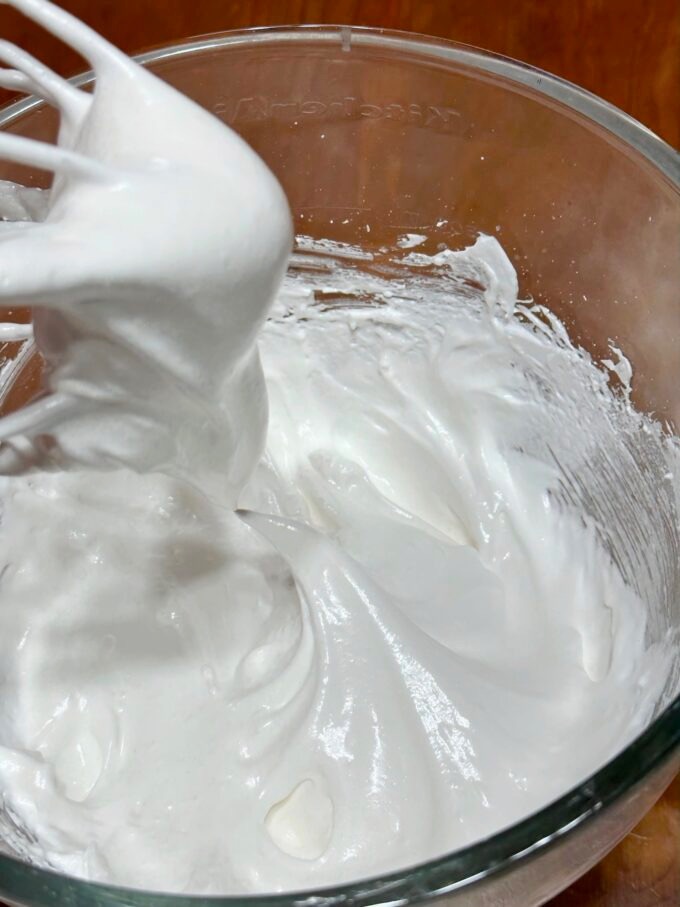
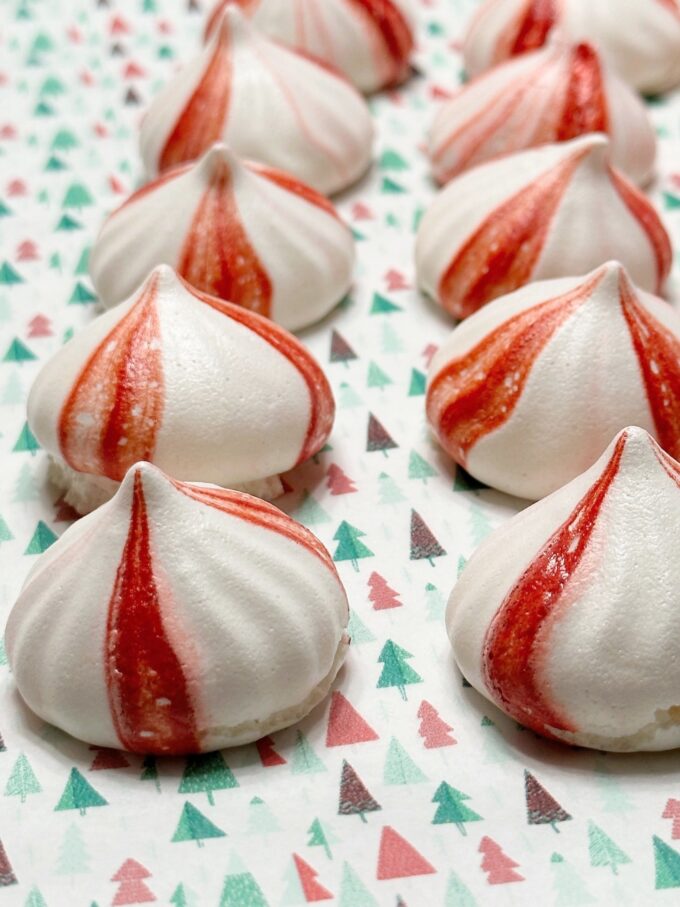
- Once the sugar has been incorporated, add the extracts and beat on high speed until the meringue reaches stiff peaks. The peaks should stand on their own without drooping or falling over.
Piping the meringue
- Spoon the meringue into the pastry bag, being careful to spoon it directly into the center of the bag, not touching the sides, or you will smudge the food coloring. (This works much easier with the large 18-inch bag).
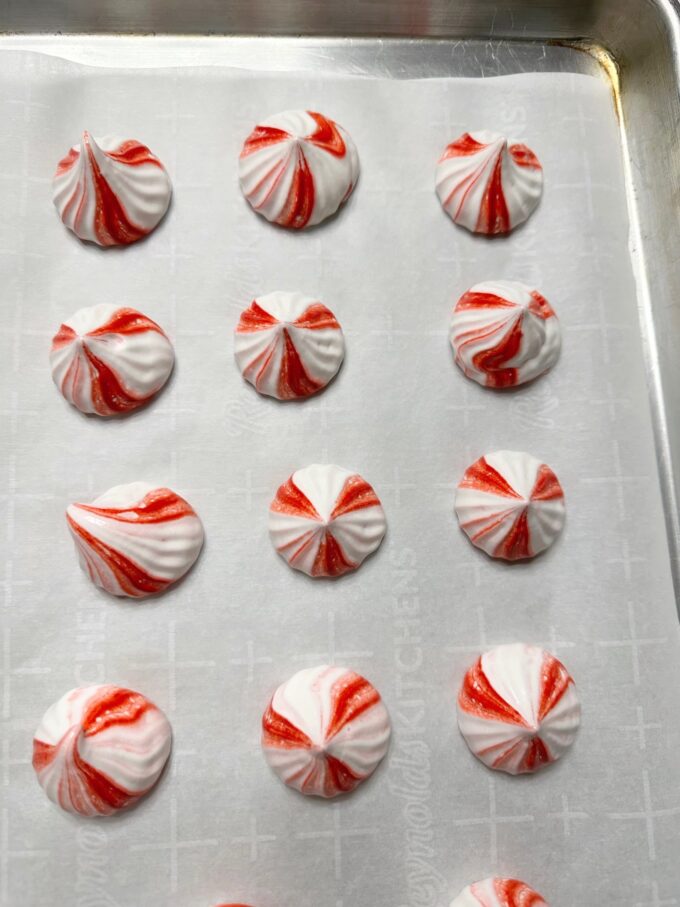
- Holding the piping tip perpendicular over the baking sheet, pipe 1-inch to 1.5-inch diameter kisses on the baking sheets, spacing them about 1/2-inch apart. When piping the meringues, lift as you squeeze then stop squeezing and lift straight up and off.
These are very simple and as you can see I should’ve practiced a couple before starting, but I didn’t want to waste my meringue. Also, if there is any air in the bag, you’ll suddenly get a big puff of air through the tip which will give the piped meringue a contorted look like a couple of mine. Make sure there’s no air in the bottom of your bag. Do as I say…not as I do! 🙂
How do you know when they are done?
The cookies will easily release from the parchment paper. They will also be completely dry and light and airy.
Why are my meringue cookies chewy?
They should be dry. However, if it’s humid, they might retain more moisture. In this case they might be less dry and more chewy. If they are chewy, place them back in a 200 degree oven for about 10 minutes and they should crisp back up.
Options
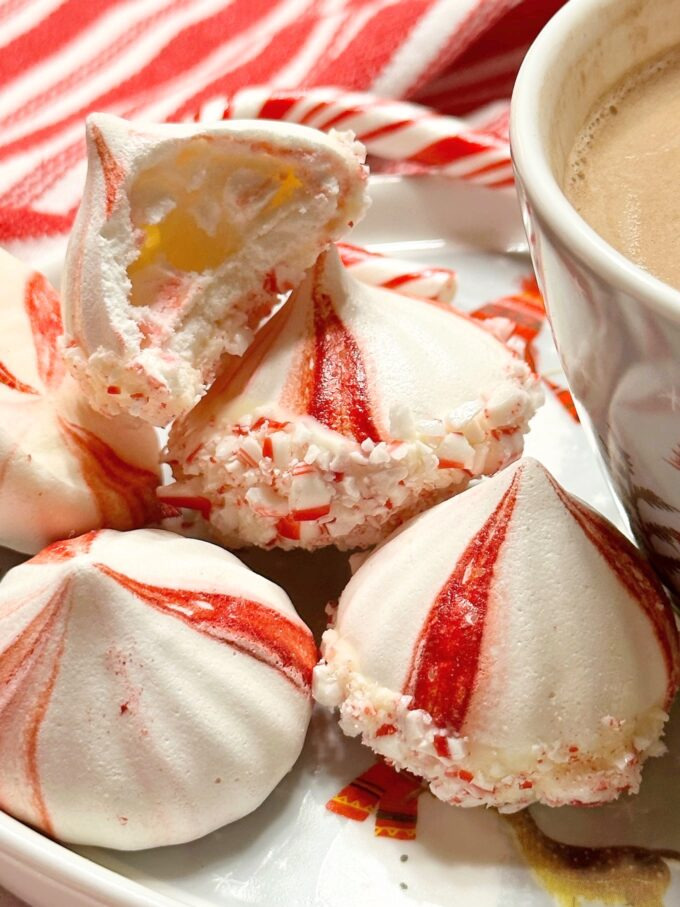
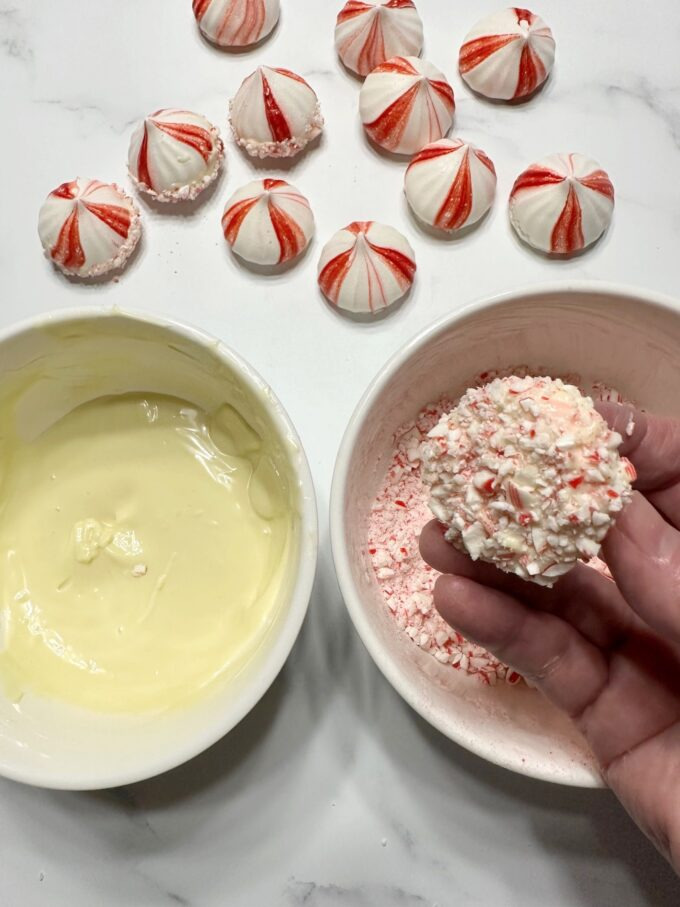
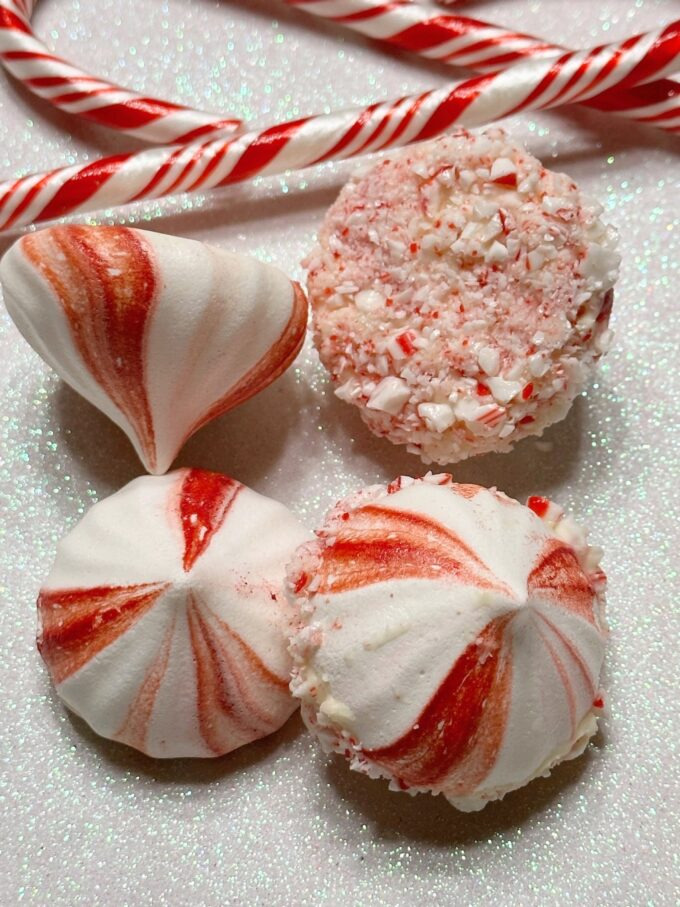
There are several options for adding to these Peppermint Meringue Cookies. You can dip the bottoms in dark chocolate, or peppermint flavored white chocolate, or you can do what I did below.
I melted a 4-ounce bar of Ghirardelli White Chocolate and dipped some of the bottoms in the white chocolate. Then I dipped the bottoms in crushed peppermint candy. I love the mix of peppermint and white chocolate on the bottoms. If you love peppermint bark, you’ll love this option. I allowed the dipped ones to set up and placed all of them in an airtight container.
Pro tips for making this recipe
- Don’t open the oven door while the meringues are drying out. Leave them in the oven at 200 degrees for exactly one hour, then turn the oven off and leave them in the closed oven for at least 2 hours. If the meringues look or feel the least bit sticky, leave them in the oven longer, or even overnight.
- Make sure your mixing bowl is totally free of anything greasy. You can wipe it out with vinegar if you think there could be traces of butter or anything greasy from prior uses.
- When beating the egg whites, it’s important to add the sugar very slowly, 1 tablespoon at a time, to give each addition time to dissolve into the egg whites. Otherwise, you’ll end up with gritty tasting meringues and we don’t want gritty!
- Make sure your egg whites are at room temperature! Eggs separate easier when they’re cold, but whip up better when they’re at room temperature. Therefore, separate them as soon as you remove them from the refrigerator, then allow the whites to come to room temperature.
- Separate the egg whites one at a time into a small bowl before adding each one to the mixing bowl. You don’t want even a spec of egg yolk in with the whites, so it’s safer to separate them one at a time in a small bowl.
- In order to keep your parchment paper from moving when you are piping, you can simply dab a tiny bit of meringue under each corner of the paper.
- If your meringues become chewy in the centers, place them back in a 200 degree oven for about 15 minutes to crisp them back up.
These aren’t Peppermint Marshmallows, but they are still a great little topper on a hot cup of cocoa. they don’t totally melt down like marshmallows do, but they give your hot cocoa a nice peppermint taste as the bottom half slowly melts into the cocoa.

More Christmas cookies you might like…
Chocolate Kiss Meringue Cookies
Sour Cream Brown Butter Cookies
If you make this recipe please rate it, and leave a comment below on how you liked it. I love hearing from you!
Wanna see different recipes each day? Feel free to follow me on Facebook, Pinterest and Instagram.
Print
Peppermint Meringue Cookies
- Prep Time: 30 minutes
- Cook Time: 1 hour
- Total Time: 1 hour 30 minutes
- Yield: 40 larger meringues 1x
- Category: cookies
- Method: Bake
- Cuisine: American, French
Description
These Peppermint Meringue Cookies have a perfect peppermint flavor, they’re light and airy, and so easy to make. They also look lovely on a cookie tray!
Ingredients
- Red food coloring
- 4 large egg whites, room temperature
- 1/4 teaspoon cream of tartar
- Pinch of salt
- 1 cup granulated sugar
- 1/2 teaspoon pure vanilla extract
- 1/2 teaspoon pure peppermint extract
Instructions
- Position oven racks in the center of the oven, and preheat oven to 200 degrees. Line two baking sheets with parchment paper and set aside.
- Prep the bag: Fit an 18-inch disposable pastry bag with a large open star tip. I used Wilton #8B. It’s 1/2-inch. You can also use Ateco #867. It’s important to use the 18-inch size bag if you can. See my tips above recipe. Fold the top of the bag over about 3 inches. Using a small paintbrush with a pointed tip, dip the paintbrush in the food coloring and carefully paint a stripe of food coloring starting from right above the piping tip and ending at the cuffed part of the bag. Make two more lines inside of the bag, spacing them evenly apart as possible. Go over each line 2 to 3 times if necessary. Set the bag aside and make the meringue.
- Make the meringue: Add the egg whites, cream of tartar, and salt to the bowl of a stand mixer fitted with the whisk attachment. Whisk the egg whites on medium speed until foamy (a few seconds). Increase speed to medium-high and start adding the sugar, one tablespoon at a time, mixing well after each addition until the sugar dissolves (is not longer gritty). Once the sugar has been added, add the extracts and beat on high speed until the meringue reaches stiff peaks. The peaks should stand on their own without drooping or falling over.
- Pipe the meringue: Spoon the meringue into the pastry bag, being careful to spoon it directly into the center of the bag, not touching the sides, or you will smudge the food coloring. (This works much easier with the large 18-inch bag). Holding the piping tip perpendicular over the baking sheet, pipe 1-inch to 1.5-inch diameter kisses on the baking sheets, spacing them about 1/2-inch apart. When piping the meringues, lift as you squeeze then stop squeezing and lift straight up and off.
- Bake the meringues for exactly 1 hour, making sure to not open the oven door during this time. After 1 hour, turn the oven off, leave the door shut, and leave the meringues in the oven for at least 2 hours or even overnight. The meringues are dry enough when they no longer feel or look sticky and they don’t stick to the parchment paper.
- Once meringues are no longer warm, store them in an airtight container at room temperature for up to two weeks. If they become too chewy in the centers, simply place them in a 200 degree oven for about 10 minutes to crisp them back up.
Notes
- Cookies can be frozen for up to three months. Thaw overnight in a refrigerator.