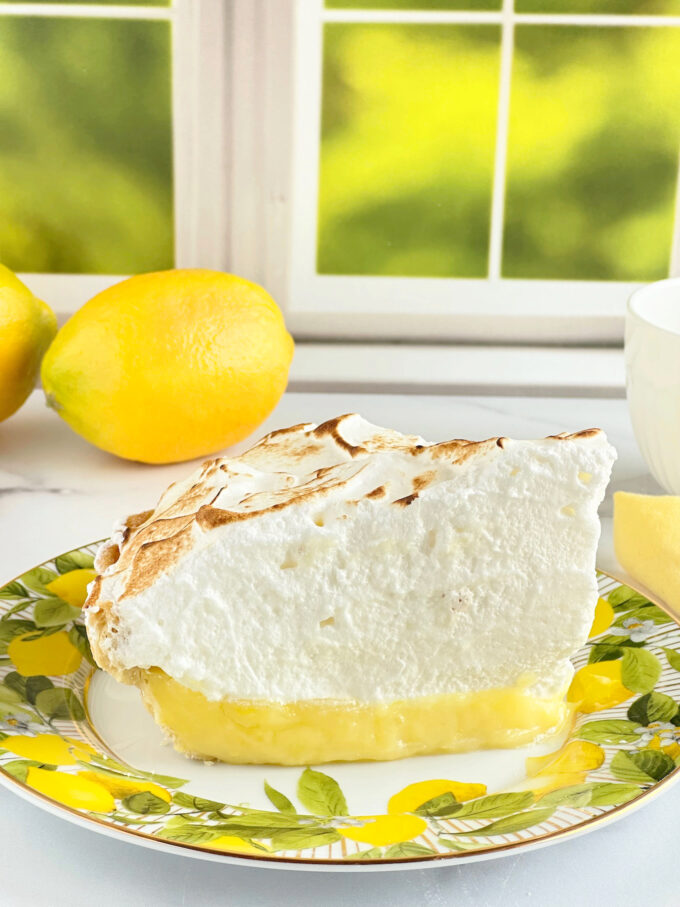
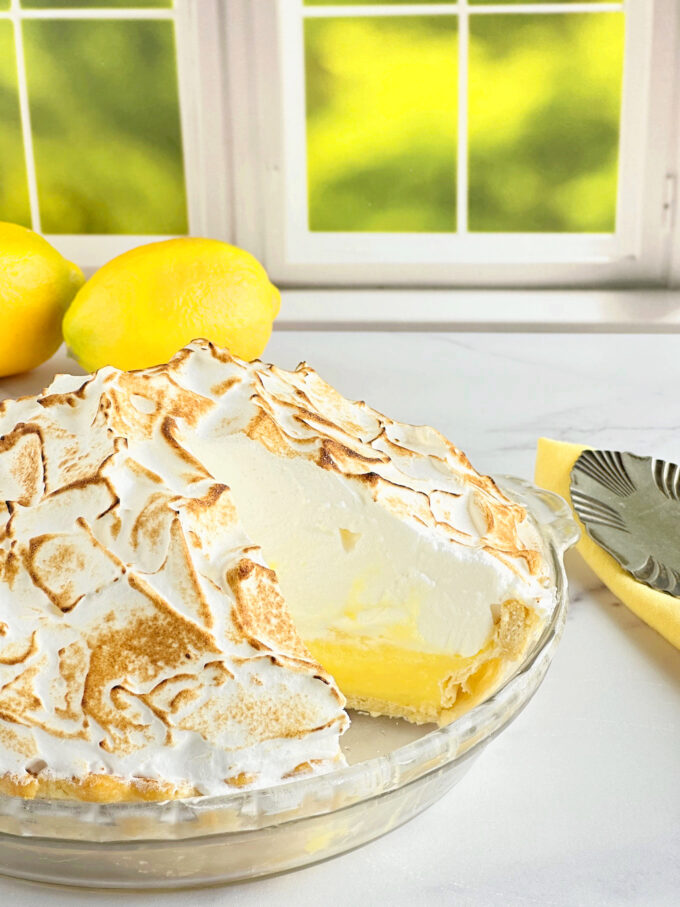
Mile High Lemon Meringue Pie (Egg Safe)
This egg safe Mile High Lemon Meringue Pie is the perfect pie for those of you that love a little pie with your meringue. You couldn’t ask for a more billowy soft meringue that simply melts in your mouth. The egg whites are also cooked to a safe temperature for consumption in this scrumptious pie. So what’s there to worry about, dig in!
The question of the day…do you like a little lemon pie with your meringue or a little meringue with your lemon pie? If you love lots of meringue this recipe is certainly for you. If you don’t, well that’s okay too. You can simply use less egg whites. 🙂
During the spring and summer months, I love a good tart lemon pie. I’m also old, and old school. Therefore, I love meringue. I do realize that some of the younger generation aren’t fans of meringue. That’s okay too.
I truly think some people think of eating meringue as the same thing as eating raw egg whites. That may be true with some meringues. However, this mile high lemon pie is egg safe. It’s made with Swiss meringue, meaning the egg whites and sugar are cooked first, until the egg whites are cooked to 160 degrees, for safe consumption. When I make my classic lemon meringue pie, I use a French meringue, where the egg whites don’t get cooked first. I also don’t use as much meringue.
If by chance you’ve never tasted meringue, let me tell you about it. Meringue resembles homemade vanilla marshmallows when they are first made before they set up. Although, they aren’t made with egg whites, they have a very similar taste and texture. If you like marshmallows or marshmallow creme, I think you’ll really like meringue. It’s so fluffy and voluminous. It’s like eating a cloud. It’s also sweet, making it the perfect complement to a tart lemon pie filling.
Besides, pie meringue, have you ever tasted little meringues that are baked in the oven? These sweet little peppermint meringue cookies are one of my all-time favorites in a cup of hot cocoa. They are made with French meringue, then baked at a low temperature. I also love these mini lemon curd pavlovas. They are also made with French meringue and baked in the oven. So pillowy soft inside. There are so many options for meringue besides for topping pies. That being said, I hope I’ve spiked your interest in meringue.
How to make Mile High Lemon Meringue Pie
Make the pie crust
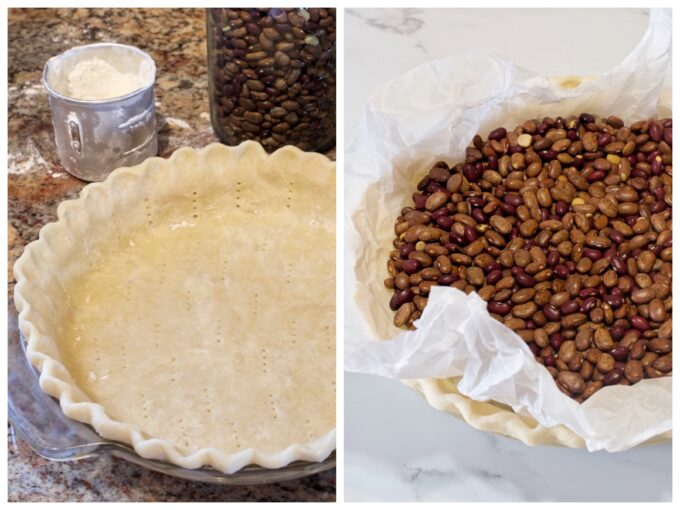
- Before making the pie filling, make & bake your pie crust. (If using a store-bought crust, follow the package directions for pre-baking it). If using homemade pie dough, make sure the dough is cold. Roll the dough out into a 12-inch circle. Transfer to a 9-inch pie dish. Don’t stretch the dough. Stretching the dough will cause shrinkage later. Gently pat the dough up and over the sides. Trim the dough, leaving a 1/2 inch over hang. Fold the dough under and crimp or flute the edges. Dock the bottom of the pie dough with a fork and place the pie dish in the freezer for about 30 minutes.
- Meantime, preheat an oven to 425 degrees. Crumple up a large square of parchment paper, then un-crumple it. Place it in the bottom of the pie dish. Fill the dish with pie weights or beans.
- Place on an old cookie sheet or pizza stone on the lowest oven rack. Bake for about 20 minutes. Remove the pie weights, and bake for an additional 15 to 20 minutes, until the crust is golden brown. I like to use a glass pie dish so I can see when the sides are browning. Remove and let cool while you make the filling.
How to zest and squeeze lemons
I certainly hope you won’t reach for a bottle of lemon juice for this recipe. I mean, this is real lemon pie we’re talking about. It deserves real pure lemon juice. Wouldn’t you agree? Besides it takes no time at all to zest and juice a few lemons.
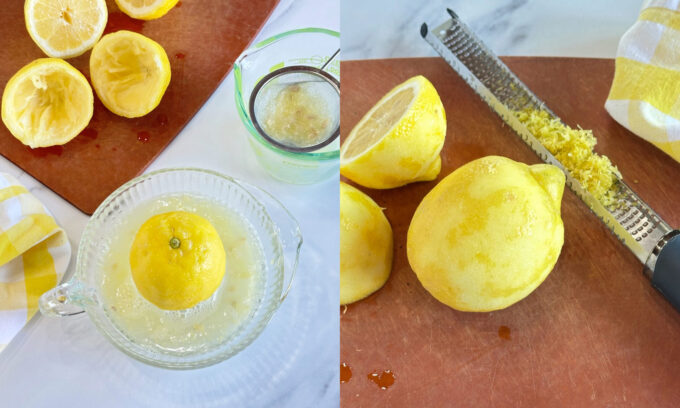
- Start by zesting the lemons. They are harder to zest when they have been squeezed. Make sure to only zest the outer yellow layer. The white layer is called the pith and it’s very bitter. Use a grater or a microplane like pictured above to zest them. I love the microplane. It’s so easy and catches all of the zest.
- It’s easier to juice a room temperature lemon than a cold one right from the fridge. You can also roll them back and forth a couple times on a counter with the palm of your hand before juicing. Use a hand held juicer or one like the one above. Make sure there are no seeds in the juice before using it. I pour it through a small stainer into the measuring cup. For more tips on zesting and juicing lemons click here.
Pro tips for making the pie filling
- It’s important to cook the filling until it starts to thicken and remove it from the heat. The cornstarch won’t activate and do its job until it gets hot enough. It fully gelatinizes around 203 degrees. Heat it until it starts to thicken. However, don’t over-cook it. Over cooking the cornstarch will result in your filling thinning out later. It will be as if you didn’t even use cornstarch.
- Make sure to correctly incorporate the eggs into the hot mixture. This is called tempering the eggs. You will pour some of the hot mixture into the beaten egg yolks while whisking vigorously for about 30 seconds. Then you will add the egg mixture back to the pan of the hot mixture and whisk vigorously again until it’s incorporated. If you simple add the eggs to the hot mixture, they will cook up into pieces of scrambled eggs in the hot filling, and we don’t want that. If for any reason you do end up with any small bits of cooked egg, strain the mixture through a sieve once it’s cooked.
Make The Pie Filling

Whisk together the water, cornstarch, sugar and salt in a medium saucepan. Bring mixture to a boil over medium heat, stirring constantly. The mixture needs to boil in order to activate the cornstarch. Boil just until the mixture thickens and remove from heat.
Slowly pour about half of the hot mixture into the egg yolks while whisking constantly. This is called tempering. Whisk vigorously for about 1 minute. Add the mixture back to the pan and return to medium heat. Tempering keeps the eggs from cooking into bits of scrambled egg when they are introduced to the hot mixture.
Bring back to a boil over medium heat, stirring constantly and boil just just until thickened, no longer. Over cooking the filling will cause the cornstarch to break down later and make the filling get runny again. Remove from heat. Add the butter, lemon juice, and lemon zest and mix well.

Pour the filling into pre-baked pie shell. Place a piece of plastic wrap over the filling, and refrigerate for at least 4 hours or overnight. The plastic wrap keeps a film from forming on the top of the filling. Click here to see how to pre-bake a pie crust.
Pro Tips for the Swiss meringue
- Start with a very clean and dry mixing bowl. Use a glass or metal bowl, not plastic. If you’ve recently used the bowl for whipping up something with butter or anything greasy, clean the bowl with a little vinegar and rinse it thoroughly. Make sure it is thoroughly dry.
- Separate the eggs while they are cold. Eggs separate easier when they are cold.
- Don’t forget to add the cream of tartar. Cream of Tartar stabilizes the egg whites, so they don’t break down.
- Make sure when you divide the egg yolks and whites, there’s absolutely no trace of egg yolk in with the whites. One spec of egg yolk can keep the egg whites from whipping up properly.
- Beat egg whites until they have stiff shiny peaks, but not dry. Under or over beating the egg whites can cause weeping.
- Spread the meringue all the way to the edges of the filling, touching the edge of the crust. This adheres the meringue to the filling and keeps it from shrinking away from the edge.
- For other meringues, such as French an Italian, it’s important to spread the meringue over a hot pie filling, to help cook the underneath of the meringue. With Swiss meringue this isn’t necessary, because the egg whites get cooked to a save temperature on the stove top first. In this recipe we will spread the meringue over a cold pie filling.
Make The Swiss Meringue

Add the egg whites, sugar, and cream of tartar to a medium heatproof bowl, (or to the heatproof bowl of a stand mixer). Whisk to combine. Place the bowl over a medium pan of simmering water. Make sure water does not touch the underneath of the bowl.
Whisk egg white mixture constantly for up to 3-4 minutes until the sugar has completely dissolved, and the mixture reaches at least 160 degrees on a thermometer. Check to make sure sugar is completely dissolved by rubbing a small amount of the mixture between two fingers. If it feels smooth and no longer grainy or gritty, it’s dissolved. The temperature of 160 degrees is the safe temperature for eating raw egg whites, if you’re concerned about that, (I’m not). Add the vanilla.

Pour the mixture into the bowl of a stand mixer. Whisk mixture on low speed for a few seconds, gradually increasing speed to high.
Whisk until mixture becomes stiff, and looks glossy and satiny. Peaks should stand on their own, when you hold the whisk in an upward position in your hand.

Remove the pie from the refrigerator and remove the plastic wrap from the surface of the pie.
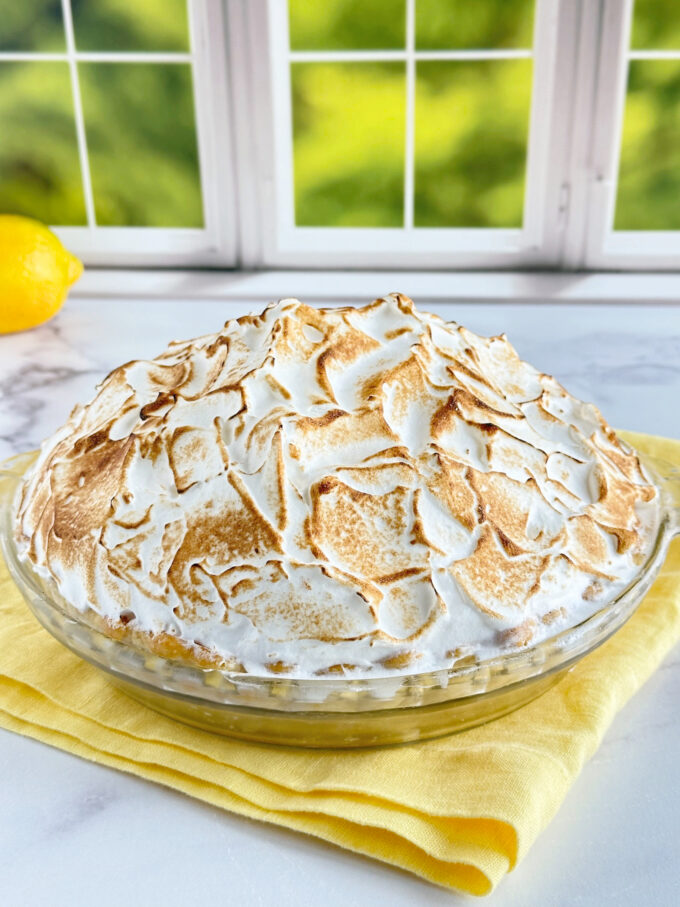
Scoop large dollops of the meringue onto the pie filling, piling them on top of one another. Using an offset spatula, spread the meringue to the very edge of the filling. The meringue should be touching the edge of the pie crust all the way around. This keeps the meringue from shrinking away from the edges. Once you seal the edges, use a spatula or the back of a spoon the level out the center and make decorative swoops in the meringue.
Toasting the meringue (3 options)
You’ll notice the toasting looks a little different with each method below.


- Use a kitchen torch. This is the quickest way.

- Place the pie on the middle rack in a preheated 350 degree oven. Bake for 10 minutes, rotating if needed, (if the back starts getting toasted before the front). If it’s not browned as much as you like, leave it another couple of minutes while watching closely. In this picture, I used the edge of a spatula and did sort of a chopping motion, (messing around).

- Place the pie under the broiler. This is my least favorite. It doesn’t take long at all. If you walk away for 10 seconds to let your dog in, it can go from a beautiful golden color to burnt. Trust me!
Frequently Asked Questions
How long will this pie stay fresh?
This pie will stay fresh for up to two days in the refrigerator. I suggest placing a few toothpicks in the top of the meringue and draping a piece of plastic wrap over it. That being said, the meringue will start weeping after a day in the refrigerator, regardless of what recipe you use or how you make it.
Can I freeze lemon meringue pie?
I don’t recommend freezing this pie. The texture of the filling and meringue changes.
Can I make this pie in advance?
Lemon meringue pie is best the day it’s made. However, for this recipe, the pie gets refrigerated for several hours before being topped with meringue. Therefore, you can make the pie (without meringue) one day in advance. Make sure to place a piece of plastic wrap over the filling to prevent a skim from forming. Make and put the meringue on the pie the following day.
If you love lemon desserts, you should check out my many lemon recipes.
If you make this recipe, please give it a rating and comment below on how you liked it. I love getting your feedback! 🙂
Wanna see different recipes each day? Feel free to follow along on Facebook, Pinterest & Instagram!
Print
Mile High Lemon Meringue Pie (Egg Safe)
- Prep Time: 45 minutes
- Cook Time: 15 minutes
- Total Time: 1 hour
- Yield: 8 servings 1x
- Category: Dessert
- Method: Cook
- Cuisine: American
Description
This lemon meringue pie has a perfect tart lemony flavor, and the sweet mile high Swiss meringue is the perfect complement to the tangy filling. If you love meringue, you’re really gonna love this recipe!
Ingredients
1 9-inch pie pie crust
PIE FILLING
- 4 large egg yolks
- 1 1/2 cups water
- 1/3 cup cornstarch
- 1 cup plus 2 tablespoons sugar
- 1/4 teaspoon salt
- 3 tablespoons unsalted butter
- 1/2 cup lemon juice
- 1 tablespoon finely grated fresh lemon zest
- 1 ( 9 inch) pie shell pre-baked
SWISS MERINGUE
- 8 large egg whites
- 1 cup plus 2 tablespoons granulated sugar
- 1/2 teaspoon cream of tartar
- 1/2 teaspoon pure vanilla extract (optional)
Instructions
PIE CRUST
- Before making the pie filling, make & bake your pie crust. (If using a store-bought crust, follow the package directions for pre-baking it). If using homemade pie dough, make sure the dough is cold. Roll the dough out into a 12-inch circle. Transfer to a 9-inch pie dish. Don’t stretch the dough. Stretching the dough will cause shrinkage later. Gently pat the dough up and over the sides. Trim the dough, leaving a 1/2 inch over hang. Fold the dough under and crimp or flute the edges. Dock the bottom of the pie dough with a fork and place the pie dish in the freezer for about 30 minutes.
- Meantime, preheat an oven to 425 degrees. Crumple up a large square of parchment paper, then un-crumple it. Place it in the bottom of the pie dish. Fill the dish with pie weights or beans.
- Place on an old cookie sheet or pizza stone on the lowest oven rack. Bake for about 20 minutes. Remove the pie weights, and bake for an additional 15 to 20 minutes, until the crust is golden brown. I like to use a glass pie dish so I can see when the sides are browning. Remove and let cool while you make the filling.
PIE FILLING
- Whisk together the egg yolks in a large 2 cup measuring cup or bowl and set aside.
- Whisk together the water, cornstarch, sugar and salt in a medium saucepan. Bring mixture to a boil over medium heat, stirring constantly until the mixture begins to thicken. This shouldn’t take long. Set the pan off the heat. Slowly pour about half of the hot mixture into the egg yolks while whisking constantly. This is called tempering. Whisk vigorously for about 1 minute. Add the mixture back to the pan and return to medium heat. Bring back to a boil over medium heat, stirring constantly until mixture thickens again. Remove from heat. Add the butter, lemon juice, and lemon zest and mix well.
- Pour the filling into pre-baked pie shell. Place a piece of plastic wrap over the filling, and refrigerate for at least 4 hours or overnight. Click here to see how to pre-bake a pie crust.
SWISS MERINGUE
- Add the egg whites, sugar, and cream of tartar to a medium heatproof bowl, (or to the heatproof bowl of a stand mixer). Whisk to combine. Place the bowl over a medium pan of simmering water. Make sure water does not touch the bottom of the bowl.
- Whisk egg white mixture constantly for up to 3-4 minutes until the sugar has completely dissolved, and the mixture reaches at least 160 degrees on a thermometer. Check to make sugar is completely dissolved by rubbing a small amount of the mixture between two fingers. If it feels smooth and no longer grainy or gritty, it’s dissolved. The temperature of 160 degrees is the safe temperature for eating raw egg whites, if you’re concerned about that, (I’m not). Add the vanilla.
- Pour the mixture into the bowl of a stand mixer, if you don’t already have it in the mixer bowl. Whisk mixture on low speed for a few seconds, gradually increasing speed to high. Whisk until mixture becomes stiff, and looks glossy and satiny. Peaks should stand on their own, when you hold the whisk in an upward position in your hand.
- Scoop large dollops of the meringue onto the pie filling, piling them on top of one another. Using an offset spatula, spread the meringue to the very edge of the filling. The meringue should be touching the edge of the pie crust all the way around. This keeps the meringue from shrinking away from the edges. Once you seal the edges, use a spatula or the back of a spoon the level out the center and make decorative swoops in the meringue.
- Use one of the 3 methods shown in the post above to toast the meringue.
- To serve pie, use a hot dry knife to neatly cut through the meringue. Dip the knife in hot water, and dry it off between cuts.
Notes
- Prep time is for the filling and meringue. It does not include the pie crust.
- Use a hot dry knife to cut neatly through the meringue. Dip the knife in hot water and dry it off between cuts.