Favorite White Cake
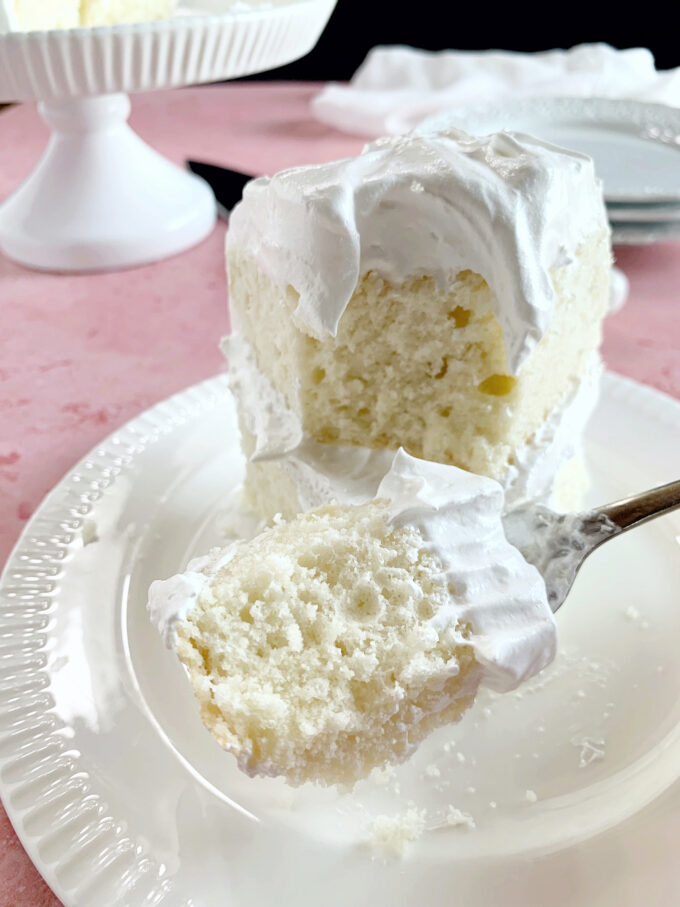
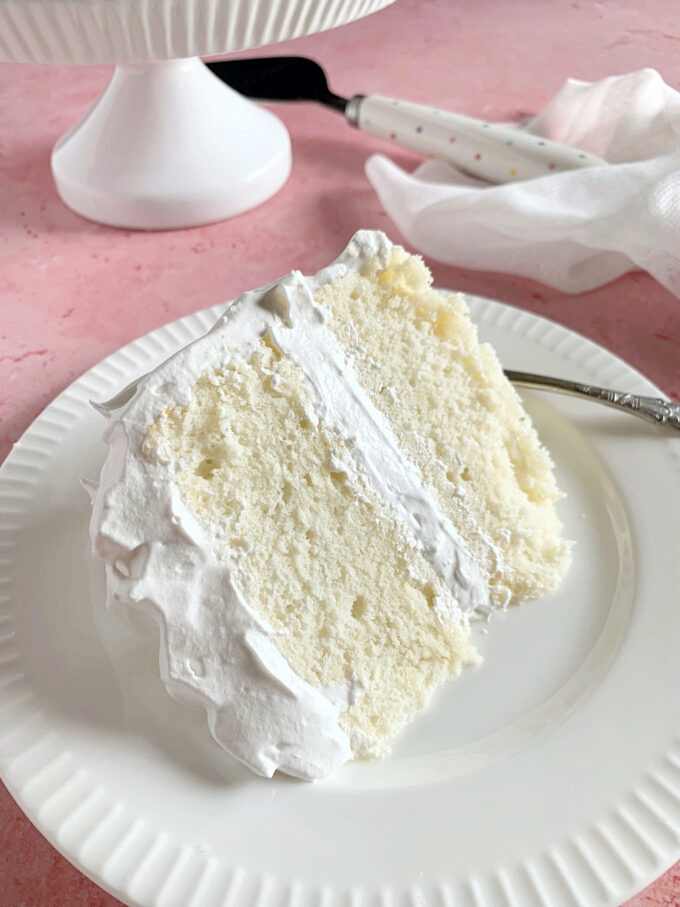
If you’re looking for the best White Cake recipe, you’ve come to the right place. This cake has a tender, velvet-like texture and a wonderful vanilla flavor, and it tastes incredible when finished with light and marshmallowy Seven-Minute frosting! This recipe also uses the reverse creaming method, resulting in a more refined cake crumb.
Do you ever find yourself wondering what the difference is between white and vanilla cake? Don’t worry, you’re not alone. It seems there are lots of people scratching their heads, trying to figure out the same thing. I hope I can clear up the confusion for you 🙂
What’s the difference between white and vanilla cake?
- Vanilla cake is made with whole eggs and the usual, butter or oil, sour cream or buttermilk, vanilla, etc. The color of the cake is an off white or pale yellow color, due to egg yolks, butter, and vanilla.
- White cake is made with egg whites only. It’s made a couple different ways depending on how pristine white the baker wants the cake to be. See options #1 & #2.
- #1 White Wedding Cakes are usually preferred to be pristine white. Therefore the baker usually prefers to use clear (imitation) vanilla extract, and crisco solid shortening in place of butter. They usually make a pristine white frosting to go on the cake.
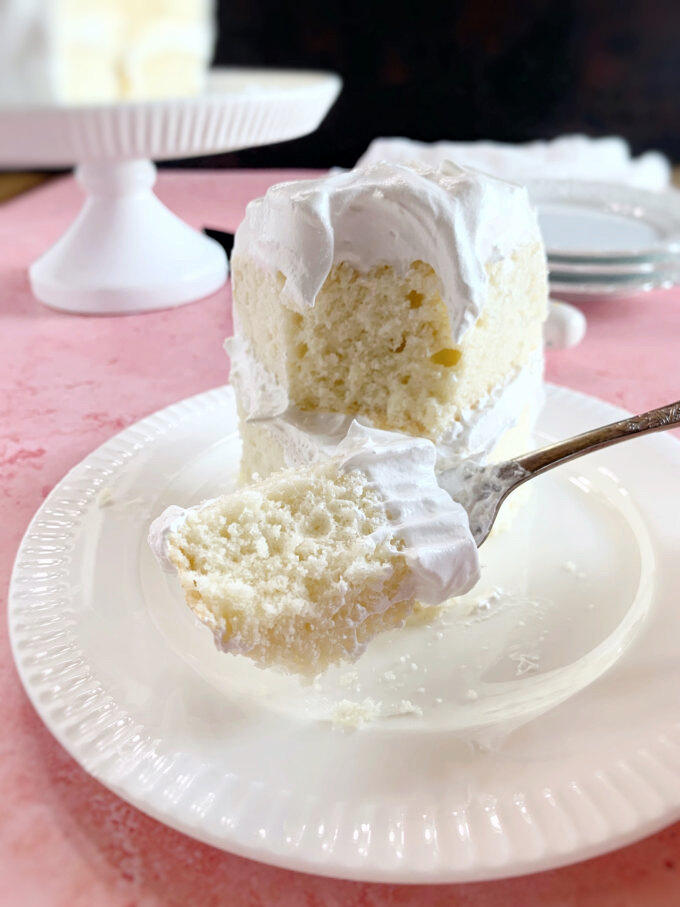
- #2 My Favorite White Cake is not pristine white, but that makes abosolutely NO difference to me. You know why? Because I prefer a cake that has a great flavor and if you look at my pictures here, I think you’ll agreee it’s probably white enough. What’s the difference between option #1 and #2? The second one, (my favorite), is made with pure vanilla extract, (it’s not clear, it’s brown), and real butter. Flavor…flavor…flavor! The one thing that is the same is the use of egg whites only, no egg yolks.

Creaming or Reversed Creaming Method
Most cakes are mixed in one of two ways. The creaming method or the reverse creaming method, the creaming method being the most common.
For over 50 years I’ve used the standard creaming method for mixing cake batter. It was ingrained in my brain to always mix the butter and sugar first, followed by the eggs, then by the liquid and dry ingredients that were added alternately. Adding the dry ingredients last kept the flour from being over incorporated, and mixing the butter and sugar together first, helped leaven the cake batter by driving air into the butter with the help of the sugar crystals.
I’ve seen quite a bit of the reverse creaming method used by bakers these days, so it got my curiosity up. You see, in the reverse creaming method, the dry ingredients and sugar are mixed together first. Then the butter and a portion of the liquids are mixed in, followed by the remaining liquids. My first thought on this was, no way can this work. Adding the flour first will result in over incorporating the flour. I was always taught this would result in a tough or rubbery texture. Well, I’m here to tell you that’s not totally true!
In the reverse creaming method, adding the fats to the dry ingredients first ensures that all of the flour particles are coated with butter. This, in turn, minimizes gluten formation. It also minimizes the size of the air particles that are incorporated, resulting in a finer crumb. Hmmm…makes sense.
To sum it up…the creaming method helps to lighten the texture of the cake, and the reverse creaming method results in a finer cake crumb.
Which method did I choose to use for this recipe? You got it…the reverse creaming method. By using the reverse creaming method my cake resulted in a fine crumb, and I didn’t have to wonder about using the creaming method to get a light texture. I whipped my egg whites before adding them in, and the whipped egg whites resulted in a perfect light texture.
Seven Minute Frosting
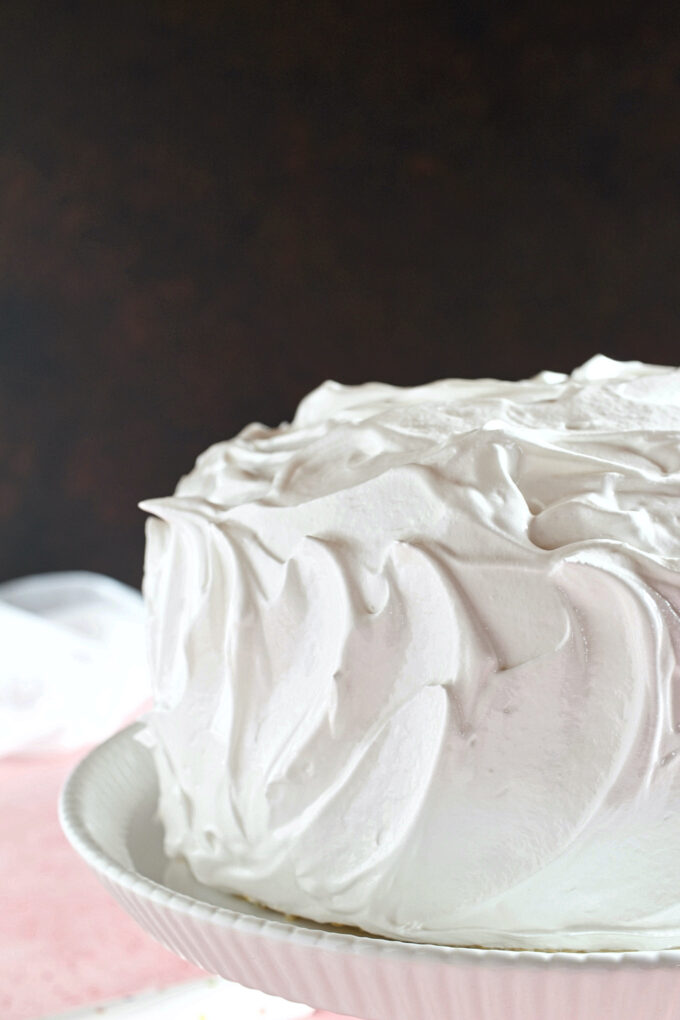
Now let’s talk about the frosting. I wanted a perfect frosting for this cake. Not the usual buttercream or cream cheese frosting. I wanted something light and airy and not overly sweet. A perfect match for this yummy white cake, and I knew exactly what I wanted… seven-minute frosting!
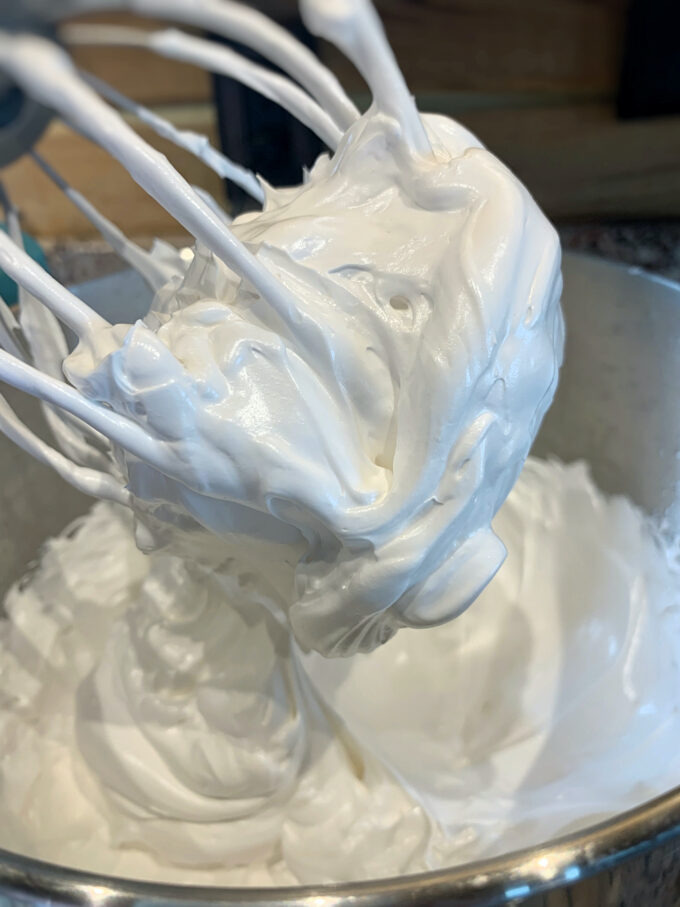
The seven-minute frosting takes 7 minutes to make! That’s right! Oh, and it’s super easy to make. What does it taste like? Whipped fluffy homemade marshmallowy goodness!! 🙂
Update: I’ve recently made this cake with Swiss Meringue Buttercream. It’s also a great frosting for this cake. It’s not overly sweet, and it holds up for a very long time…longer than seven-minute frosting. So if you’re taking this cake to an event where it will be sitting out for hours, you might want to make this one.
You’ll have 9 leftover egg yolks when you make both the cake and the frosting. Here are a few recipes from various bloggers that you can use those egg yolks in,
If you make this recipe please rate it, and leave a comment below on how you liked it. I love getting your feedback. 🙂
Wanna see different recipes each day? Feel free to follow me on Facebook, Pinterest, & Instagram.
Print
Favorite White Cake
- Prep Time: 35 minutes
- Cook Time: 35 minutes
- Total Time: 1 hour 10 minutes
- Yield: 12 servings 1x
- Category: cake
- Method: Bake
- Cuisine: American
Description
This velvety soft cake uses the reversed creaming method, and it has a perfect tender and moist crumb.
Ingredients
CAKE
- 2 cups cake flour
- 1/2 teaspoon baking soda
- 3/4 teaspoon baking powder
- 3/4 teaspoon salt
- 1 1/2 cups granulated sugar, divided
- 1 cup sour cream, room temperature
- 1 cup (2 sticks) unsalted butter, room temperature
- 1 tablespoon canola or vegetable oil
- 1 tablespoon pure vanilla extract
- 6 large egg whites, room temperature
- 1/2 teaspoon cream of tartar
SEVEN MINUTE FROSTING
- 3 large egg whites
- 1 1/4 cups granulated sugar
- 5 tablespoons water
- 1/4 teaspoon cream of tartar
- 1 teaspoon pure vanilla extract
Instructions
CAKE
- Preheat oven to 350 degrees. Line two 8-inch cake pans with a piece of waxed or parchment paper. Grease and lightly flour the paper, but not the sides of the pans.
- To the bowl of a stand mixer, (or use a hand mixer), add the cake flour, baking soda, baking powder, salt and 1 cup of the granulated sugar. Turn the mixer on low to thoroughly combine all of the ingredients. On low speed, add 1/2 of the sour cream and the butter, one tablespoon at a time. Stop and scrape down the sides and bottom of the mixing bowl. Mixing on low speed, add the remaining sour cream, oil, and vanilla. Mix on medium speed until the mixture becomes light and airy, about 2 minutes.
- In a separate bowl, using the whisk attachment, whip the egg whites and cream of tartar together on medium-high speed until they form soft peaks. Turn the mixer to medium-low and slowly add the remaining 1/2 cup of sugar. Turn the mixture to medium-high speed and mix until stiff shiny peaks begin to form. Do not over beat! Once the egg whites look stiff and shiny, stop the mixer. If they look dry, you’ve over mixed, and the cake layers may not rise as much.
- Using a spatula, fold the egg whites into the first mixture, one third at a time, folding only until there are slight streaks of egg white remaining. Note: To fold, simply run a spatula down the side of the mixing bowl, under the mixture and back up and over. Divide the batter evenly between the two cake pans, using an offset spatula to spread evenly. Gently tap the pans on a counter to remove air bubbles.
- Bake the cakes for 30 to 35 minutes until the cakes are golden brown on top and a toothpick inserted comes out with moist crumbs on it. Ovens vary! I suggest doing the first toothpick check at 25 minutes.
- Cool for 15 minutes in the pans and invert the cakes onto a wire cooling rack to finish cooling.
SEVEN MINUTE FROSTING
- Fill a medium saucepan about 1/2 full with water. Bring it to a boil over medium heat and reduce the heat to medium-low so that it just simmering around the edges, not boiling.
- Add the egg whites, sugar, water, and cream of tartar to a large heatproof bowl of a stand mixer. If you don’t have a stand mixer, just make sure you use a heatproof bowl.
- Place the bowl over the saucepan of simmering water. Whisk the mixture frequently, for about 5 minutes, until the sugar has completely dissolved and it will also be foamy. This takes about 5 minutes. Check it by rubbing a tiny bit of the mixture between two fingers. If it feels grainy, the sugar has not dissolved yet.
- Place the bowl on the stand mixer fitted with the whisk attachment. Beat on high speed until the frosting is very glossy and triples in volume, about 7 minutes. Mix in the vanilla and any food coloring, if using.
- Spread the frosting on a cake or cupcakes as desired.
- This frosting will hold up for 1 day at room temperature. After day 1, this frosting will slowly begin to disintegrate and seep into the cake. It’s best to serve cake, the day it’s made or the very next day.
Notes
- If your frosting breaks down or disintegrates the same day it’s made, it was under whipped.
- If your frosting has a grainy texture, the simple syrup wasn’t cooked long enough to completely dissolve the sugar crystals.
- This cake batter will also fill 3 6-inch cake pans.
Cake recipe adapted from Baking Sense.
hi how much is 4 sticks of butter in grams
could you please get back to me asap as i am making it today
I am soo excited to see how it tastes as i have tried many other recipes and didn’t like them
Hi Aleena,
4 sticks of butter = 453.6 grams. This recipe calls for 2 sticks of butter which is 226.8 grams.
Cindy
Can this frosting be piped?
Hi Kristin,
Yes, it can. Just make sure you beat it until it’s stiff.
Cindy
Can you use all-purpose flour instead of cake flour?
Hi Cyn,
Yes. For each cup of all-purpose flour, replace 2 tablespoons of the flour with 2 tablespoons of cornstarch, and sift the flour. Happy baking!
Hi is there any alternative to cake flour? Sadly cake flour is not readily found in UK.
Hi PB,
Yes, there sure is. Use all-purpose flour. For each cup of flour, remove 2 tablespoons of the flour and replace it with 2 tablespoons of cornstarch. I also sift the flour. Happy baking!
Hi. I don’t have two 8” cake pans. Was wondering how many cups of batter this recipe made. Was going to use 6” inch pans instead and was wondering if I needed 3 or 4 of them. How far up the pans should the batter come? Thank you
Hi Juliette, I’m not sure, but I would think three 6-inch would work. Don’t fill the pans more than 2/3 full. If you fill them 3/4 full, you’ll probably end up with domed cakes and have to slice off the dome if you want flatter cakes. I hope this helps!
How can I make for 3 6in Cake pans?
Hi Tina, This cake batter should fit in 2 8-inch or 3 6-inch cake pans. Happy baking!!
Good morning….
Can I use this batter for cupcakes?
Hi Lori, Yes you sure can.
Thank u
It looks delicious!!
Thank You!
Can you use avocado or grape seed oil instead?
Hi Rachel, I haven’t used either of these in baking, therefore, I can’t advise. If you try either of them, please let us know how it turns out. Happy baking! 🙂
When you said cake flour you mean a box of cake? Like a betty crocker mix?
Thank you!
Hi Alexa, This recipe calls for cake flour. It’s not a cake mix. It’s a more refined flour than all-purpose flour. It’s sold in a box next to the regular bags of flour. Swans is a popular cake flour. It’s in a red and white box. I hope this helps.
Can the finished cake be kept in the refrigerator?
Hi Christy, Yes, it certainly can. However, for best flavor remove it from the refrigerator about 20 minutes before serving.
What are the measurements for the ingredients for the frosting?
Hi Joyce, They are on the ingredient list on the recipe card. Happy baking! 🙂
Moist, tender and delicious. I have never tried this method but thought the results were great and this will definitely be my new “go to” for a white cake!
Any thoughts on using gluten free flour?
Would you still use the reverse creaming method?
Hi Lori, I’m sorry I’ve not used gluten free flour in my baking recipes. However the reverse creaming method should still work for any flour.
Hello! First of all your cake looks amazing!!
I have a few questions… I want to make cupcakes. How full do I fill the cupcake liners, 1/2 full? How long should I bake them? Thank you in advance. Sharron
Hi Sharon, The cupcakes shouldn’t take more than 20 minutes max. Only fill them 2/3 full.
How can I get a cook book?
Hi John, I’m sorry, but I don’t have a cookbook.
I made this for a family event over the weekend and it was a hit! My sister has always proclaimed white cake to be her favorite and now I know why. The flavor was rich and the texture luxurious, like eating velvet. I used a 9 x 13 and eliminated the bottom parchment, but did butter and flour the sides as well as the bottom. I used the cake flour and splurged for fine-ground sugar (not powdered), though I’m sure it would work with “normal” ingredients. Don’t usually bake cakes from scratch but this recipe convinced me it’s definitely the best way. Looking forward to exploring more of your recipes and baking this white cake again in three weeks for Easter dinner! Oh, what’s your chocolate version of this cake? Fine crumb, soft texture, rich flavor?
Fabulous recipe! Thank you!
Hi Carrie, I have a chocolate version coming soon! 🙂
Hi Mary, I’m sorry your cake didn’t turn out. If it caved when it was removed from the oven, it wouldn’t have been done enough. A toothpick test is recommended for testing it for doneness. I hope you have better luck next time.
I’m excited to make this incredible looking cake! However, I’m unable to consume canola/vegetable oil. Is it okay to use a conversion calculator and swap out the oil for more butter?
H Michelle, You can, but the cake won’t be as moist. I would suggest coconut or some type of oil that you can consume.
The cake tasted amazing. One of the best white cake flavors I’ve had. However, I made cupcakes and they shrunk and shriveled as they cooled. Have you had this happen?
Hi Stephanie, No, I haven’t made cupcakes with this recipe. I’m sorry this happened to your cupcakes, and I’m honestly not sure why that would happen. This has never happened when I bake it in the layers. I hope you have better luck next time.
How long do you bake it if made in a 9×13 pan?
Hi Donna, It will take less time. I would do a toothpick check after 20 minutes.
I want to try
Among this with a GF flour blend and adding cacao powder to make chocolate cupcakes for my grandsons birthday. Is this too much to try and do to this recipe?
Hi Jeanie, I honestly haven’t tried the reverse creaming method done in this recipe with chocolate yet, and I haven’t used GF flour in any of my recipes. If you do try it, please let me know how it turns out for you. 🙂
That was supposed to say I want to try and make this. Sorry for the type -o!! Jeanie
As I was reading this. I thought….hmmm, I think I want Swiss Meringue instead of Seven Minute Icing because I want more richness.
And then you say the same thing a few sentences later!
I made this for friends who ONLY love white cake, and we ALL raved! Delicious.
Hi Donald, I’m so glad it was a hit. It’s my all-time favorite white cake. Of course I love white cake too! 🙂
Hello, how long would it take in 4 4 inch pans?
Hello
How long will cake last in fridge? 1 cake take about 3 days to eat In my house.
Hi Leann, It will last at least 3 days. However, if you used 7-minute frosting, the frosting will start to break down and dissolve into the cake after 2 days in the fridge.
How eggy does the cake taste? I really want to try ghis recipe but i hate the taste of eggs
Hi Jess, It doesn’t taste eggy, I promise. Check out my “Favorite White Cake” recipe. It only has egg whites.
Absolutely delicious.
I baked it in a 9 inch round pan and a 6″ pan and I wasn’t sure how long to bake the 6″ pan. I made the rookie mistake of opening the oven too many times and while the 9″ was PERFECT, the 6″ was super dense in the middle. Do you have any recommendations for how long to bake this for in a 6″ pan?
Otherwise, it’s so delicious and melt in your mouth.
Hi Jasmine, I’m so glad you like it. Six inch cakes usually bake for about 18 to 21 minutes.
Hi. When you measured your flour, did you weigh it (grams) or just scoop and level? I usually like to work in grams since it’s more accurate. If you have a gram weight, please share. Thanks.
Hi Desiree, I spooned and leveled it. There’s a metric conversion at the top of the recipe card. Happy baking! 🙂
This looks absolutely amazing. Can’t wait to try.
Hi. Just to clarify… is the oven temperature of 350 degrees in Fahrenheit? I am baking from the UK.
Can’t wait to try your recipe. Thanks.
Hi Yinka, Yes, it is Fahrenheit.
Hi cindy. What can I use instead of sour cream. Can not find sour cream where I live.
Hi Amina, You can substitute yogurt.
Can you use gluten free flour?
Hi Mary, I have not used gluten free flour. Everything that I’ve read says you can. Here’s a post about it…https://gfjules.com/converting-recipes-gluten-free-flour/#:~:text=If%20you%20are%20trying%20to,What%20is%20this%3F
How many cups of batter does this make? Are carton egg whites okay to use?
Thanks so much!
Hi Paula, I haven’t measured the cups, but I’m guessing about 9 to 10 cups. I’ve also not used carton egg whites. However, you can use them. They are thinner and will take longer to whip up.
Has anyone else had issue w/ this frosting?I followed directions,….. yikes more like 10 minutes on high speed ♀️
Hi, Paula, have you ever tried making a Coconut Cake with this White Cake recipe? Bet it would be delicious! My great grandmother in Fulton, Mississippi made a Coconut Cake with a White Cake recipe with 7 minute icing and it was delicious they say. That was 1899!
Hello! I cannot wait to try this cake, it looks and sounds delicious. I can’t wait to try this. Also, I’m wondering, if possible, how/when would I add a box of strawberry jello to make this a strawberry cake? Thank you
Hi Jennifer, I’ve not experimented with adding a box of jello to this recipe. However, if you do add a box, I recommend mixing it with the flour and other dry ingredients. 🙂
I live above 5000 feet. Any adjustments with the rising agents with this recipe? I’m going to add some of my best friend’s homemade raspberry jam between the layers. Cannot wait to cut a nice slice with a good cuppa.
Hi Peggy, I’m sorry, but I am not familiar with high altitude baking. I hope this turns out great for you. It’s very delicious!
Can you substitute sour cream with milk or buttermilk. Thank you.
Hi Estelle, You can substitute buttermilk, but only use 3/4 cup. It’s much thinner than sour cream.