Swiss Meringue Buttercream
Published: March 22, 2022 · Modified: May 7, 2024 by Cindy Gibbs
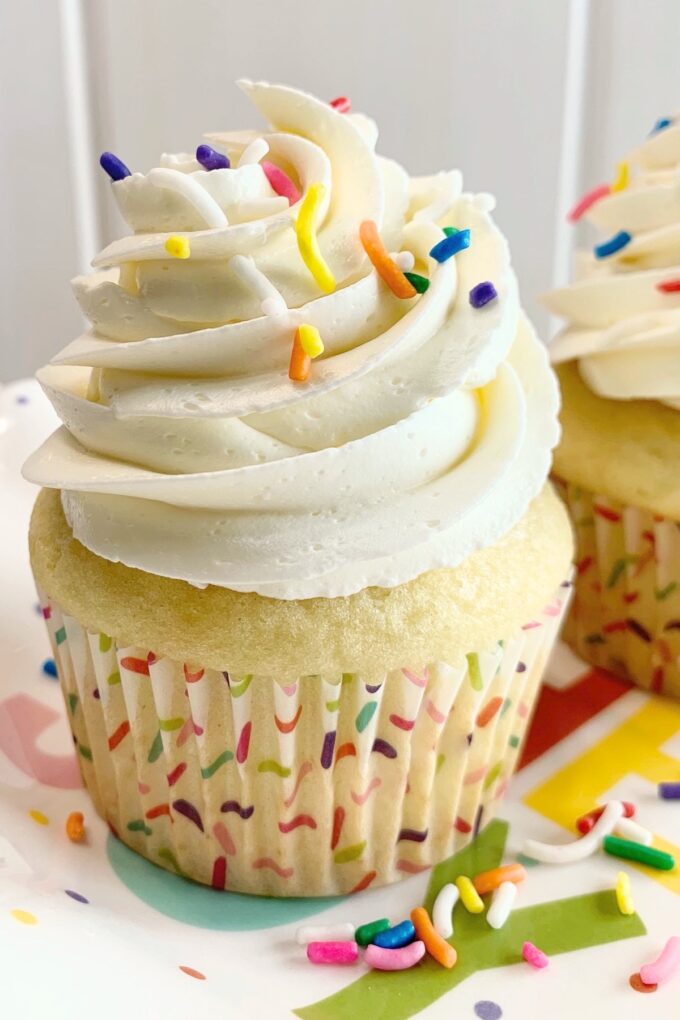
Swiss Meringue Buttercream is silky smooth, not overly sweet, and pipes beautifully on cakes and cupcakes. It’s also a breeze to make and holds up great at room temperature. If you’ve never made Swiss meringue buttercream don’t be intimidated. This recipe shows you all the tips and tricks for making it perfect!

If you’re not a fan of how cloyingly sweet American buttercream can be, you need to be introduced to Swiss Meringue Buttercream. This not-so-sweet, silky smooth buttercream, just might be your new favorite!
First things first! Let’s talk about Swiss Meringue for a minute. Swiss Meringue is simply Swiss Meringue Buttercream without the butter. In case you’ve never tasted it, Swiss Meringue tastes like a pillowy voluminous homemade marshmallow in a melty soft form. If you love Swiss Meringue you’ll love the buttercream version even more.
Swiss meringue by itself doesn’t hold up for more than a day or so without starting to break down. Once butter is added to the equation it becomes stable, making it perfect for cakes and cupcakes that need to set out for hours.
TIPS FOR MAKING PERFECT SWISS MERINGUE BUTTERCREAM
In the tips below, I mention “fat”. Why does this matter? Allow me to explain! Butter and egg yolk are both a form of fat. The purpose of beating egg whites is to beat air into them. As they beat, the egg whites form a network of air bubbles, expanding more as they are beaten. Introducing fat will deflate the air bubbles, thus hindering the egg whites from whipping up.
- Use a clean bowl & beaters (fat): Start with a clean, grease-free mixing bowl and beaters, preferably not a plastic bowl. Plastic absorbs fat. The bowl and beaters need to be perfectly clean and free of any grease. If you’ve recently used the bowl for something buttery, rub the inside of the bowl and beaters with a lemon or lemon juice and wipe them clean with a paper towel, or wash them in hot soapy water, rinse and wipe dry. A greasy bowl or beaters will prohibit the egg whites from whipping up properly.
- No egg yolk (fat): There should not be any remnant of egg yolk in the egg whites. Egg yolk prohibits the egg whites from becoming frothy and airy. Separate the eggs carefully. Separate them one at a time in a small bowl before adding them together to a larger bowl, in case some of the egg yolk slips through with the egg whites. If any of the egg yolk gets mixed into the egg whites, pitch the egg white and start over.
- Separate the eggs while they are cold. It’s so much easier to separte eggs when they are cold, because the yolk is firmer and less likely to break.
- Make sure you cook the egg whites and sugar long enough. This takes about 3-4 minutes. There are 2 easy ways to check to see if the mixture is ready to come off the heat. Use an instant read thermometer and wait until it reaches 160 degrees, or rub a tiny bit of the mixture between two fingers. If it no longer feels gritty, meaning the sugar is totally dissolved, then it’s ready. It should also be sort of frothy.
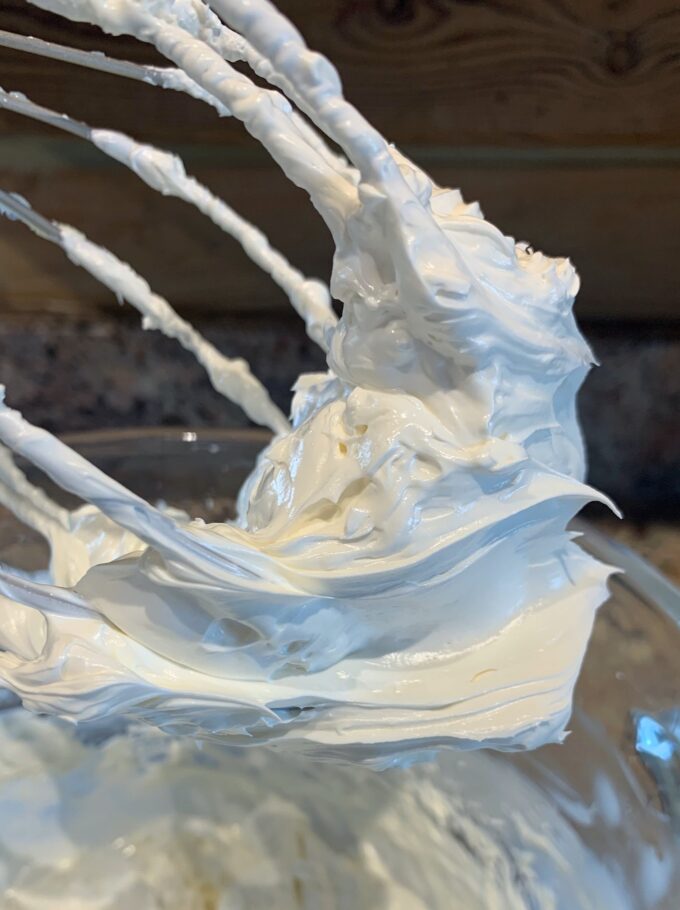
- Beat the egg whites long enough, before adding the butter. The egg whites should be beat until stiff shiny peaks form, that stand on their own without falling, (see picture above). Remember, when you start beating the egg whites they are hot off the stove. It could take up to 12 to 15 minutes to whip them, depending on your mixer and the humidity in the air. I highly recommend using a stand mixer for this, instead of a hand mixer.
- Your butter should be a little colder than room temperature. Soft enough to mix in, but cool.
- Don’t add the butter too early! The whipped egg whites should be cooled to room temperature before adding the butter. If the egg whites and bowl are still warm to the touch after you finish beating them, simply place the bowl in the refrigerator for about 10 minutes, before adding the butter.
- If you make your buttercream ahead of time, remove it from the fridge, allow it to warm to room temperature, and whip it for a couple of minutes before using it.
FAQ’S

My buttercream is soupy!
If your buttercream becomes thin & soupy after adding the butter, don’t fret! This often happens if the butter is added when the whipped egg whites are still too warm. Simply place the mixing bowl, beaters, and all, in the fridge or freezer for a few minutes, then whip it again. If it’s still too thin, place it back in the fridge or freezer again for a few minutes and try again. It can get sort of spongy after being in the fridge for a while but don’t worry. Simply keep beating it, and it will smooth out and become creamy again.
My buttercream separated…looks curdled!
If your buttercream starts to separate or look curdled, it usually comes back together after beating it a little longer. If it simply gets too thick or chunky looking and beating doesn’t fix it, there’s a second fix. Return the buttercream to the double boiler of simmering water. Heat it for about 1 to 1 1/2 minutes until you see the edges only of the buttercream start to melt and remove it from the heat. Return the buttercream to the mixer and beat again. The buttercream should whip up to a creamy, satiny smooth texture after about one minute on medium-high speed.
Can I freeze Swiss Meringue Buttercream?
Yes! Swiss meringue buttercream freezes beautifully. Freeze it in an airtight container or large freezer bag for up to three months. Thaw it to room temperature on a counter. Place it in the bowl of a stand mixer and beat for about 2 minutes until it’s creamy and satiny smooth again. If for any reason it begins to look curdled, refer to my tip above for curdled buttercream.
How to color Swiss Meringue Buttercream!
SMB cannot be colored the same as American buttercream. When coloring American buttercream, the food coloring can be added directly to the buttercream. Not so, with SMB.
What happens when you add food coloring to any meringue frosting? The color will never have a saturated hue. Instead, there will be tiny microbeads of color suspended throughout the buttercream. No matter how much coloring you keep adding, the buttercream will never darken in color.
Here’s how to get the color you want!
- Add about 2 tablespoons of the buttercream to a small bowl.
- Add food coloring to the bowl, (adding more than you think you might need). It will look lighter in color for now.
- Mix it together and microwave for about 30 seconds. The color will look darker. Mix it with a spoon and it will become even darker and more vibrant.
- Add the colored mixture to your batch of buttercream and mix well. You will have the perfect color throughout…no light and dark streaks.
- If you want to break it up in different small batches you can. Say you want the cake frosting one shade and the flowers on top a different shade. Use the small bowl of color as your base to create different shades.
Bonus Vanilla Cupcake Tip!
You might think I’m a diehard “from scratch” cake baker and for the most part I am. However, I’m also a diehard vanilla cake fan, and I’ll share a little secret with you. I can take a boxed white cake mix and turn it into a delectable vanilla cake in just minutes. In fact, when I’m having last-minute visitors on a weekend afternoon, or need a quick cupcake to illustrate a frosting recipe, I often do this trick that I’m about to share with you.
Use a box of white cake mix. I used Pillsbury Super Moist. You don’t need one that has pudding in it. Follow the directions on the back of the box using 3 whole large eggs instead of egg whites. Add 2 teaspoons of pure vanilla extract and 2 tablespoons of real butter to the recipe. Then bake as directed on the cake mix box. You can also simply replace the oil in the recipe with butter, but I prefer my version, resulting in a fluffier cupcake, yet still buttery flavored.
More frosting recipes you might like…
Milk Chocolate Cream Cheese Frosting
Strawberry Buttercream Frosting
Whipped Chocolate Ganache Frosting
Peppermint White Chocolate Buttercream
If you make this recipe please rate it below, and leave a comment on how you liked it. I love hearing from you!
Wanna see different recipes each day? Feel free to follow me on Facebook, Pinterest & Instagram.
Print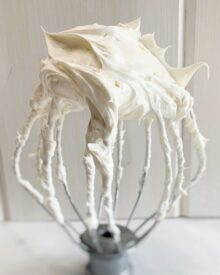
Swiss Meringue Buttercream
- Prep Time: 20 minutes
- Cook Time: 5 minutes
- Total Time: 25 minutes
- Yield: 5 cups 1x
- Category: Frosting
- Method: Cook
- Cuisine: American
Description
Swiss meringue buttercream is silky smooth, not overly sweet, and it pipes beautifully. The butter also keeps the Swiss meringue stable, allowing your cakes or cupcakes to set out on a counter for hours without any problem.
Ingredients
- 6 large egg whites, room temperature
- 1 1/2 cups granulated sugar
- 1/8 teaspoons salt
- 1 cup (2 sticks) unsalted butter, close to room temperature*
- 2 teaspoons pure vanilla extract
Instructions
- If you’ve never made Swiss Meringue or Swiss Meringue Buttercream before, read the tips above this recipe and read the recipe before starting. Wipe clean the large bowl of a stand mixer, making sure the bowl is completely grease-free. Even the slightest amount of grease will prohibit the egg whites from whipping up.
- Separating the egg whites: Make sure the egg whites have absolutely no remnants of egg yolk in them. If there is any egg yolk present, you need to discard the egg white'(s) and start over.
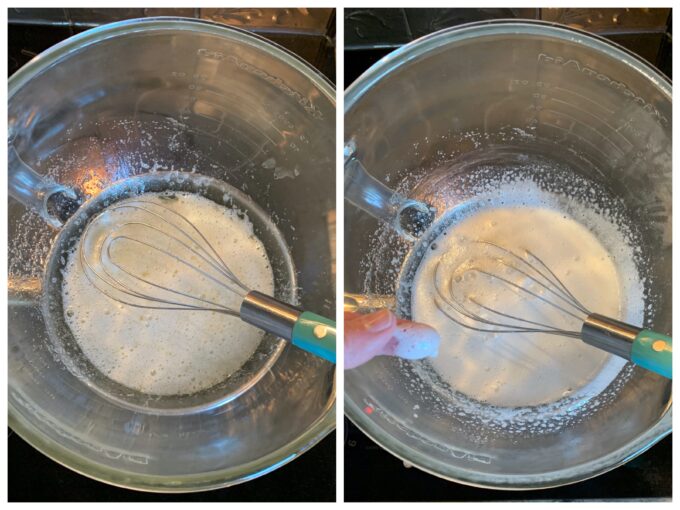
- Cooking the egg whites and dissolving the sugar: Whisk together the egg whites, granulated sugar, and salt in a heatproof, grease-free mixing bowl and place over a saucepan of about 2 inches of simmering water on medium heat. The bottom of the bowl should not touch the water. There should be a seal between the outside of the bowl and the inside edge of the pan. This keeps the steam locked inside under the bowl where it’s needed. Whisk the mixture until all of the sugar has dissolved, about 4 minutes. Test by rubbing a tiny bit of the mixture between two fingers. If it’s gritty, it’s not ready. If it’s smooth it’s ready. You can also test with a thermometer if you’re worried about the egg whites not being cooked to a safe temperature. The thermometer should read 160 degrees.
- Beating & cooling the mixture: Transfer the mixture to the bowl of a stand mixer fitted with the whisk attachment, (if you’re not already using the stand mixer bowl). Turn the mixer to low for about 30 seconds, and gradually turn the mixer up every few seconds until it’s on high speed. Leave the mixer on high and beat the mixture until it forms stiff shiny peaks. This can take anywhere from 12 to 15 minutes, depending on your mixer. The bowl will probably still feel warm. If it does, transfer the bowl, whisk and all, to the refrigerator for about 5 to 10 minutes, and return it back to the stand mixer. If the bowl and meringue are still warm, they will melt the butter when you add it, and you don’t want that.
- Add the butter: Cut the butter into slices. Turn the mixer to high and start adding the butter one slice at a time, allowing the butter to be incorporated before adding more. Once all of the butter is added, mix a few seconds more or until the mixture is very creamy and smooth, turn the mixer to medium and mix in the vanilla.
- Troubleshooting: Too thin: If the buttercream is too thin after you’ve added all the butter, the meringue was probably too warm when you added the butter, thus causing the butter to melt. Place the mixing bowl in the refrigerator for 10 minutes. Return the bowl to the stand mixer and beat on medium-high speed for a couple of minutes and it should thicken up to the correct thicker creamy consistency. Too thick: If the buttercream suddenly looks curdled or extra thick, return the mixture back over the double boiler on medium heat. Heat just for about 1 minute until the edges only of the mixture turns to liquid. Remove from heat and return to the stand mixer. Beat on medium-high speed and beat it for 1 to 2 minutes until it’s smooth again.
- Frost your cake or cupcakes. The buttercream can be left at room temperature for up to 3 days.
- The buttercream can be refrigerated for up to 5 days before using it. Remove it from the refrigerator and allow it to come to room temperature, then beat it with a mixer for about 2 minutes until smooth and creamy again.
- Freezing: The buttercream can be frozen for up to 3 months in an airtight container. Thaw on a counter until it comes to room temperature before mixing, then mix with a mixer until creamy and smooth.
Notes
- This recipe makes enough buttercream to frost one 8-inch three-layer cake, one 9-inch two-layer cake, 24 cupcakes if you don’t pipe the buttercream high, or 12 cupcakes if piped high. With most frostings/buttercreams, they are so rich that I don’t pipe them high on cupcakes. However, Swiss meringue buttercream is the exception. It’s so light and not overly sweet that I love a ratio of one big bite of buttercream to one big bit of cupcake.
- *The butter should be a little bit colder than room temperature. It should be soft enough to allow you to easily press your finger into it and leave an indentation, but not so soft that it spreads apart and looks mushy when you leave an indentation. I hope that makes sense.
- Many bakers switch to the paddle attachment before they start adding the butter. Once you start adding the butter, you longer want to incorporate lots of air. A paddle attachment is supposed to add in less air. However, I do use the whisk attachment with no problem with air bubbles, so don’t worry if you want to use the whisk attachment.
- See my notes above this recipe on how to color SMB.
- I highly recommend using a stand mixer for this recipe. It takes several minutes of beating on high speed with a stand mixer to make this buttercream. If you have to use a hand mixer, just be patient. You might have to give your hand mixer a break after a few minutes to let it cool off, and it will take longer.
Can you used carton egg whites for this?
Hi Kristi, Yes, you sure can.
Thanks for all your great recipes, which are far more interesting than standard cookbook recipes!
I notice when I double the recipe, all ingredients increase except for the egg whites… is this correct?
Hi Diane,
No, You need to double the egg whites too. However, if you don’t have a commercial size stand mixer, I don’t recommend it. I’m sorry it’s not showing it correctly. I hope you love this recipe. It takes Swiss meringue up a notch. 🙂
Would this be enough frosting to cover a cake made in a 12 cu[ bundt pan? I’ve never tried to frost a bundt cake before so I want to be sure it will cover it nicely.
Thank you for any tips you can add.
Hi Marie, Yes, it certainly will be enough. This recipe makes 5 cups, so you’ll have plenty. Happy baking! 🙂
I saw somewhere that you can apply simple syrup to a cake before frosting or decorating in case it is a bit dry. I wonder if you can please tell me if a cake be brushed with simple syrup before dusting with powdered sugar or will it make it sticky? Or could it be done some time ahead and then dust with the powdered sugar just before serving?