Country Peach Pie
What happens when you combine fresh juicy sweet peaches and a flaky pie crust? The most delectable peach pie you ever ate. A touch of cinnamon is the perfect complement to fresh peaches and this simple Country Peach Pie is perfect!
Don’t mess with a good thing! Peach pie is one dessert that’s best when made with simple ingredients, like this Country Peach Pie.
Cinnamon has always been a great partner to peaches. Cinnamon greatly complements peaches and allows the flavor of the peaches to shine through.
USE THE RIGHT PEACHES!!
It’s best to use fresh peaches when making a peach pie. They should not be hard, but slightly firm. Try to find peaches that have no soft spots or bruises. I used 2/3 cup of sugar in this pie. However, if your peaches aren’t as sweet as they should be, you might want to increase the sugar.
If you can’t find fresh in-season peaches, you can use frozen unsweetened peaches for this recipe, but make sure they are thawed and blotted dry.
PROTECT YOUR PIE CRUST EDGES
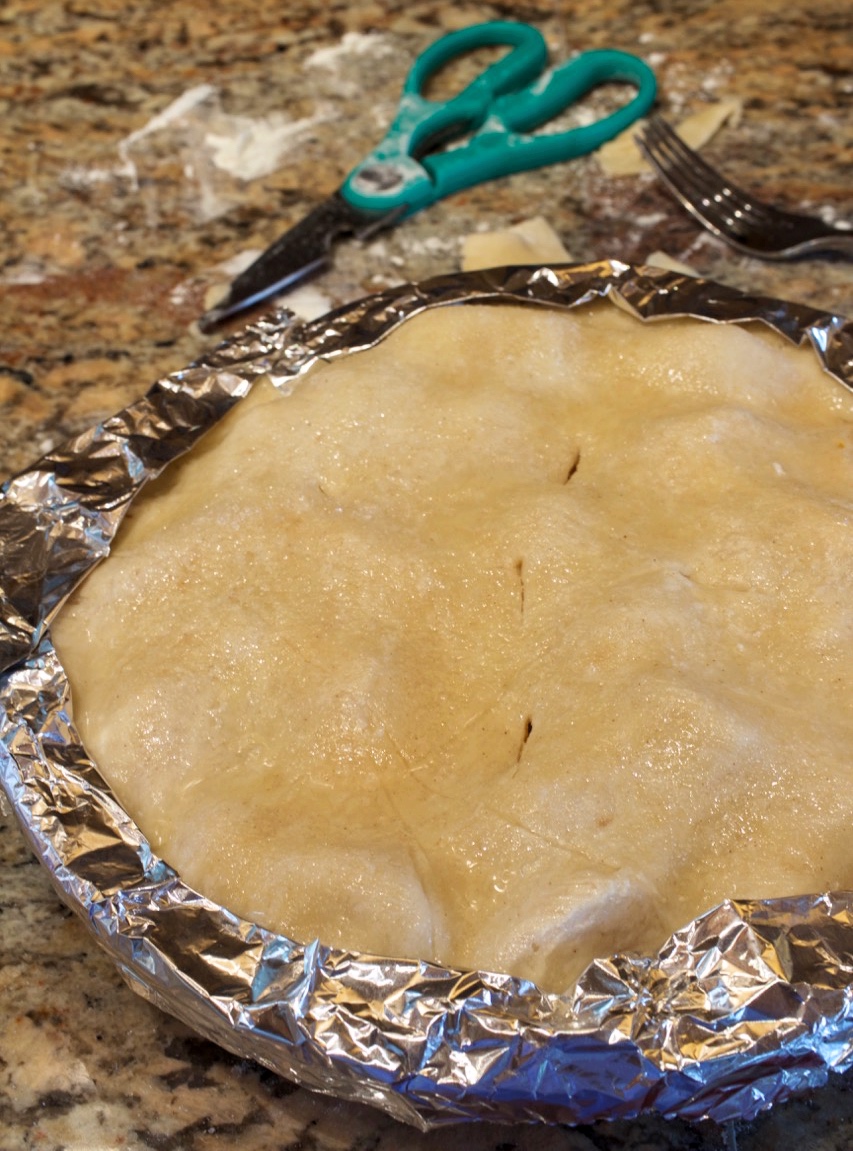
There are 2 things that you don’t want to happen to that pretty fluted pie crust edge that you’ve just made. You don’t want to burn or smash down the edges. You have 2 options here…use a pie shield, but if you do, make sure you allow the pie to bake for at least 20 minutes before adding the shield. This gives the edges time to be firm. Use foil on the edges, (my favorite). I simply fold strips of foil in half and place them around the edges. My secret to making the foil stay on the pie? Staples! That’s right, I staple the ends together, then I just fold the foil inward towards the top crust. I got that tip from my twin who’s smarter than I am. 🙂
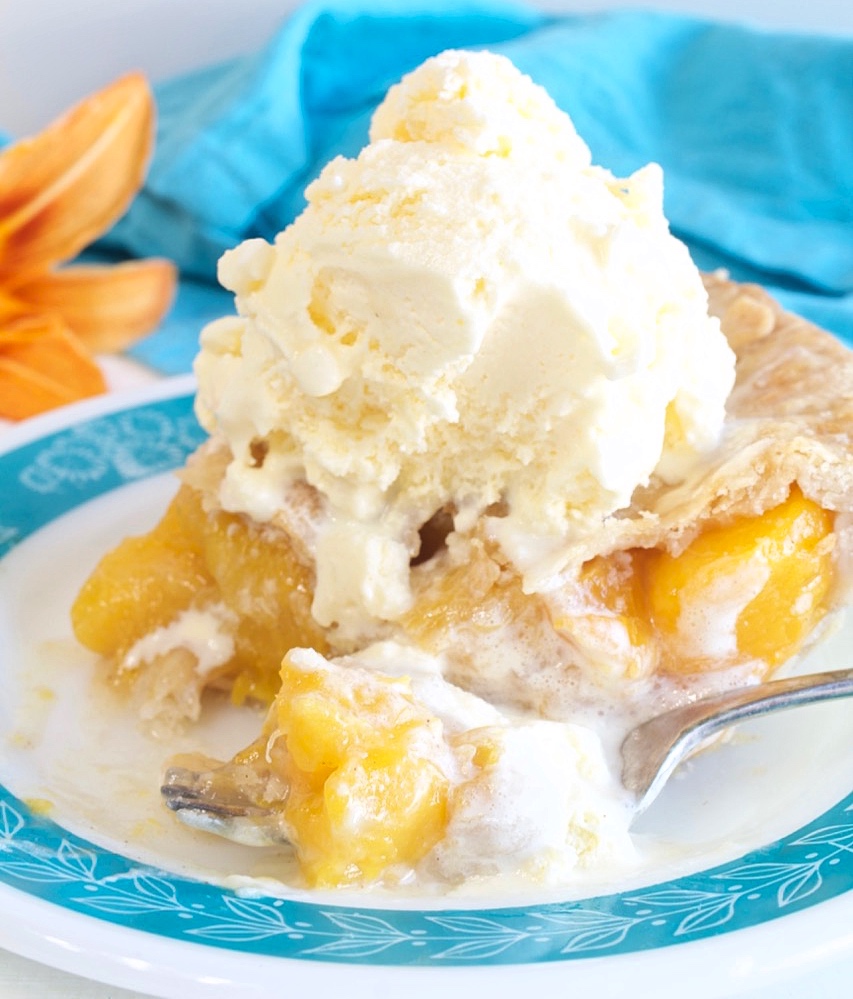
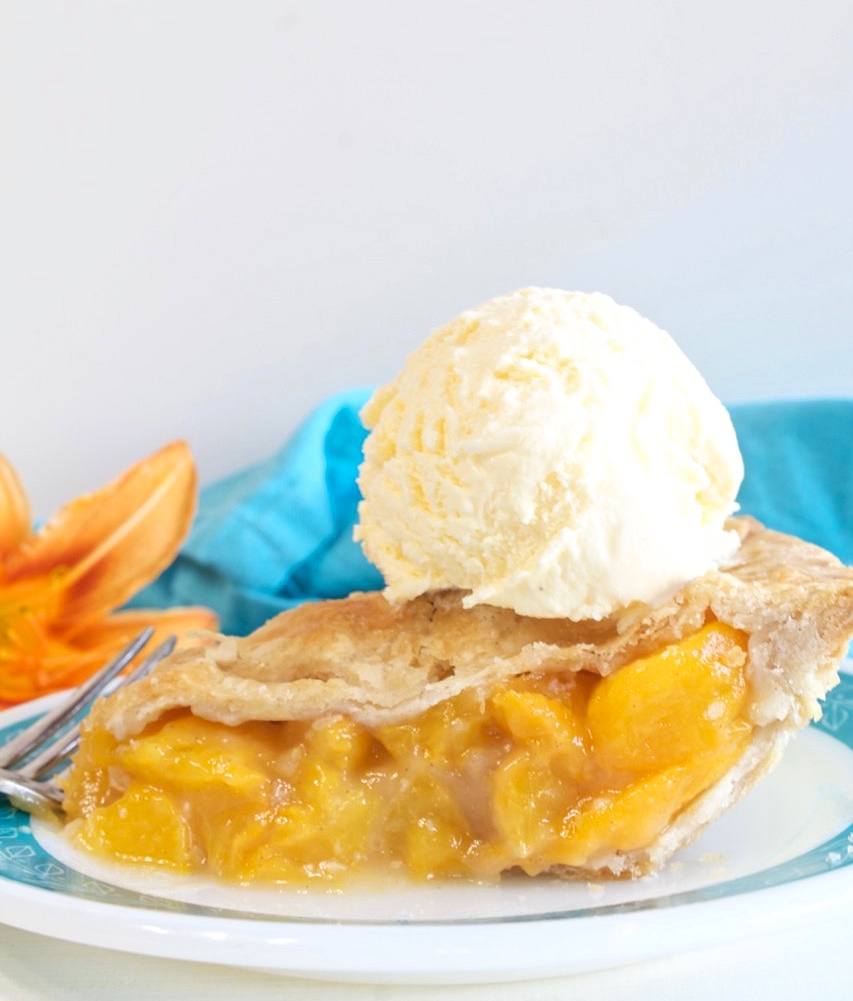
Serve this delicious pie any way you want. I love it warm with a scoop of vanilla ice cream, and sometimes I sprinkle a tiny bit of cinnamon over the ice cream. YUM!
If you love fruit pies, check out these other delicious fruit pie recipes…
If you make this recipe please rate it, and leave a comment below on how you liked it. I love getting your feedback! 🙂
Wanna see different recipes each day? Feel free to follow me on Facebook, Pinterest, & Instagram.
Print
Country Peach Pie
- Prep Time: 45 Minutes
- Cook Time: 45 Minutes
- Total Time: 1 hour 30 minutes
- Yield: 8 Servings 1x
- Category: Pies
- Method: Bake
- Cuisine: American
Description
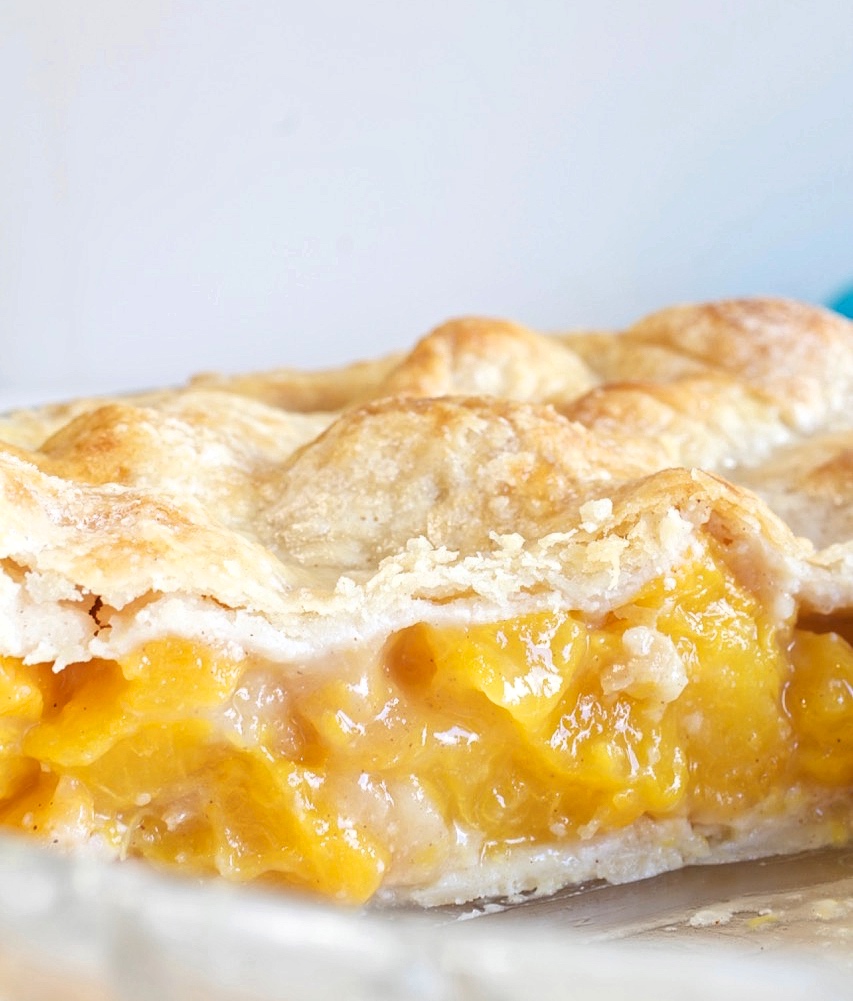
This Country Peach Pie is made from fresh juicy peaches that are complemented by a touch of cinnamon. The true flavor of the peaches shines through in this pie. It’s simple and delicous just like your grandma made!
Ingredients
- Pastry for a 2-crust pie (I used Aunt Elsie’s Flaky Pie Crust).
- 6 cups, sliced peaches, about 7 to 8 medium peaches
- 3/4 cup granulated sugar
- 1/3 cup all-purpose flour
- 1 teaspoon cinnamon
- 2 teaspoons lemon juice
- 2 tablespoon butter, cut into small pieces
- 1 egg mixed with 2 tablespoons half & half
- Granulated or coarse sugar for sprinkling over the top
Instructions
Preheat oven to 425 degrees.
- Make pie pastry as recipe directs. Roll one half of the dough out and fit into a 9-inch pie plate, allowing the excess dough to hang about 1/2 inch over the edge of the pie plate.
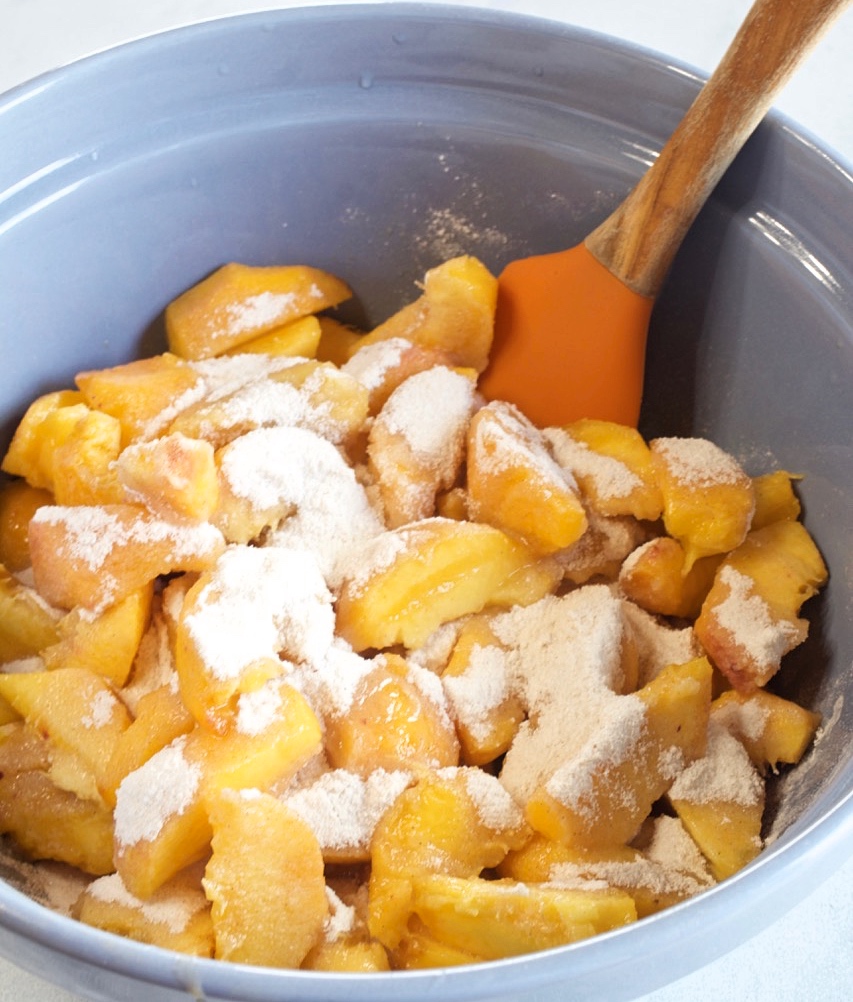
- In a small bowl, whisk together the sugar, flour and cinnamon and set aside.
- Add the peaches to a large bowl and sprinkle the lemon juice over them.
- Sprinkle the sugar over the peaches and lightly toss the peaches to coat with the sugar mixture.
- Add the peach filling to the prepared pie shell and sprinkle the butter pieces over the top.
- Roll out the second half of the pie pastry and place over the peach filling, leaving about a 1/2 inch overhang. Fold the edge of the top pastry over and under the edge of the bottom pastry. Flute edges or trim the pastry to the edge of the pie dish and press the edges together using a fork to seal. Cut 4 to 5 slits in the top crust to allow for steam to escape.
- Brush the top crust with the egg and half & half and sprinkle with sugar. Place foil around the edges to keep them from over-browning. See my notes below on protecting the edges.
- Place the pie on an old cookie sheet. Bake the pie for 15 minutes. Reduce heat to 350 degrees and bake for approximately 40 to 45 minutes until the top is nicely browned and the juices are trying to bubble through the slits. You can also place the end of a sharp knife through one of the slits to see if the peaches are tender. You’re looking for two things, a done crust and tender peaches.
- Transfer the pie to a cooling rack and remove the foil. Allow the pie to cool for at least 2 hours before serving, to allow the pie filling to set up.
- Cover and refrigerate leftovers.
Notes
- If you don’t have fresh peaches, you can use 6 cups of frozen sliced peaches that have been thawed.
- Protect the edges: I’ve played around with different pie crust shields for years, and I keep going back to my good ole’ foil. Here’s what I do. I fold a 3-inch strip of foil in half and place it around the pie. Of course, one strip isn’t enough to circle the entire pie. I usually use 3 pieces and here’s what I do. I staple the pieces together to join them. Works perfect! After I staple them, I fold the foil inward towards the pie filling. When the pie is done, I simply pull the strips off. Option 2 – Allow the pie to bake for about 20 to 25 minutes and place a pie shield over the crust. If you place a pie shield over the crust when you first place the pie in the oven, it will end up smashing down your nice pretty fluted edge and making you mad! Trust me on this one! The problem with pie shields is this. No matter how they are made, they don’t seem to fit all pie dishes, and the ones that come in pieces tend to fall off the edge. I love foil because I can make it conform to my pie dish size and what I want it to do.
- Unbaked pie can be frozen for up to 3 months. Wrap securely with two layers of plastic wrap and a final layer of heavy-duty foil, or you can wrap the pie and place it in a pie container before freezing. Allow pie to slightly thaw in the refrigerator overnight. Baking time will probably take an additional 10 minutes.
- Baked pie can be frozen for up to 3 months. Again, wrap the pie with a double layer of plastic wrap and a layer of heavy foil. Thaw overnight in the refrigerator, then bring to room temperature. Heat servings for a few seconds in a microwave to serve warm.
- Always bake fruit pies on an old cookie sheet. They tend to bubble out through the top crust and edges, depending on how juicy they are.
- You can substitute frozen peaches for fresh peaches. Make sure you thaw the peaches and partially drain them. You don’t need to drain off all of the juices. Flour is added to the filling to help thicken the juices.
Hello I made the country peach and it was absolutely delicious !!!!
Hi April, I’m so glad you liked it!! 🙂