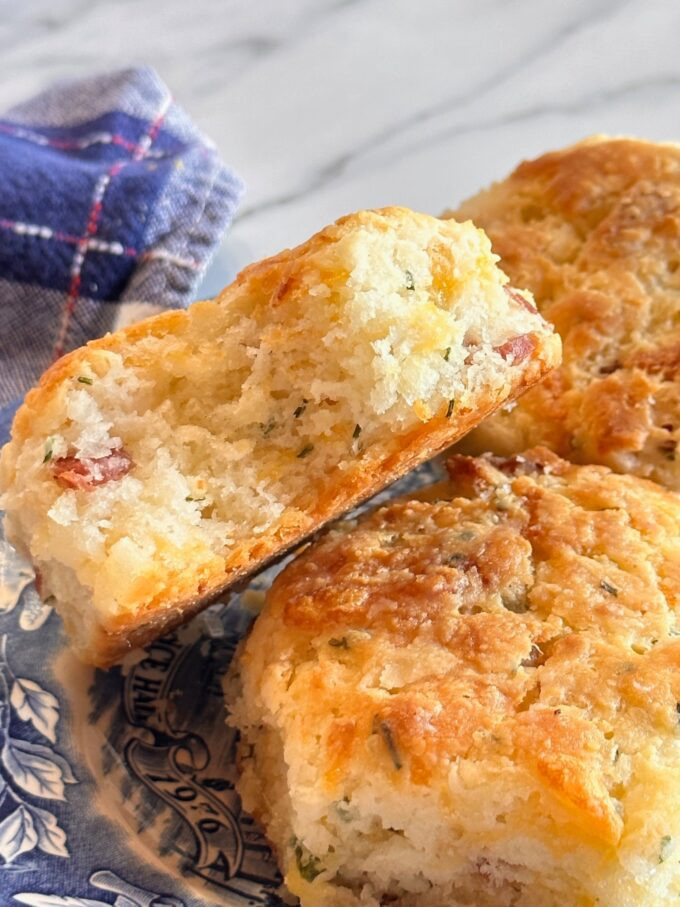
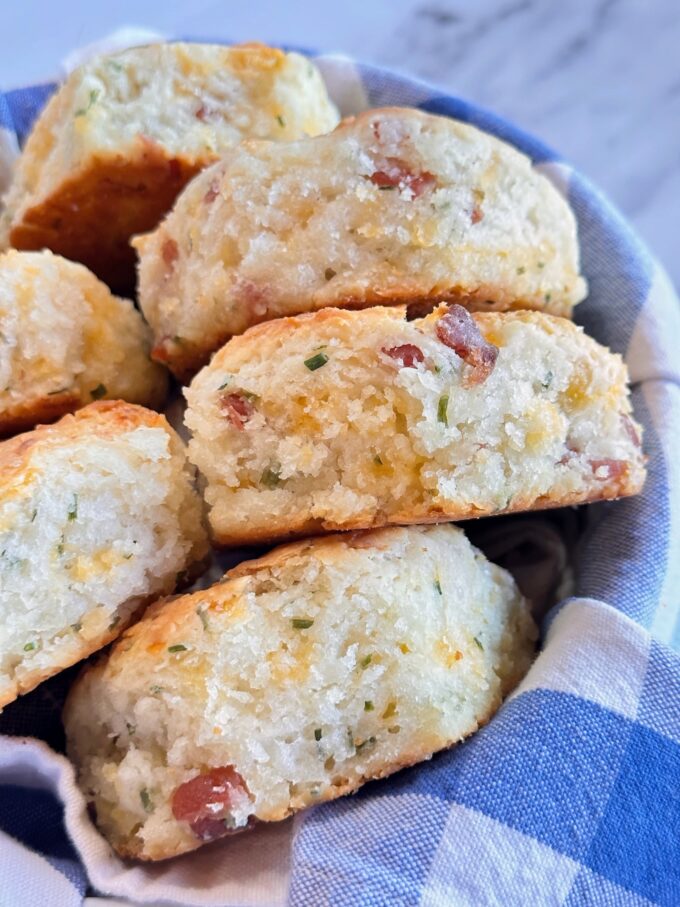
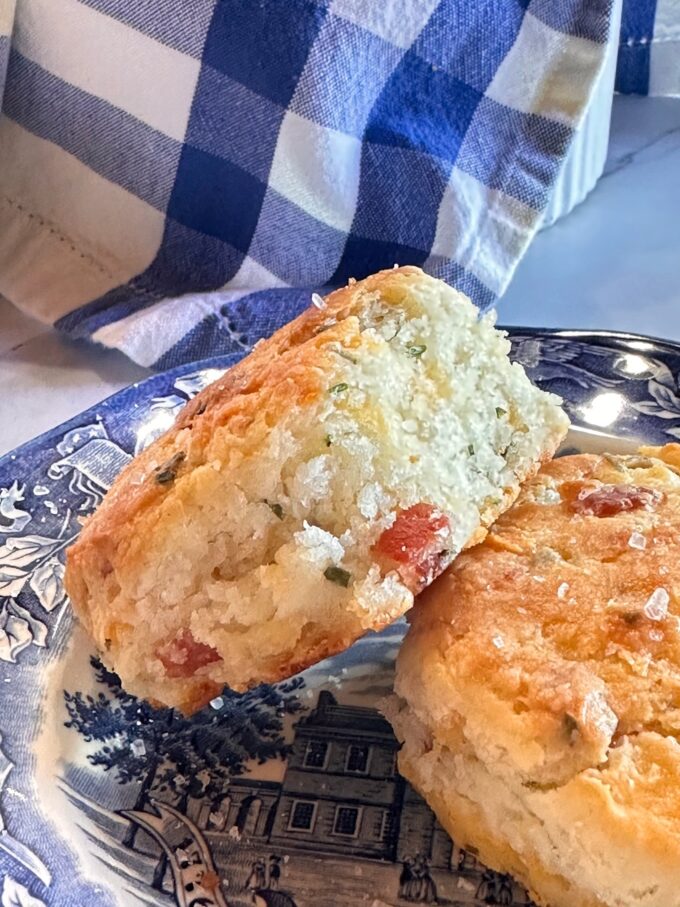
Bacon Cheddar & Chive Biscuits
These Bacon Cheddar & Chive Biscuits are delightfully soft and come together quickly. These are so delicious, easy to make, and are a perfect addition to any meal.
You won’t believe how easy it is to make these biscuits. All you do is grate some butter, add it to buttermilk, and place it in the freezer for a few minutes. Mix your dry ingredients. Add the butter and buttermilk to the dry and combine. Dump the mixture onto a floured surface and lightly knead it a few times. Then cut out your biscuits.
These biscuits are so flavorful, and the perfect side to so many meals. I serve them with my Tailgate Chili, Hearty Beef Stew, and Crockpot Beef Tips & Gravy, along with several soup recipes.
Simple Ingredients
- 1 cup full-fat buttermilk, cold
- 1/2 cup (1 stick) unsalted butter, cold
- 1/2 cup grated cheddar cheese, mild, medium or sharp
- 2 tablespoon freshly minced chives
- 1/3 cup fresh bacon bits
- 1 tablespoon flour, any kind
- 2 cups self-rising flour, spoon & leveled (plus more for work surface)
- 1 teaspoon baking powder
- 2 tablespoons melted butter
- Sea salt
How to make Bacon Cheddar Chive Biscuits
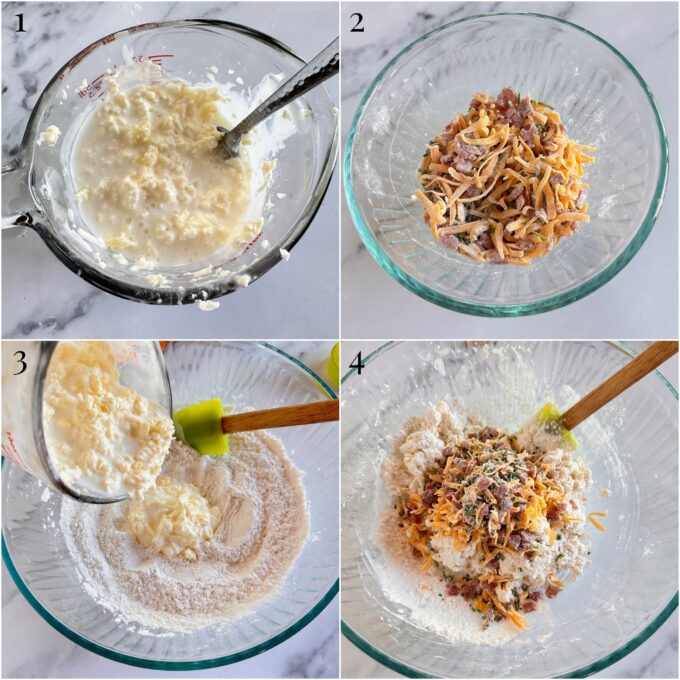

- Pour the buttermilk in a 2 cup measuring cup or medium size bowl. Grate the butter and add it to the buttermilk. Use a fork to combine the two. Place the mixture in the freezer for 10 minutes.
- In a small bowl, toss the bacon and cheddar cheese with the 1 tablespoon of flour, and place in the refrigerator until you remove the buttermilk/butter mixture from the freezer.
- In a large bowl, whisk together the flour and baking powder. Make a well in the center of the flour. Pour the cold buttermilk/butter mixture into the center. Using a spatula, gently mix the wet and dry until all of the dry ingredients are almost wet.
- Add the grated cheddar, minced chives and bacon bits.
- Using a spatula, mix all ingredients together until they’re just moist. The mixture will be shaggy.
- Transfer the dough to a floured work surface. Gently knead the dough a couple of times, adding more flour as needed if the dough is sticky.
- Using a rolling pin or your floured hand, gently roll or pat the dough into a circle or rectangle that is about 1 1/4 inches thick. Using a cookie or biscuit cutter with a sharp edge, (I used a 2 1/2 inch cutter), cut straight down and back up.
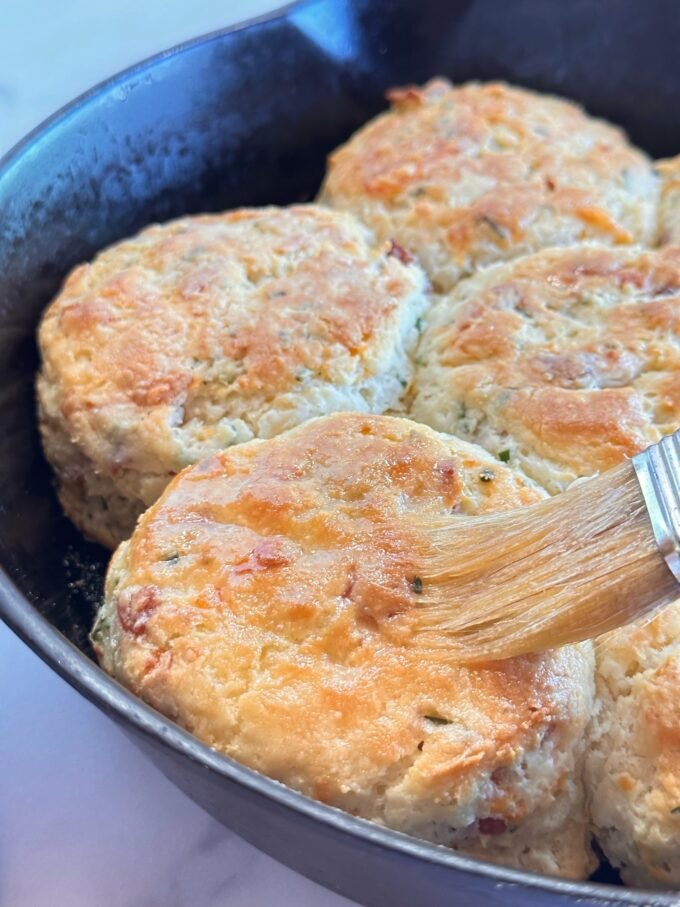
- Bake the biscuits until golden brown on top, then brush them with melted butter.
More Add-ins
You can opt to swap out some of the ingredients or add in more. Just make sure you don’t add too many. If you want these biscuits to taste like Red Lobster biscuits, feel free to add garlic powder and garlic salt. Rosemary is another good add-in. You can even swap out the cheddar cheese for your favorite cheese.
Pro tips for this recipe
- Make sure your butter and buttermilk are very cold. I place my butter in the freezer for 10 minutes. This makes grating it easier. I grate the butter, combine it with the buttermilk and place the mixture in the freezer fro at least 10 minutes while prepping the rest of my recipe. The cold pieces of butter will create air pockets when the biscuits are baked, making them more fluffy and airy.
- Don’t grease your skillet or pan with butter. Using butter will cause the bottoms of the biscuits brown too much before the rest of the biscuits are done. I’ve seen too many bakers make beautiful biscuits with burnt bottoms. I use solid Crisco, or you can use canola or vegetable oil, or spray your pan…my least favorite.
- Make sure your self-rising flour and baking powder are both fresh. These are the two ingredients that make you biscuits rise.
- Don’t overwork the biscuit dough. This will result in tough biscuits. We want soft fluffy biscuits.
- Shred your own cheese from a block. Packaged shredded cheese has a wax coating on it. Block cheese melts more smoothly and is creamier.
- Make sure your oven is preheated ahead of time. As soon as you cut the biscuits, they need to go right into the oven before the butter and buttermilk have time to get warm.
- Don’t twist your biscuit cutter. This seals the edges of the dough and keeps the biscuits from rising. Always push straight down and back up. If for some reason, the dough stick to the cutter, use your fingers to gently remove it.
Frequently asked questions
Can I make the biscuits dough ahead of time?
I don’t recommend. You’re better off baking the biscuits ahead of time and reheating them. Once the self rising flour and baking powder get mixed with the buttermilk, the baking powder becomes activated. If you refrigerate the wet dough, the leavener (baking powder) will become weakened, and the biscuits won’t rise as much when baked.
How do I reheat the baked biscuits?
You can reheat the biscuits in the microwave. Make sure to wrap each one in a dampened paper towel, to prevent them from being rubbery and dry. You can also place them covered in a 300 degree oven to warm them. Keep an eye on them. As soon as they’re warm, remove them from the oven.
Can I freeze the baked biscuits?
Yes. Make sure to layer them in waxed paper and place in an airtight container or a freezer bag. Freeze for up to 2 months. Thaw overnight in the refrigerator.
Can I use all-purpose flour in this recipe?
Yes. If you want to use all-purpose flour, add 2 teaspoons of baking powder, 1/2 teaspoon of baking soda, and 3/4 teaspoon of salt.
More yummy biscuits…
Big Fluffy Buttermilk Biscuits
Soft & Fluffy Cream Cheese Biscuits
Buttermilk Butter Dip Biscuits
If you make this recipe please rate it, and leave a comment below on how it turned out. I love hearing from you!
Wanna see different recipes each day? Feel free to follow me on Facebook, Pinterest and Instagram.
Print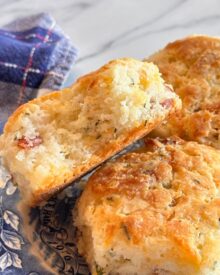
Bacon Cheddar & Chive Biscuits
- Prep Time: 15 minutes
- Cook Time: 20 minutes
- Total Time: 35 minutes
- Yield: 6–7 biscuits 1x
- Category: Bread/Sides
- Method: Bake
- Cuisine: American
Ingredients
- 1 cup full-fat buttermilk, cold
- 1/2 cup (1 stick) unsalted butter, cold
- 1/2 cup grated cheddar cheese, mild, medium or sharp
- 2 tablespoon freshly minced chives
- 1/3 cup fresh bacon bits
- 1 tablespoon flour, any kind
- 2 cups self-rising flour, spoon & leveled (plus more for work surface)
- 1 teaspoon baking powder
- 2 tablespoons melted butter
- Sea salt
Instructions
- Pour the buttermilk in a 2 cup measuring cup or medium size bowl. Grate the butter and add it to the buttermilk. Use a fork to combine the two. Place the mixture in the freezer for 10 minutes.
- Meantime, preheat an oven to 475 degrees. Grease an iron skillet or round cake pan and set aside.
- In a small bowl, mix together the grated cheddar cheese, chives, and bacon bits, and toss them with the tablespoon of flour, coating all of them. Place in the refrigerator while you mix the biscuit dough.
- In a large bowl, whisk together the flour and baking powder. Make a well in the center of the flour. Pour the cold buttermilk/butter mixture into the center. Using a spatula, gently mix the wet and dry until all of the dry ingredients are almost wet. Add the grated cheddar, minced chives and bacon bits. Mix with a spatula until all dry ingredients are wet. The mixture should look shaggy.
- Transfer the dough to a well floured work surface. Gently knead the dough a couple of times, adding more flour as needed if the dough is sticky. Using a rolling pin or your floured hand, gently roll or pat the dough into a circle or rectangle that is about 1 1/4 inches thick. Using a cookie or biscuit cutter with a sharp edge, (I used a 2 1/2 inch cutter), cut straight down through the dough and back up. Do not twist the cutter. This seals the edges of the dough and keeps the biscuits from rising.
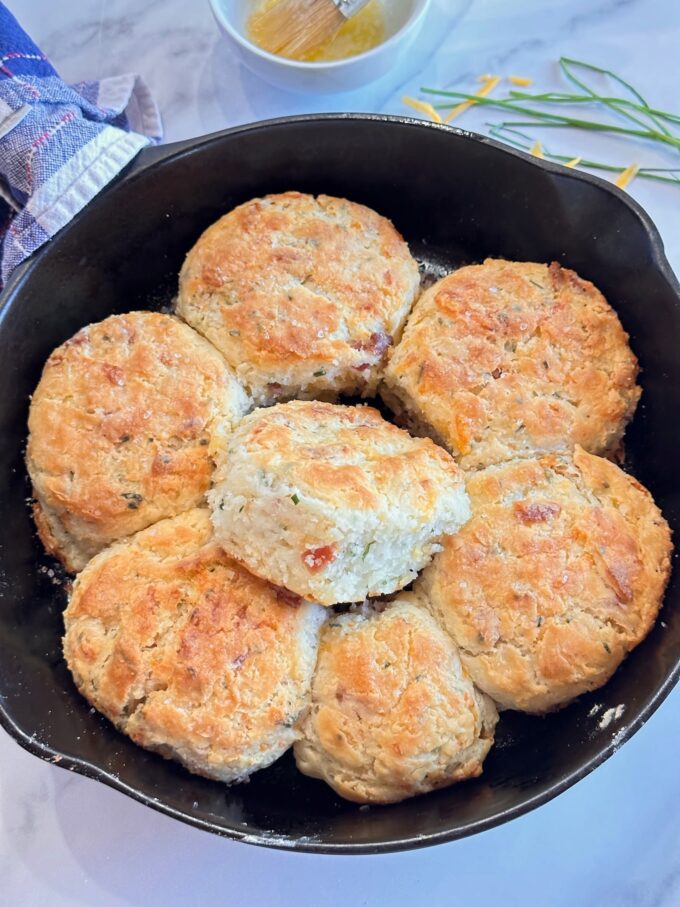
- Place the biscuits, sides touching in the iron skillet or cake pan. If you use a 2 1/4 inch cutter, you should get 7 biscuits. I used a 2 1/2 inch cutter and got 6 biscuits plus one tiny one. My two little dogs didn’t mind sharing that one.
- Bake on a middle or lower oven rack until the biscuits are golden brown on top, about 22 to 25 minutes. Ovens vary, so keep an eye on them.
- Remove them from the oven and brush with the melted butter. Sprinkle with sea salt. Serve immediately while hot.
Notes
- These biscuits will stay fresh for up to 2 days if covered. Wrap them individually in a paper towel and microwave for a few seconds. You can also cover them with foil and warm in a 300 degree oven.
- If you want to use all-purpose flour instead of self-rising, add 2 teaspoons of baking powder, 1/2 teaspoon of baking soda, and 3/4 teaspoon of salt.