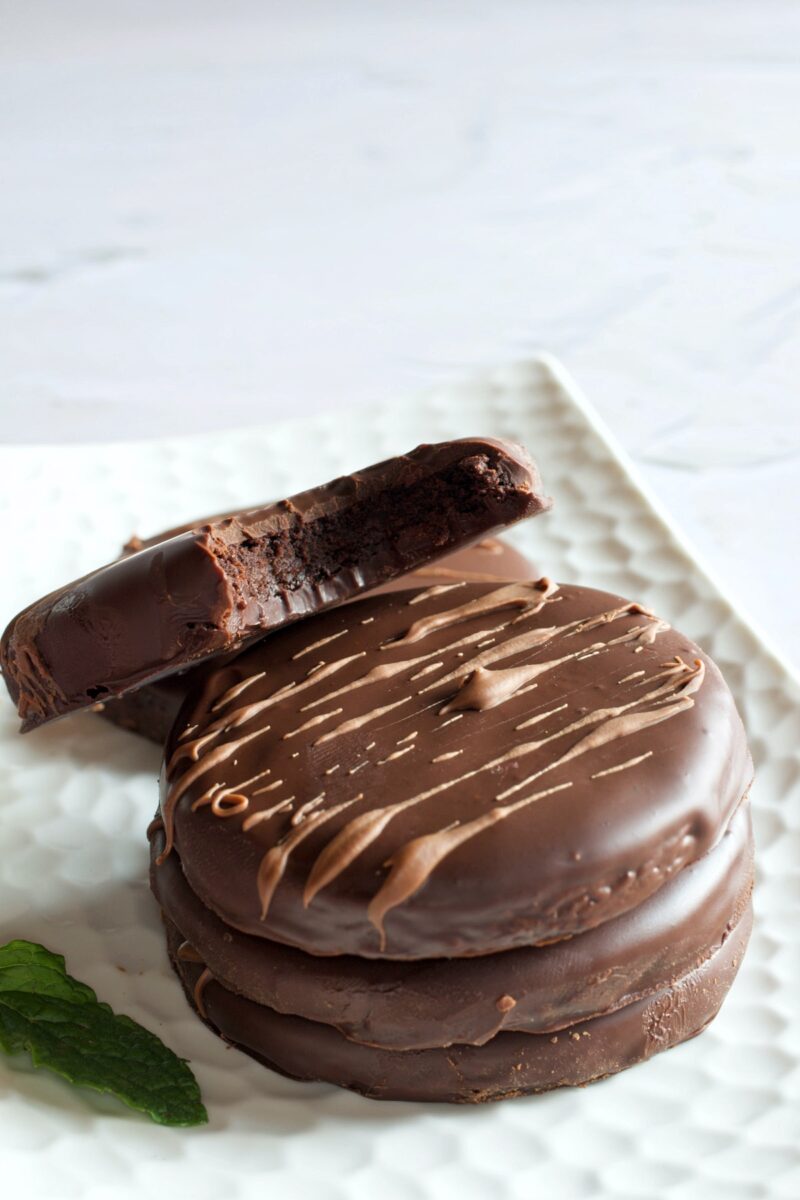
Homemade Thin Mint Cookies
These Homemade Thin Mint Cookies are an easy recipe made with dark Dutch cocoa, peppermint extract, and melted dark chocolate. If you love those famous Girl Scout Thin Mints, you’ll love these, and you can eat these cookies fresh any time of year!

Okay, I’m going to admit something here. I am not a fan of peppermint and chocolate. I know!! I love all kinds of sweets, with few exceptions, but this combo is one of those exceptions. Now you’re probably wondering why I bothered making them. Well, it might have to do with the fact that my husband Don loves them and he doesn’t like the thought of having to freeze them until he’s ready to eat them. He’s a little bit spoiled and likes his cookies fresh out of the oven.
COOKIE INGREDIENTS
- 1 1/2 cups all-purpose flour, spoon & leveled
- 1 teaspoon baking powder
- 1/4 teaspoon salt
- 3/4 cup dutch process cocoa*
- 1 1/2 sticks unsalted butter
- 1 cup granulated sugar
- 1 large egg, room temperature
- 1/2 teaspoon pure vanilla extract
- 1/4 teaspoon pure peppermint extract or oil**
- 12 ounces good-quality semisweet or bittersweet chocolate, such as Ghirardelli
- 1/2 teaspoon canola or vegetable oil
- 1/2 teaspoon pure peppermint extract or oil (don’t use mint extract)
INSTRUCTIONS FOR MAKING THESE COOKIES
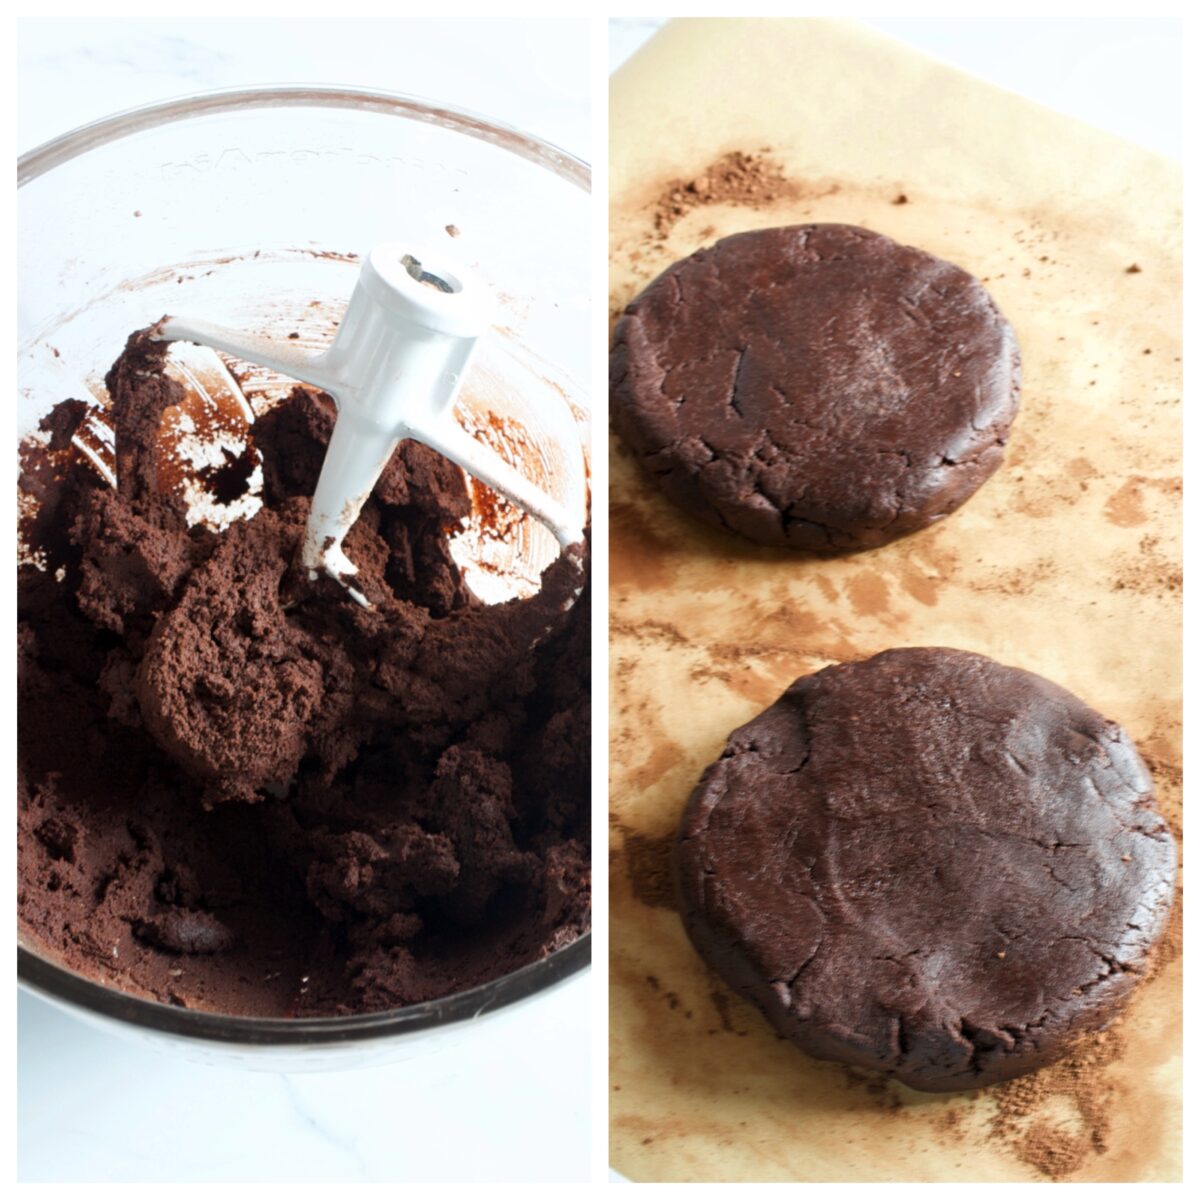
- Mix the dough. This takes less than 15 minutes.
- Divide the dough in half and form it into two discs. Refrigerate for a couple of hours.
- Roll out and cut into circles and bake.
- Melt some chocolate, dip the cookies in the chocolate and allow the chocolate to set up.
- Eat!!!
WHY SHOULD I USE DUTCH-PROCESS COCOA IN THIS RECIPE?
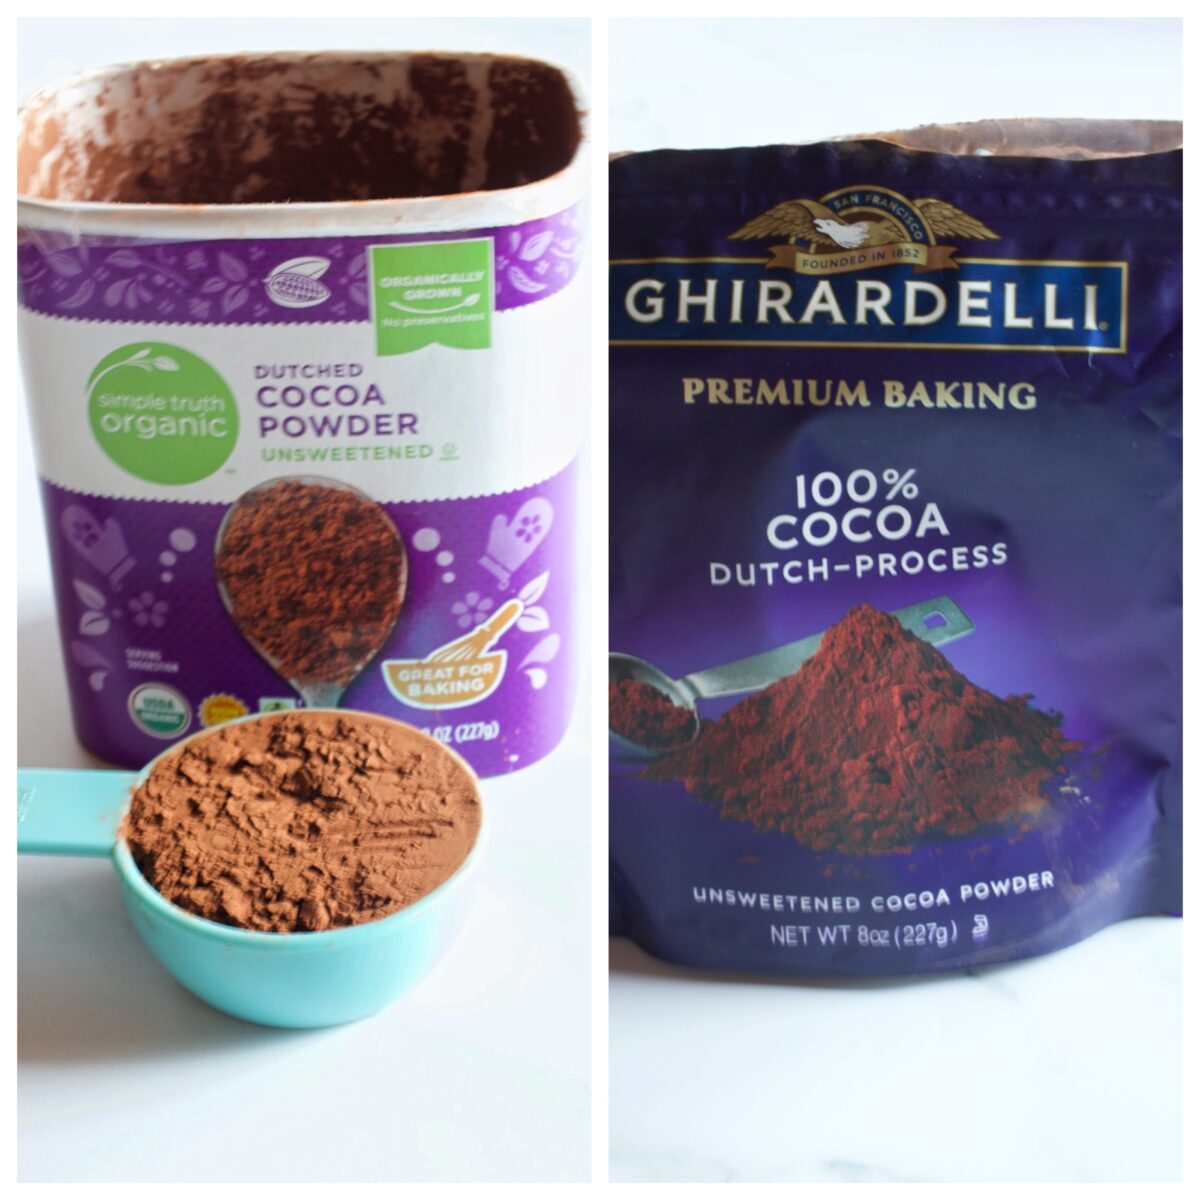
Anytime a recipe calls for baking powder in a recipe, you should use Dutch process cocoa. By the way…you can find Dutch process cocoa at most of your local grocery stores.
Why?
Well, I’m not going to dive deep into the science of baking here, so I will give a simplified version of the differences and why you should use Dutch cocoa versus Natural cocoa in this recipe.
Dutch-Process Cocoa is alkaline. It’s had its acid neutralized. It’s darker in color and has a smoother flavor then natural cocoa. Anytime you’re making a recipe with baking powder, you should use Dutch-process cocoa. You see, baking powder is actually baking soda that has had acid added to it. Since the baking powder already has acidic properties, it doesn’t need to be combined with something else acidic like natural cocoa. Therefore, we use Dutch cocoa which is alkaline. Summed up…use baking powder & Dutch-process cocoa together!
Natural or unsweetened cocoa is acidic. It’s not as dark as Dutch cocoa and its flavor isn’t as smooth, due to its acidic properties. Anytime you use baking soda in a recipe, you should use natural cocoa instead of Dutch-process cocoa because baking soda is an alkaline base. It needs acid to make it work. The acid in the natural cocoa will activate the baking soda to make it leaven your baked goods. Summed up…use baking soda & natural cocoa together!
Can I substitute Natural Cocoa for Dutch Processed in this recipe?
Yes! However, if you simply substitute natural for dutch, the result will be a subtle tanginess or slight bitter flavor. The natural cocoa is acidic and so is the baking powder. The acid probably won’t be fully neutralized by the remaining ingredients in the recipe. If you do substitute natural cocoa in this recipe, omit the baking powder and use 1/2 teaspoon of baking soda.
Chocolate Coating Ingredients
- 12 ounces good quality semi-sweet or bittersweet chocolate, such as Ghirardelli
- 1/2 teaspoon canola or vegetable oil
- 1/2 teaspoon pure peppermint extract or oil (don’t use mint extract)
INSTRUCTIONS
- Add the chocolate and oil to a small deep bowl. Microwave for 30 seconds. Stir and microwave for 20 more seconds. Stir until chocolate melts. It it’s still not totally melted, microwave for 20 more seconds. Add the peppermint flavoring and mix well.
- Dip each cookie in the chocolate, using a fork to lift them out of the chocolate. Gently tap the fork on the edge of the bowl and then scrape it over the edge to remove the excess chocolate from the bottom of the cookie. Transfer the cookies to parchment lined cookie sheets. Refrigerate for 10 minutes until the chocolate is set. If you want, you can melt some milk chocolate and drizzle over the tops with a fork. This is optional.

Pro tips for this recipe
- Don’t add extra cocoa: Cocoa is a dry ingredient. If you’re a chocoholic, you might be tempted to keep adding more cocoa to a recipe but don’t do it, unless you’re able to compensate somewhere else. If you increase the cocoa, consider reducing the flour by the same amount, or increasing the liquid in your recipe.
- Don’t wrap the cookie dough in parchment paper: When you refrigerate the dough, especially for more than an hour or two, do not wrap the dough in parchment paper. Use plastic wrap. Parchment paper will absorb the butter from the dough, thus stealing the moisture from the dough.
Check out this interesting article from Cook’s Illustrated, about expired cocoa. Should you pitch that expired cocoa? You’ll be surprised!
If you like these Homemade Thin Mint Cookies, you should check out these other chocolate recipes…
Chocolate Caramel Whipped Cream Pie
If you make this recipe, please rate it and leave a comment below on how you liked it. I love getting your feedback! 🙂
Wanna see different recipes each day? Feel free to follow me on Facebook, Pinterest, & Instagram.
Print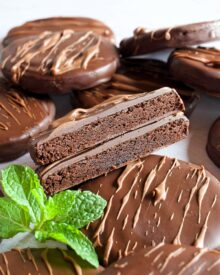
Homemade Thin Mint Cookies
- Prep Time: 1 hour 30 minutes
- Cook Time: 10 minutes
- Total Time: 1 hour 40 minutes
- Yield: 30 2-inch cookies 1x
- Category: cookies
- Method: Bake
- Cuisine: American
Description
These Homemade Thin Mint Cookies are an easy recipe made with dark Dutch cocoa, peppermint extract, and melted dark chocolate. If you love those famous Girl Scout Thin Mints, you’ll love these, and you can eat these any time of year!
Ingredients
- 1 1/2 cups all-purpose flour, spoon & leveled
- 1 teaspoon baking powder
- 1/4 teaspoon salt
- 3/4 cup dutch process cocoa*
- 1 1/2 sticks (3/4 cup) unsalted butter
- 1 cup granulated sugar
- 1 large egg, room temperature
- 1/2 teaspoon pure vanilla extract
- 1/4 teaspoon pure peppermint extract or oil**
- 12 ounces good quality semi-sweet or bittersweet chocolate, such as Ghirardelli
- 1/2 teaspoon canola or vegetable oil
- 1/2 teaspoon pure peppermint extract or oil (don’t use mint extract)
Instructions
COOKIES
- In a medium bowl, whisk together the flour, baking powder, salt, and cocoa. Set aside.
- Add the butter to a large mixing bowl of a stand mixer, or use a hand mixer. Mix on high speed until the butter is light and creamy, about 1 minute. Add the sugar and mix on medium-high speed until the mixture is fluffy and light, about 1 more minute. Add the egg, vanilla, and peppermint extract or oil. Mix on high speed for a few seconds. Stop and scrape down the sides of the bowl. Add the dry ingredients and mix on medium speed, just until they are incorporated. Do not overmix!
- Transfer the dough to a piece of parchment paper that’s lightly dusted with cocoa. Divide the dough in half. Form each half into a disc. Wrap each disc in a piece of plastic wrap. Do not refrigerate the dough wrapped in parchment paper if refrigerating overnight. The parchment paper will absorb a lot of the butter from your cookie dough. Refrigerate for 1 hour. If you refrigerate the dough overnight, remove it from the refrigerator for about 1 hour before trying to roll it out.
- Preheat oven to 350 degrees.
- Remove the chilled dough from the refrigerator. Lightly dust a work surface or piece of parchment paper with cocoa powder. (Do not use flour). Before you roll the dough out, pat it out somewhat with your hand, especially if it’s still slightly chilled. Roll the dough out to a scant 1/4″ in thickness. Using a 2-inch round cookie cutter, cut out circles of dough and transfer them to ungreased cookie sheets, spacing at least 1-inch apart. Re-roll the remaining dough and cut it into cookie rounds. Leave the second disc of dough in the refrigerator until the first cookies are baked and the cookie sheets are cooled.
- Bake the cookies for approximately 8 to 10 minutes until the cookies are set around the edges. The cookies will be soft in the centers. Allow the cookies to cool on the cookie sheets for at least 3 minutes and transfer them to a wire cooling rack to cool completely before dipping them in chocolate.
CHOCOLATE COATING
- Add the chocolate and oil to a small deep bowl. Microwave for 30 seconds. Stir and microwave for 20 more seconds. Stir until chocolate melts. It it’s still not totally melted, microwave for 20 more seconds. Add the peppermint flavoring and mix well.
- Dip each cookie in the chocolate, using a fork to lift them out of the chocolate. Gently tap the fork on the edge of the bowl and then scrape it over the edge to remove the excess chocolate from the bottom of the cookie. Transfer the cookies to parchment lined cookie sheets. Refrigerate for 10 minutes until the chocolate is set. If you want, you can melt some milk chocolate and drizzle over the tops with a fork. This is optional.
- Place cookies in an airtight container and refrigerate for up to 1 week. Cookies can be left at room temperature for up to 3 days, but they taste best, in my opinion, if refrigerated.
Notes
- * The best cocoa to use in this recipe is Dutch cocoa. You can find it at most grocery stores such as Kroger. If you don’t have Dutch cocoa, use natural cocoa. However, the acidity in the natural cocoa will slightly change the pre-existing balance in the baking powder. If you must use natural cocoa in this recipe, omit the 1 teaspoon of baking powder and substitute 1/2 teaspoon of baking soda.
- ** Make sure you use only 1/4 teaspoon of pure peppermint extract or oil in the cookie part of this recipe. Both of these are very potent. A little goes a long way. In this recipe, there is an additional 1/2 teaspoon of peppermint extract in the chocolate coating, which is a total of 3/4 teaspoon which is plenty. Do not use mint extract. It is different than peppermint and taste more like spearmint.
- These cookies can be frozen for up to 3 months. Make sure they’re in a freezer safe container. They are actually very good right out of the freezer.
- Do not refrigerate the cookie dough, wrapped in parchment paper, if refrigerating overnight. Parchment paper will absorb a lot of the butter from the cookie dough.
love the chocolate & mint, much better than those old GS Cookies – lol !!!
Excited to try these. They look amazing and pretty easy. I didn’t know the difference between baking soda and baking powder. Thanks for explaining.