Speckled Easter Cake
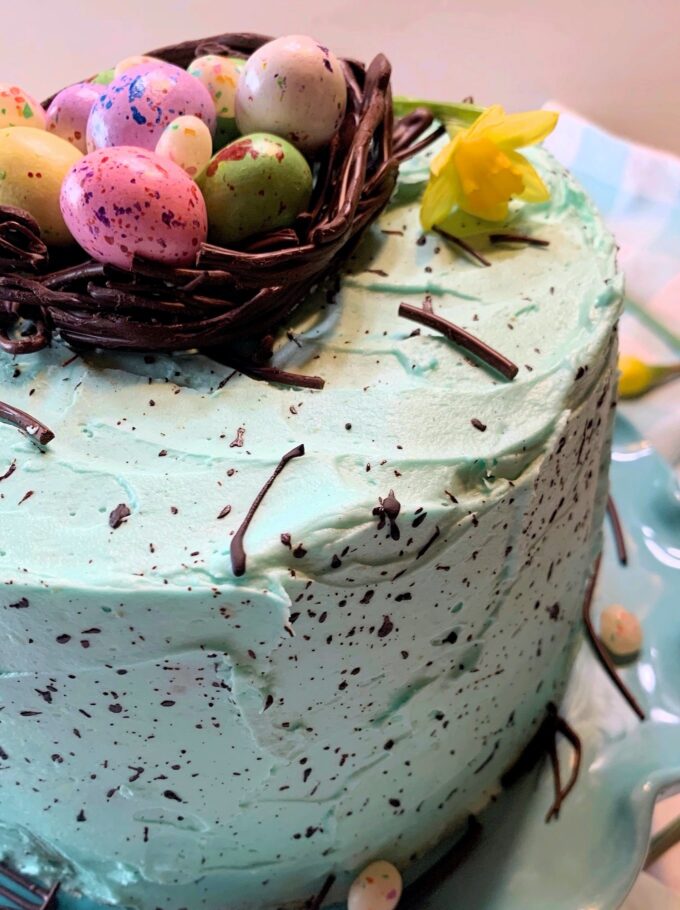
This Speckled Easter Cake is the perfect showstopper for Easter! It starts with moist vanilla cake layers and it’s frosted with a robin egg blue buttercream. Don’t let it intimidate you either. The chocolate nest on top and chocolate flecks are super easy! Your guests will think you worked for hours on this cake. Be prepared to impress!
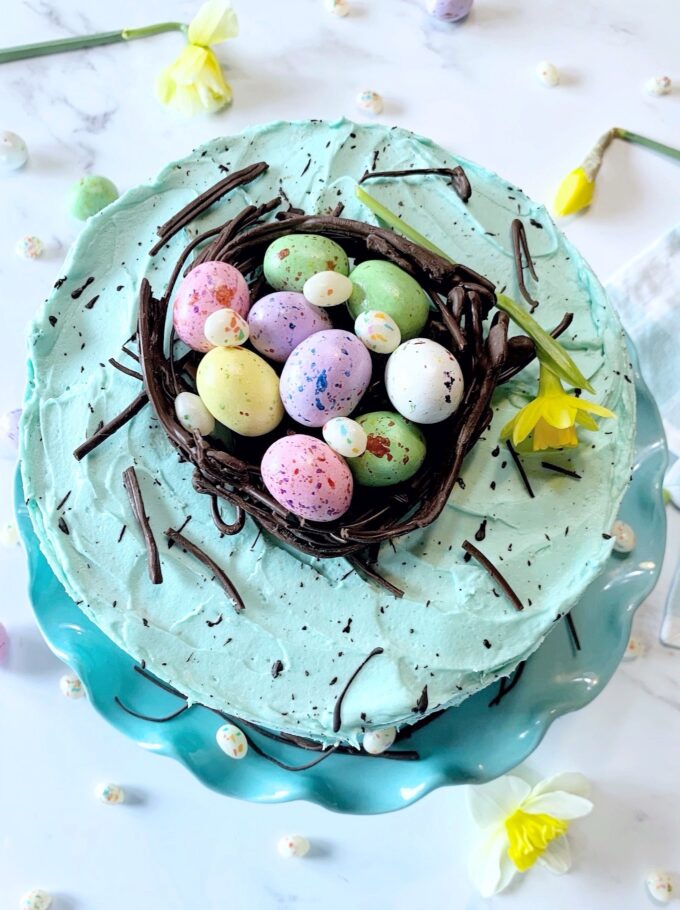
I couldn’t think of a cuter idea for Easter than to make this Speckled Easter Cake. The chocolate nest on top is so easy and holds candy eggs and the chocolate flecks are made simply by mixing cocoa powder and vanilla together. How easy!
TIPS FOR MAKING A PERFECT SPECKLED EASTER CAKE
THE DON’TS
- Don’t overmix the batter. Overmixing equals tough cake. When you add the dry ingredients, mix only until they are just incorporated, no longer.
- Don’t over-measure the flour. Too much flour equals dry cake. If you don’t have a kitchen scale to weigh the flour, aerate your container of flour with a whisk or fork before measuring it. Measure the flour by spooning it into your measuring cup and leveling it off with a knife, (spoon & level). Flour gets compacted as it sets in a bag or container. Don’t simply scoop up a cupful of flour.
- Don’t overbake the cake layers. When a toothpick test comes out with slightly moist crumbs, the cake layers are done.
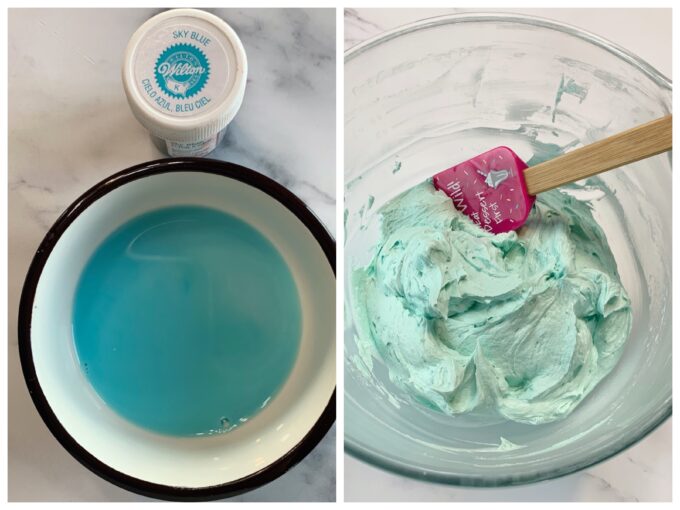
HOW TO MAKE ROBIN EGG BLUE FROSTING
- Use a bluish/teal/turquoise gel food coloring. I used Wilton Sky Blue here.
- If you’re leary of what the color will look like once you add it to the frosting do this. Add a little bit on a knife tip or toothpick to a couple of tablespoons of the cream you’re going to use in the frosting and mix it well. Mix it and add more if needed, until it becomes the same color as the color on the lid of good coloring. This should be a couple of shades darker than the robin’s egg blue that you want to achieve. Add this to your bowl of frosting. Once it’s mixed, it should be the perfect shade.
- This frosting is off-white because it contains butter. This helps in resulting in a robin’s egg blue color. Depending on the brand of butter you use, your frosting might look more white. If your color isn’t quite where you want it to be, try adding a drop of green to the blue food coloring.
HOW TO MAKE A CHOCOLATE NEST
Making the chocolate nest is super easy. Simply follow these easy steps…
- A day in advance: Fill a cookie sheet with about 1/8-inch of water and place it level in a freezer. Allow it to freeze overnight.
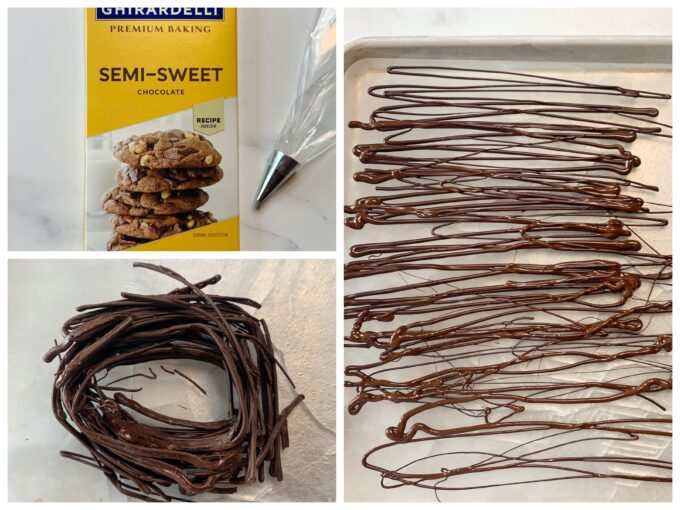
- Break up the chocolate bar and place it in a small microwave-safe bowl or measuring cup. Melt the chocolate for 30 seconds. Stop and stir the chocolate. Microwave for about 20 seconds and stir the chocolate again. It should be melted. If it isn’t microwave for 10 seconds and stir again.
- Allow the chocolate to cool for about 5 minutes. Transfer the chocolate to a piping bag fitted with a small round tip.
- Remove the cookie sheet from the freezer after you’ve filled the piping bag and are all set to make the chocolate next. Don’t remove it before this. The ice will begin to melt rather quickly, and you want solid ice, no water.
- Place the cookie sheet of frozen ice on a counter. Pick up the piping bag of chocolate and quickly start piping the chocolate from left to right onto the frozen ice. Immediately use both hands and form the long strips into a circle. See the pictures above this recipe. Using a metal spatula, gently transfer the chocolate next to a piece of foil, wax, or parchment paper. Place it in the fridge for about 5 minutes to finish setting up.
- Place the next on the top center of the cake. Use any small broken pieces of chocolate to scatter over the top of the cake.
- Fill the nest will malted egg candy.
CHOCOLATE FLECKS
To make the chocolate flecks…
- In a small bowl, add the unsweetened cocoa powder and enough vanilla to make a thin mixture.
- Dip the ends of a small clean brush with rather firm bristles into the chocolate. Use the tips of your fingers to flick chocolate onto the cake. You can practice first if you’d like on a piece of wax or parchment paper. Simply tape a piece to the front of a cabinet. Practice seeing how far from the cake you should hold the brush. Once you’ve practiced, flick the chocolate onto the sides and top of the cake. Place the cake in the refrigerator for a few minutes to set the chocolate flecks.
More recipes you might like at Easter…
No-Cook Perfect Banana Pudding
If you make this recipe please rate it, and leave a comment below on how you liked it. I love hearing from you!
Wanna see different recipes each day? Feel free to follow me on Facebook, Pinterest & Instagram!
Print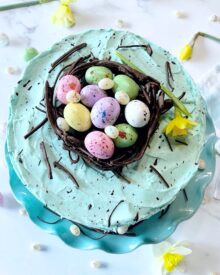
Speckled Easter Cake
- Prep Time: 1 hour
- Cook Time: 30 minutes
- Total Time: 1 hour 30 minutes
- Yield: 1 3-layer 8-inch cake 1x
- Category: Cake
- Method: Bake
- Cuisine: American
Description
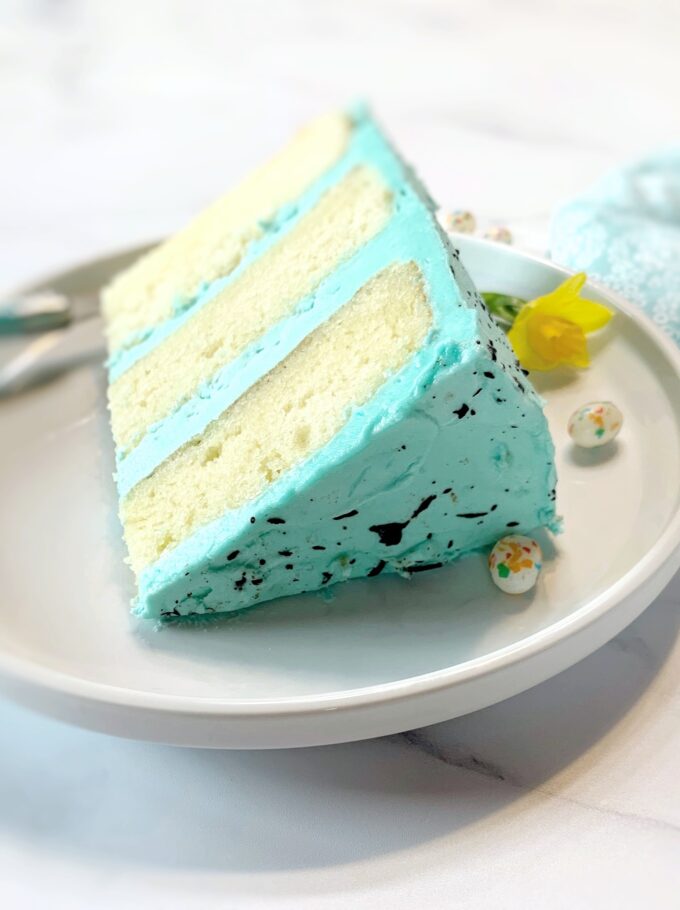
This cake starts with three layers of moist vanilla cake, and it’s frosted with a creamy buttercream frosting. It’s finished with a chocolate nest and chocolate flecks, making it the perfect Easter cake.
Ingredients
CAKE
- 3 1/3 cups all-purpose flour
- 1 tablespoon baking powder
- 1/2 teaspoon baking soda
- 1/2 teaspoon salt
- 1 stick (1/2 cup) unsalted butter, room temperature
- 2 cups granulated sugar
- 1/2 cup canola or vegetable oil
- 4 large eggs, room temperature
- 1 tablespoon pure vanilla extract
- 1 cup sour cream
- 1 cup milk
FROSTING
- 4 sticks of unsalted butter, room temperature
- 7 cups powdered sugar, sifted
- 3 tablespoons heavy whipping cream
- 1 tablespoon pure vanilla extract
- 1/4 teaspoon salt
- Food coloring (see notes above recipe)
CHOCOLATE NEST (I suggest making this in advance)
- 1 4–ounce good quality chocolate baking bar, such as Ghirardelli
CHOCOLATE FLECKS
- 1 tablespoon unsweetened cocoa powder
- Enough vanilla to make a thin slurry, about 4 teaspoons
Instructions
CAKE
- Preheat oven to 350 degrees. Line three 8-inch cake pans with rounds of wax or parchment paper. Butter the paper and the insides of the pans, then lightly flour each pan. Set aside.
- Sift together the flour, baking powder, baking soda, and salt in a large bowl.
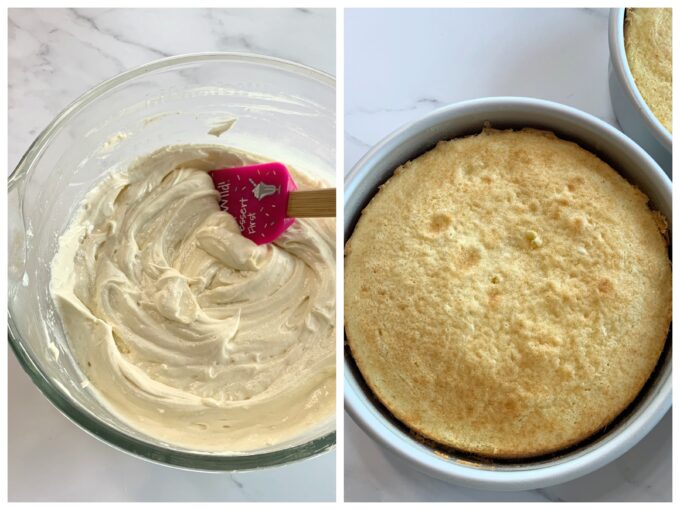
- Add the butter to the bowl of a stand mixer, fitted with the paddle attachment,(or use a hand mixer). Beat the butter on high speed until it’s very light and creamy, about 3 minutes. Add the sugar and continue beating until the butter/sugar mixture becomes light and creamy again. Add the oil and mix again for about 1 minute. Stop and scrape down the sides of the bowl. Add the eggs, one at a time on medium speed, mixing well after each addition. Add the vanilla, and sour cream and mix in. Add the milk, followed by the dry ingredients, mixing just long enough to incorporate the dry ingredients. Do not overmix.
- Divide the batter equally between the cake pans. Shake the pans back and forth to level out the batter, then tap them a couple of times on a counter, to get rid of any air pockets. If you have a kitchen scale, weigh the pans to make sure you have the same amount of batter in each pan.
- Bake for about 25 to 30 minutes until a toothpick inserted in the center comes out clean or the centers are springy to the touch. Allow the cakes to cool for 5 minutes. Run a knife around the edges and invert tham to a wire rack. Peel off the wax or parchment paper and allow them to cool completely.
FROSTING
- Add the butter to the mixing bowl of a stand mixer (or use a hand mixer). Beat the butter until it’s very light and creamy. Add the powdered sugar one cup at a time on medium-low speed, until it’s all incorporated. Add the whipping cream, vanilla, and salt and beat on medium-high speed until the mixture is very creamy and smooth. The frosting should be a perfect spreading consistency. If it’s a little too thick, add a tiny bit more cream, one teaspoon at a time. If it’s too thin, add a little more sugar.
- Add in the blue food coloring until you get a robins egg blue color. See my notes above this recipe for food coloring tips.
- Frost the sides and top of the cake with the frosting, using an offset spatula to frost the cake. Set the cake aside while you make the chocolate next and the chocolate fleck mixture.
CHOCOLATE NEST (I suggest making the chocolate nest in advance)
- A day in advance: Fill a cookie sheet with about 1/8-inch of water and place it evenly in a freezer. Allow it to freeze overnight.
- Break up the chocolate bar and place it in a small microwave-safe bowl or measuring cup. Melt the chocolate for 30 seconds. Stop and stir the chocolate. Microwave for about 20 seconds and stir the chocolate again. It should be melted. If it isn’t microwave for 10 seconds and stir again.
- Allow the chocolate to cool for about 5 minutes. Transfer the chocolate to a piping bag fitted with a small round tip.
- Remove the cookie sheet from the freezer after you’ve filled the piping bag and are all set to make the chocolate next. Don’t remove it before this. The ice will begin to melt rather quickly, and you want solid ice, no water.
- Place the cookie sheet of frozen ice on a counter. Pick up the piping bag of chocolate and quickly start piping the chocolate from left to right onto the frozen ice. Immediately use both hands and form the long strips into a circle. See pictures above this recipe. Using a metal spatula, gently transfer the chocolate next to a piece of foil, wax or parchment paper. Place it in the fridge for about 5 minutes to finish setting up.
- Place the next on the top center of the cake. Use any small broken pieces of chocolate to scatter over the top of the cake.
- Fill the nest will malted egg candy.
CHOCOLATE FLECKS
- In a small bowl, add the unsweetened cocoa powder and enough vanilla to make a thin mixture.
- Dip the ends of a small clean brush with rather firm bristles into the chocolate. Use the tips of your fingers to flick chocolate onto the cake. You can practice first if you’d like on a piece of wax or parchment paper. Simply tape a piece to the front of a cabinet. Practice seeing how far from the cake you shuld hold the brush. Once you’ve practiced, flick the chocolate onto the sides and top of the cake. Place the cake in the refrigerator for a few minutes to set the chocolate flecks.
- Store cake in an airtight container for up to 4 days.
Notes
- This frosting is enough to decorate one 9-inch 2-layer cake, one 8-inch 3 layer cake, or 24 cupcakes.
- Freezing the cake: The frosted cake can be frozen for up to 3 months. Thaw overnight in the refrigerator and bring to room temperature before decorating or serving.