No-Knead Rustic Artisan Bread
Published: March 20, 2018 · Updated: December 31, 2025 by Cindy Gibbs
Let your dutch oven do all the work with this easy & delicious No-Knead Rustic Artisan Bread!! It’s crusty on the outside, soft and chewy on the inside, and made with three simple ingredients.

Do you ever find yourself wishing you had a fresh loaf of chewy artisan bread that tasted like it was straight from a high end bakery? A chewy bread to dunk into your hot bowl of soup? You’re gonna love this easy recipe that you can make at home!
Besides sweets, hot bread is my big weakness. This past weekend I was in the mood for some hot soup and hot rustic bread so I made a deal with my sister Nancy. She brought over the hot homemade soup, and watched me make this no knead rustic artisan bread. She couldn’t get over how easy it was to make.
The Fermenting
Artisan Bread requires several hours of fermenting versus leavening in order for it to rise. The longer the fermentation, the better the flavor. Artisan bread is usually made in small batches and because it doesn’t get kneaded, the dough looks a little shaggy. When the bread finishes baking, it has a rough rustic appearance.
How To Make
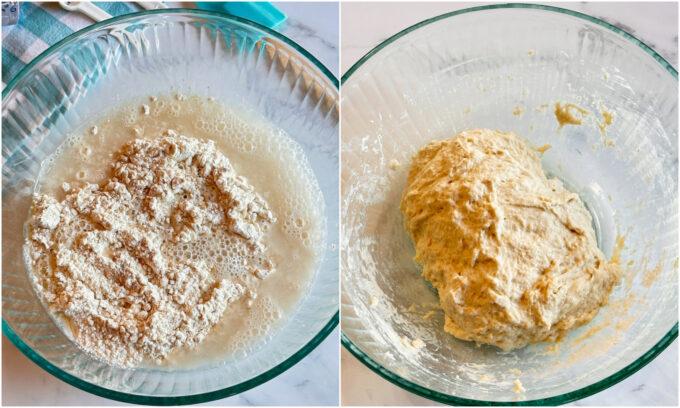
Whisk together the flour, salt and yeast in a large mixing bowl. Add water and stir mixture with a wooden spoon until the mixture forms a sticky ball. This dough does not get kneaded so it will be rough, not smooth looking.
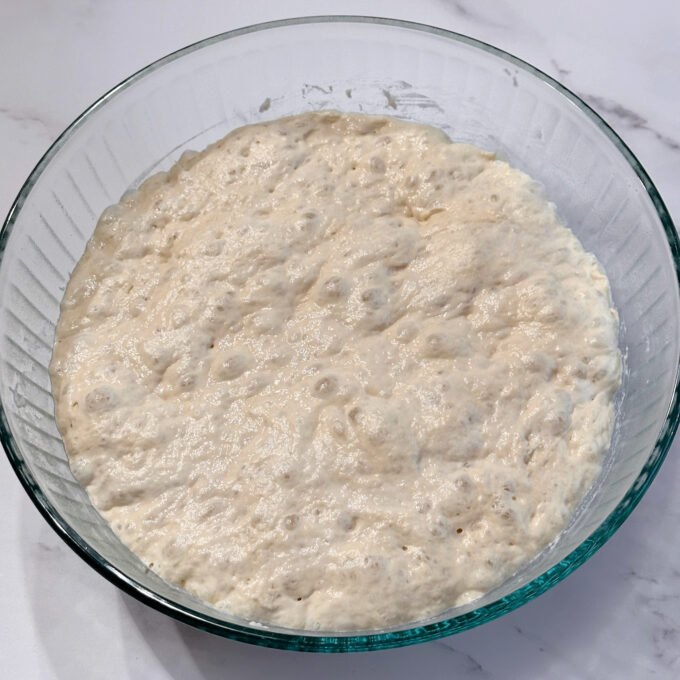
Cover bowl with plastic wrap and allow bowl to set at room temperature for 12 to 15 hours to ferment and rise. The longer it ferments, the more flavor the bread will have.

The following day, dump the sticky dough onto a well-floured surface, and using floured hands, form it into a round ball, but don’t knead it. Dust the top with a little flour. The ball will flatten into more of a disc shape, but don’t worry about it. Allow the dough ball to rest while you heat a dutch oven with the lid in a 450 degree oven. You can go ahead and place the dutch oven in the oven as it’s preheating. The dutch oven needs about 30 minutes to get hot enough.

Once the bread is ready to bake, use a bread lame to cut a couple slits in the top. If you don’t have a bread lame, use a thin sharp knife or razor blade. You can cut some fancy designs in the top or just a couple of slits like I did here. However, you do need at least a couple of cuts. The cuts in the dough help to enhance the rise and also the texture.
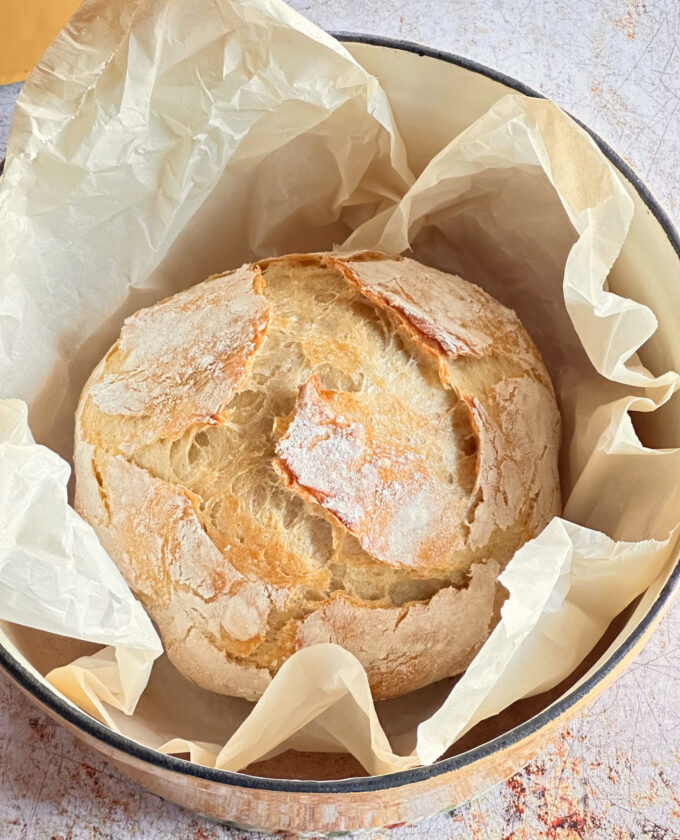
Remove the dutch oven from the oven. Be careful, it will be extremely hot. Line the dutch oven with a piece of parchment paper, and transfer the dough to the hot dutch oven. Place the lid on the dutch oven, and bake the bread for 30 minutes, remove the lid and bake for an additional 15 minutes, or until the bread is a nice golden brown on top.
Pro Tips For This Recipe
- Make sure your dutch oven is preheated and very hot. The hot dutch oven is what helps to form the crispy crust on the outside of the bread.
- Don’t be tempted to turn your oven higher than 450 degrees, or the parchment paper might catch on fire.
- Don’t knead the bread dough. It will be very sticky and wet. Simply sprinkle flour as needed on the sticky dough, flour your hands, and form it into a round disc. No kneading is needed.
- Check your yeast to make sure it’s not expired. If it’s expired your dough will not rise.
Frequently Asked Questions
Can I allow the bread dough to rise in the refrigerator?
Yes, you can leave it in the fridge for up to 3 days. If you refrigerate the dough, allow it to sit in a warm environment for about 1 hour before baking. Cold dough doesn’t rise very well.
How long can I leave the dough to rise on my kitchen counter?
I don’t recommend leaving the dough to rise for more than 18 hours.
What size dutch oven should I use?
I used a 3 quart dutch oven. You can use a bigger one if you need to, but I wouldn’t go much smaller.
What if I don’t have a dutch oven?
Any heavy duty pot with a lid will work.
Can I freeze this bread?
Yes, you can freeze this bread for up to two months. Thaw on a counter.
Do I have to allow the dough to rise for 12 to 15 hours?
No. Some bakers allow the dough to rise for 2 hours, or doubled in size, then bake it. This will work. However, the bread has so much more flavor if it’s allowed to rise for several hours and ferment.
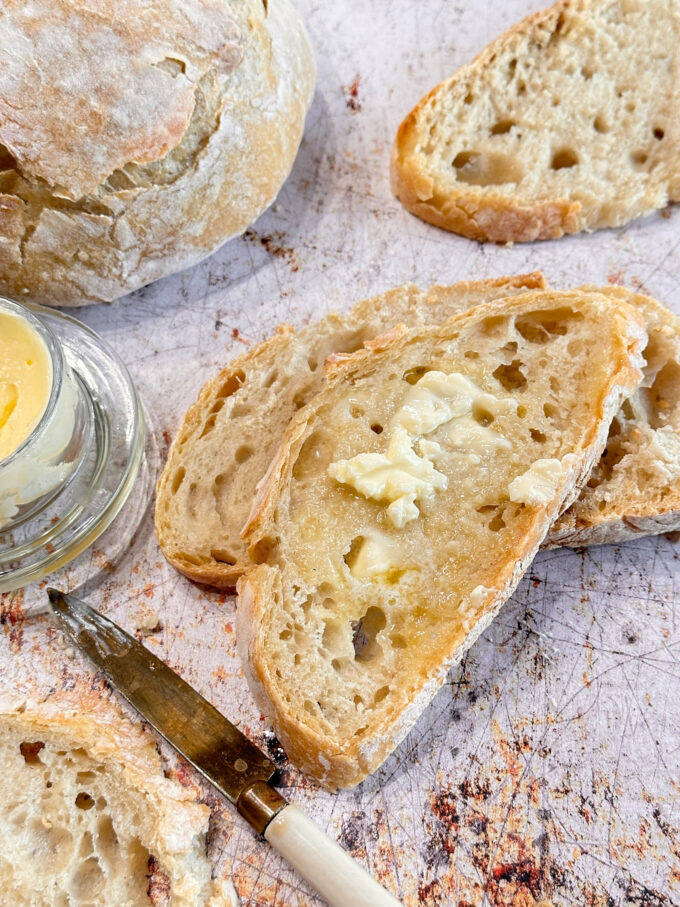
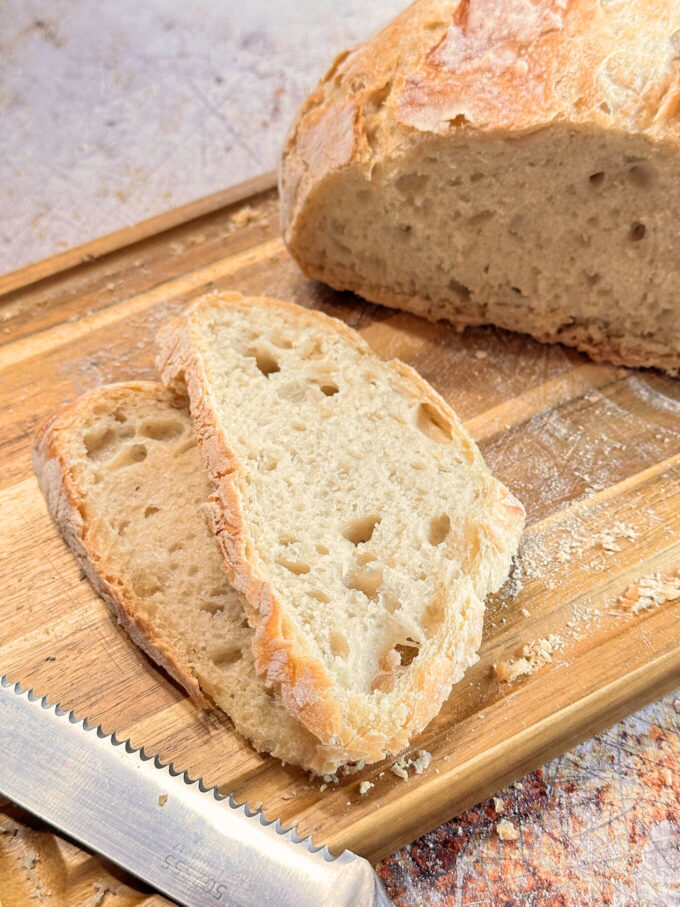
This No-Knead Rustic Artisan Bread is crusty on the outside and soft and chewy on the inside. It’s wonderful served hot with butter, or room temperature with soup or cheese. It’s great any way you eat it!
If you make this recipe please rate it, and leave a comment below on how you liked it. I love hearing from you!
Wanna see different recipes each day? Feel free to follow me on Facebook, Pinterest and Instagram.
Print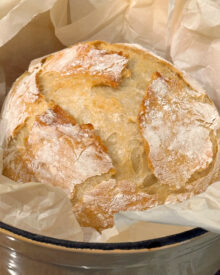
No-Knead Rustic Artisan Bread
- Prep Time: 16 hours
- Cook Time: 50 minutes
- Total Time: 16 hours 50 minutes
- Yield: 1 loaf 1x
- Category: Bread, Sides
- Method: Bake
- Cuisine: American
Description
This No-Knead Rustic Artisan Bread is made in a dutch oven and it’s the easiest bread you’ll ever make. It’s crusty on the outside, soft and chewy on the inside, and made with three simple ingredients. Simply delicious!
Ingredients
- 3 cups all purpose flour
- 1 3/4 teaspoon kosher salt
- 3/4 teaspoon Rapid Rise or instant yeast, (or 1 teaspoon active dry yeast)
- 1 1/2 cups room temperature or warm water, no hotter than 115 degrees.
Instructions
- Whisk together the flour, salt and yeast in a large mixing bowl. Add water and stir mixture with a wooden spoon until the mixture forms a sticky ball. This dough does not get kneaded so it will be rough, not smooth looking. Cover bowl with plastic wrap and allow bowl to set at room temperature for 12 to 15 hours to ferment and rise. The dough should be doubled in size and be covered in wet bubbles.
- Heat oven to 450 degrees.
- Place a dutch oven with the lid in the oven for 30 minutes. A 3.5 quart dutch oven is big enough and any cast iron pot with a lid will work.
- Meanwhile, transfer the dough onto a generously floured work surface. Dough will be sticky. Using floured hands, shape the dough into a ball. Cover the dough with a towel or plastic wrap and allow it to rest while dutch oven is preheating.
- Remove lid from dutch oven. Place a large piece of parchment paper inside and over the sides of the dutch oven. Using floured hands, transfer the dough to the dutch oven. Place lid on dutch oven.
- Bake in preheated oven for 35 minutes. Remove lid and bake for an additional 10 to 15 minutes until golden brown on top.
- Remove bread from the dutch oven and transfer to a wire rack to cool before slicing. If you prefer to eat the bread hot, tear it apart with your hands instead of trying to slice it.
- Store bread in a paper bag, to help it retain its crispness.
Notes
- Prep time includes 15 hours of fermentation.
Nutrition
- Serving Size: 6
Hi Kerri, It can, but I don’t recommend using the parchment paper. The oven will be at 450 degrees, and parchment paper is generally not safe over 450 degrees. It might catch fire.
This is excellent! I have made this recipe several times and it turns out perfect every time. I sometimes add dried rosemary to give it a little kick. I also think this would work well with some roasted garlic thrown in for a savory bread. Very yummy and fool-proof if you follow directions.
Hi Cindy, I already made this bread once, it’s simple and delicious. Now I want to add black olives to this recipe… when do you think I should add them? Thanks!
Hi Maria, I think that would be great. I would mix them in right after prepping the dough.