Homemade Buttermilk Waffles
These Homemade Buttermilk Waffles are so good! They are thick, soft, and fluffy with buttery crispy exteriors and they are super easy to make.
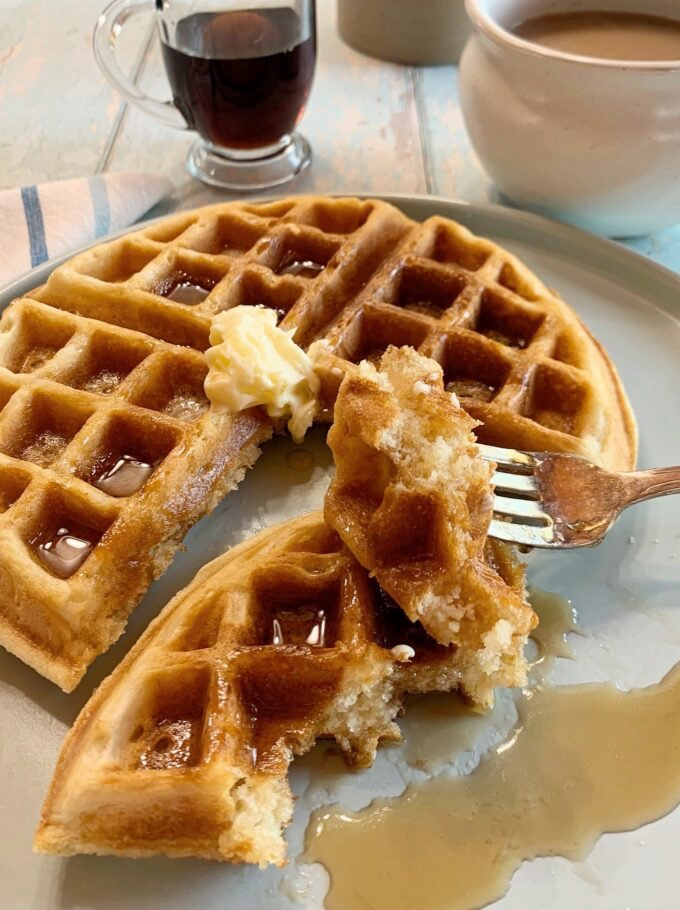
Well HELLO, you big soft, and fluffy Buttermilk Waffle with buttery crispy edges. Nice to meet you! I’m going to soak each and every bite of you in some maple syrup and indulge until every little crumb of you is gone! 🙂
I love breakfast recipes, especially sweet ones. After posting several pancake recipes over the years I figured it was high time I posted a waffle recipe! My first ones turned out dense and rather dry, so the birds got a treat and I started experimenting again. I added more butter and an additional egg, and the second batch turned out perfect!
Tips for perfect waffles!
- Don’t overmix: Don’t overmix the batter. Mix only to combine. There should still be some small lumps or streaks of flour in the batter and unlike pancakes, this batter will be on the thicker side. Over mixing causes more gluten which results in tough & dense waffles. We want light and fluffy!
- Allow the batter to rest: Once you mix the batter, allow it to sit for about 10-15 minutes. See the side by side pictures below. The one on the right looks really spongy after 15 minutes. This is what you want. Allowing the batter to rest allows the strands of gluten to relax, and allows the starch to absorb more of the moisture in the batter, resulting in a thicker batter. We want a thicker batter for waffles so they are crispy on the outside with soft interiors.

- Use a hot waffle iron: Make sure your waffle iron is hot enough. The light should turn green when it is ready. I heat my waffle iron on #3, (high). You might want to test the heat on your first waffle.
- Greasing the waffle iron: If you don’t have a non-stick waffle iron, brush the grids with butter or oil before pouring the batter. I have a non-stick (Hamilton Beach) and it never needs greased.
- Use full-fat buttermilk in this recipe. Don’t skimp by using milk. Sure a vinegar and milk work for a buttermilk substitute, but trust me it’s not the same.
- Don’t use too much batter per waffle: I experimented with the amount of batter per waffle in this recipe and found 1/3 cup of batter the perfect amount per waffle grid. When I used 1/2 cup the batter overflowed. However, not all waffle irons are the same. I suggest starting with 1/3 cup for the first waffle if you’re not sure how much to use for your waffle iron.
- Pour the batter in the center of each waffle grid. Your waffle iron should have 4 grids/cavities. It’s important to pour the batter over the very center of each waffle grid. Pouring it off center can also cause the batter to over flow over the edge.
- Don’t undercook: Cook the waffles until they are a dark golden brown and don’t open the waffle iron until there is no longer any steam coming out of it.
- Measuring the flour: Measure the flour correctly. Either weigh the flour or use the spoon & level method for measuring. Don’t simply scoop up the flour. Flour gets compacted after sitting in a canister or bag. It needs to be aerated or you will end up using too much in your recipe.
Can I mix the batter the day before?
Not a good idea! Why? This recipe contains both baking powder and baking soda, along with buttermilk. The baking soda gets activated as soon as it meets up with the buttermilk. If it’s not used within just a few minutes, the baking soda will deactivate and stop doing its job. If this recipe called for baking powder only, you could leave it in the fridge overnight. Why? Because the baking powder is double-acting, meaning it activates when it’s mixed with the wet ingredients and then again when it’s heated.

Keeping the waffles warm
Waffles get soggy after sitting for a few minutes. If you’re going to make waffles a few minutes before serving them, you can keep them warm by placing them in a 250-degree oven. This will also help keep them crisp. First, place a wire rack on a rimmed cookie sheet and place the waffles on the wire rack, then in the oven.
More recipes you might like,
Buttermilk Pancakes with Cherry Compote
If you make this recipe, please rate it and leave a comment below on how it turned out. I love getting your feedback! 🙂
If you wanna see different recipes each day, feel free to follow me on Facebook, Pinterest, & Instagram.
Print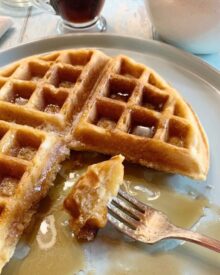
Homemade Buttermilk Waffles
- Prep Time: 10 minutes
- Cook Time: 12 minutes
- Total Time: 22 minutes
- Yield: 4 waffles 1x
- Category: Breakfast
- Method: Cook
- Cuisine: American
Description
These Homemade Buttermilk Waffles are so good! They are thick, soft, and fluffy with buttery crispy exteriors and they are super easy to make!
Ingredients
- 2 cups all-purpose flour, minus 2 tablespoons
- 1/4 cup granulated sugar
- 2 tablespoons cornstarch
- 1/4 teaspoon salt
- 1/2 teaspoon baking soda
- 2 teaspoons baking powder
- 1 3/4 cups full-fat buttermilk
- 1/4 cup (1/2 stick) unsalted butter, melted
- 2 teaspoons pure vanilla extract
- 2 large eggs
Instructions
- Add the flour, sugar, cornstarch, salt, baking soda, and baking powder to a mixing bowl. Whisk with a fork or whisk to combine. Add the buttermilk, butter, vanilla, and eggs to the dry ingredients to the dry ingredients and mix with a large spoon only until combined. Do not overmix! The mixture should be thick and slightly lumpy. Set the mixture aside to rest for 15 minutes.
- Preheat a belgian waffle maker to high (#3). If you don’t have a non-stick waffle maker, brush the grids with oil or butter. Mine is non-stick and doesn’t need to be greased.
- Pour a scant 1/4 cup of batter into each of the 4 grids, making sure to pour the batter into the center of each one. Don’t spread it out. This will cause it to over flow over the edges when you close the lid. Close the waffle iron and flip it over. Cook the waffle until it’s a medium golden brown and crispy around the edges, about 2 to 3 minutes, depending on your waffle iron. The green light should light up when it’s ready.
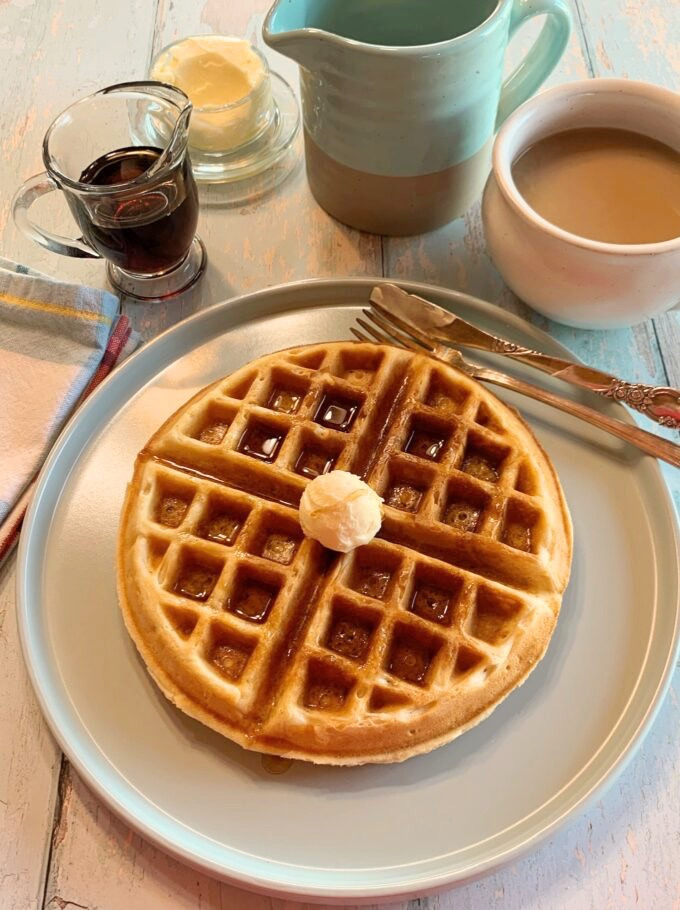
- Serve the waffles with butter and syrup, or your favorite fruit toppings.
- If you’re fixing several waffles you can keep them warm by preheating an oven to 250 degrees and placing the waffles on a wire rack placed inside of a rimmed cookie sheet.
- Waffles are best if eaten the same day.
Notes
- Waffles can be frozen for up to 2 months. Place a layer of parchment paper between them and wrapped securely with plastic wrap, then foil.
- If using a regular waffle iron, reduce the amount of batter per grid, experimenting with the first waffle.
Delicious! Just had these for breakfast and they were so good
Hi Brandy, Yay! So glad you liked them. 🙂