Overnight Orange Rolls
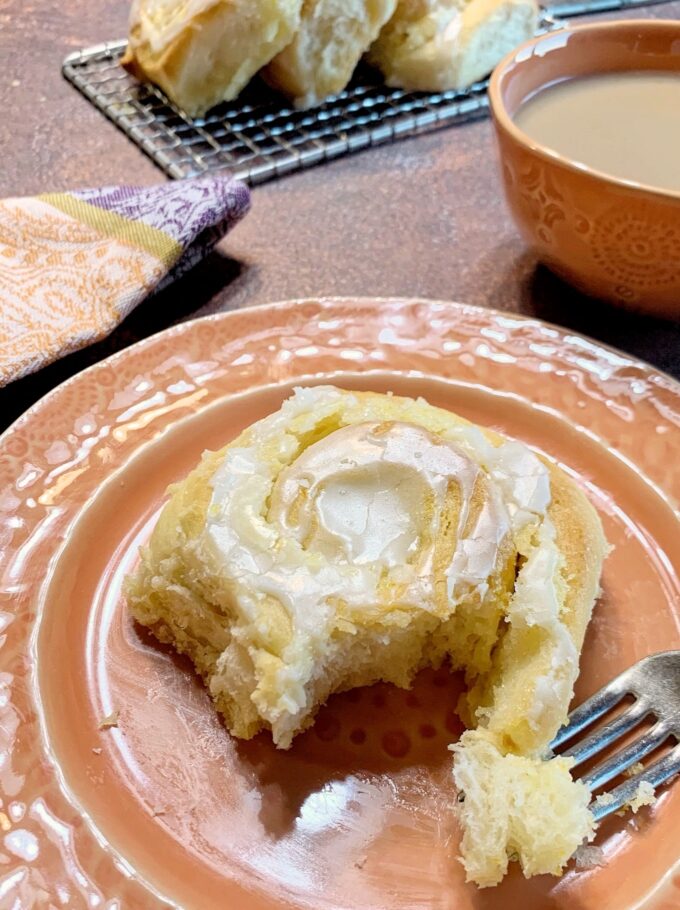
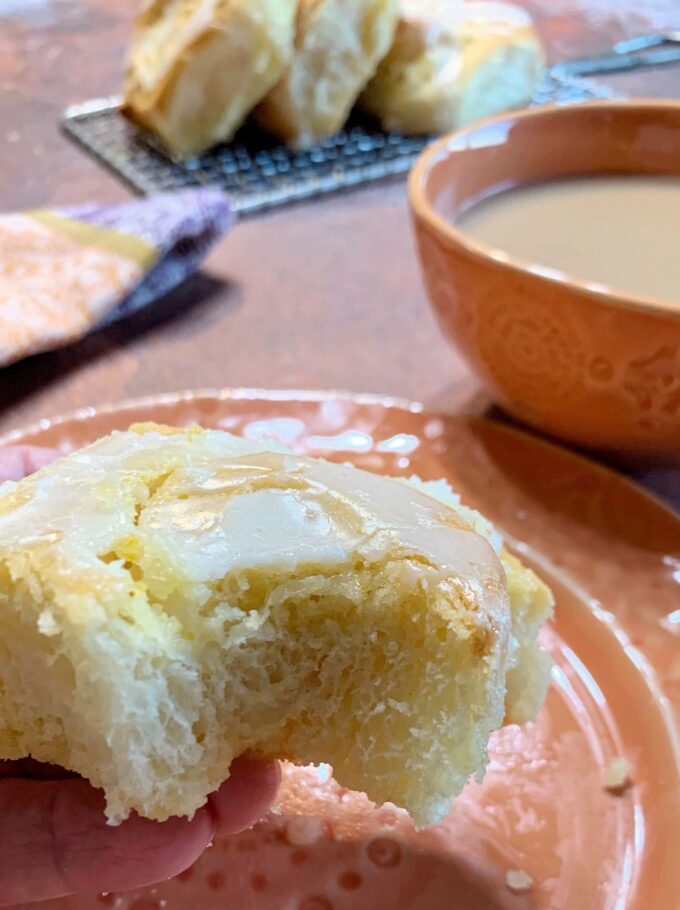
You won’t find a more delectable sweet roll than these Overnight Orange Rolls. They are super soft and fluffy with a perfect orange flavor, and the tops are drizzled with an equally delectable orange glaze. They are a great weekend breakfast treat.

I’ve been wanting to make an orange version of my classic Cinnamon Rolls for a very long time and it has finally happened. My oh my! You know I honestly can’t say what my favorite sweet roll is but these are definitely at the top of my list of faves.
If you’ve never made any type of yeast rolls before and you’re feeling a little intimidated by using yeast, don’t fret. In this Overnight Cinnamon Roll recipe, I’m going to break down each step for you, and I assure you it’s not that hard. Are you ready?
Proofing the yeast
The first thing we need to do when making any recipe calling for yeast is to proof the yeast. This is simply checking the yeast to make sure it is alive. Make sure you check the date on your packet of yeast to make sure it’s not expired. Proofing is usually the first step when using active dry yeast. When using rapid rise or instant yeast, this step is not necessary.
Proof the yeast: For this recipe, add one packet of yeast to a warm cup of milk, around 110 to 115 degrees. You don’t want the milk any warmer. If it’s too warm it will kill the yeast. Using a spoon lightly push down on the yeast granules to ensure all of them are wet. Set the mixture aside for 5 minutes. If the yeast is good the mixture will look sort of foamy or bubbly. If it hasn’t changed, it’s probably dead.

Optional: You can also add a pinch of sugar to the yeast and milk if you prefer. Yeast loves sugar, and it should activate the yeast more quickly.
Mixing the dough
Once you’ve proofed the yeast, you’re ready to go! Mixing the dough is not hard. In this recipe, I used a stand mixer, starting with a paddle attachment and later switching to a hook attachment. If you don’t have a hook attachment you can use the paddle attachment for the entire mixing step. Alternately, you can also mix the dough by hand if you don’t have a stand mixer. Are you ready? Let’s get started!
- Add the sugar, butter, and salt to the bowl of a stand mixer fitted with the paddle attachment. Mix on medium speed to combine.
- Add the milk/yeast mixture and mix on medium-low speed just to combine. Add the egg and mix on medium speed until the egg is incorporated.
- Switch to the hook attachment, (if you don’t have one, use the paddle attachment). On low speed, add 3 1/2 cups of the flour. Continue to mix on medium-low speed until the flour is moist. Mix on medium speed until the dough begins to pull away from the sides of the bowl, but sticks to the bottom. The mixture should be elastic but not sticky. If the dough is sticky, add the last 1/4 cup of flour and mix for another minute or so. Again, the dough should pull away from the sides but stick to the bottom of the mixing bowl, and it should not stick to your fingers when pulled.
- Transfer the dough to a lightly floured surface and lightly knead it for about 1 minute, until it forms a smooth round ball.

The first rise
Now we’re ready for the first rise. Let’s talk about it. If you’re planning to bake the rolls off the following day, you want to allow them to rise one time only and refrigerate the dough. The next day you’ll allow the dough to rise a second time and bake the rolls.
- Preheat an oven to 160 degrees ahead of time and turn it off.
- Place the dough in a well-greased bowl, turning the dough once so the top is greased. Cover the bowl with a damp towel.
- Place the bowl in the warm oven, (make sure the oven rack is warm, but not hot). Leave the oven door ajar. Leave the bowl in the oven until the dough has doubled in size, about 1 hour, or ready when you do a poke test. What’s a poke test? If you’re not sure when the dough is ready, simply poke your finger about 1/2 inch into the dough. If it leaves an indentation, it’s ready. If it doesn’t leave one, leave the bowl in the oven for a few more minutes and test again.

Filling, rolling, and cutting the rolls
Are you still with me? I hope so. Once you make these Overnight Orange Rolls, you’ll be wanting to make a variety of different sweet and dinner rolls with yeast. Okay, let’s continue on!
- Once the dough is ready, lightly punch it down and transfer it to a lightly floured work surface. Roll the dough into a long rectangle. Spread the filling over the dough, stopping about 1/2-inch from the edge.
- Starting on a long side, roll the dough up into a long roll. With your fingers, go along the edge of the roll pinching the edge of the dough together with the roll of dough. Place the roll seam side down.
- Using a sharp knife or a long piece of unwaxed dental floss, cut the long roll into 12 equal pieces. I always cut off and discard the two end pieces, then score the dough where I want to make my cuts. Then I use a sharp knife or unwaxed floss to cut them. Place the rolls cut side down on a well greased 10 x 15 cookie sheet.

The second rise
Now you can decide if you want to refrigerate the rolls and bake them the next day or go ahead and let them rise again and bake them now. Let’s discuss both ways…
Refrigerate overnight, and do 2nd rise and bake the next day
- Cover the rolls with plastic wrap and refrigerate. The next day, remove plastic wrap. Cover rolls with a towel and allow them to rise for 1 hour. Meantime, preheat an oven to 375 degrees.
- Bake the rolls for approximately 25 minutes or until the tops are golden brown, remove them from the oven, and allow them to slightly cool while making the glaze.
Do 2nd rise and bake today
- Place a damp towel over the pan of rolls and place them back in the lukewarm oven. After 30 minutes, transfer them to a counter and leave covered. Meantime, preheat the oven to 375 degrees. Allow the rolls to sit for an additional 15 minutes, (a total of 45 minutes).
- Bake the rolls for approximately 25 minutes or until the tops are golden brown, remove them from the oven, and allow them to slightly cool while making the glaze.

Yes, there are a few steps to making these delicious Overnight Orange Rolls, but won’t you agree that none of them are really hard? Each time you make these yummy rolls it will become easier for you to do each step.
Can’t you imagine the look on little faces when you sit a pan of these scrumptious sweet rolls in front of them? Finger-lickin’ good!! Oh yeah!!

You might also like my recipe for,
Classic Sweet Dough Cinnamon Rolls
More yummy breakfast rolls from other food bloggers…
Raspberry Cheesecake Sweet Rolls by Mindee over at Mindee’s Cooking Obsession
Cranberry Orange Rolls by Julia over at Plated Cravings
Pecan Sticky Buns by Rebecca over at Sugar and Soul
Swedish Cardamom Buns by Stine Mari over at Ginger with Spice
If you make this recipe please rate it and leave a comment below on how you liked it. I love getting your feedback.
Wanna see different recipes each day? Feel free to follow me on Facebook, Pinterest, & Instagram.
Print
Overnight Orange Rolls
- Prep Time: 2 hours
- Cook Time: 25 minutes
- Total Time: 2 hours 25 minutes
- Yield: 12 rolls 1x
- Category: bread, breakfast
- Method: bake
- Cuisine: American
Description
These Overnight Orange Rolls are so light and fluffy with the perfect amount of orange flavor and they’re finished with a delectable orange glaze. A great weekend breakfast roll.
Ingredients
Dough:
- 1 cup warm milk (around 110 degrees)
- 1 packet active dry yeast, .25 ounce
- 1/3 cup granulated sugar
- 1 stick (1/2 cup) unsalted butter, melted (not hot)
- 1 teaspoon salt
- 1 large egg, room temperature
- 3 1/2 to 3 3/4 cups all-purpose flour, spoon & leveled
- Vegetable oil or solid shortening for greasing bowl
- Butter or solid shortening for greasing baking pan
Filling:
- 1 stick unsalted butter, softened to room temperature
- 1 cup granulated sugar
- 2 tablespoons fresh orange zest
Orange Glaze:
- 1 cup powdered sugar
- 1 tablespoon butter
- 1/4 teaspoon pure orange extract*
- 5 teaspoons milk, (more or less as needed for perfect spreading consistency)
Instructions
Dough:
- Proof the yeast: Add the yeast to the milk. Using a spoon lightly push down on the yeast granules to ensure all of them are wet. Set the mixture aside for 5 minutes.
- Preheat oven to 165 degrees and turn off.
- Mixing the dough: Add the sugar, butter, and salt to the bowl of a stand mixer fitted with the paddle attachment. Mix on medium speed to combine. Add the milk/yeast mixture and mix on medium-low speed just to combine. Add the egg and mix on medium speed until the egg is incorporated. Switch to the hook attachment, (if you don’t have one, use the paddle attachment). On low speed, add 3 1/2 cups of the flour. Continue to mix on medium-low speed until the flour is moist. Mix on medium speed until the dough begins to pull away from the sides of the bowl, but sticks to the bottom. The mixture should be elastic but not sticky. If the dough is sticky, add the last 1/4 cup of flour and mix for another minute or so. Again, the dough should pull away from the sides but stick to the bottom of the mixing bowl, and it should not stick to your fingers when pulled. Transfer the dough to a lightly floured surface and lightly knead it for about 1 minute, until it forms a smooth round ball.
- First rise: Place the dough in a well-greased bowl, turning the dough once so the top is greased. Cover the bowl with a damp towel. Place the bowl in the warm oven, (make sure the oven rack is warm, but not hot). Leave the oven door ajar. Leave the bowl in the oven until the dough has doubled in size, about 1 hour. If you’re not sure when the dough is ready, simply poke your finger about 1/2 inch into the dough. If it leaves an indentation, it’s ready. If it doesn’t leave one, leave the bowl in the oven for a few more minutes and test again.
- Mix the filling: Meantime mix the filling ingredients together in a small bowl and set aside.
- Forming the rolls: Once the dough is ready, lightly punch it down and transfer it to a lightly floured work surface. Roll the dough into a long rectangle. Spread the filling over the dough, stopping about 1/2-inch from the edge. Starting on a long side, roll the dough up into a long roll. With your fingers, go along the edge of the roll pinching the edge of the dough together with the roll of dough (see picture). Place the roll seam side down. Using a sharp knife or a long piece of unwaxed dental floss, cut the long roll into 12 equal pieces. I always cut off and discard the two end pieces. Place the rolls cut side down on a well greased 10 x 15 cookie sheet.
- Overnight Rolls, (option #1): If you want to bake them off the next day, cover them with plastic wrap and refrigerate. The next day, remove plastic wrap. Cover rolls with a towel and allow them to rise for 1 hour. Skip to step 9.
- Same day rolls, (option #2): Place a towel over the pan of rolls and place them back in the oven. After 30 minutes, transfer them to a counter, leave covered, and preheat the oven to 375 minutes. Allow the rolls to sit for an additional 15 minutes, (a total of 45 minutes).
- Bake the rolls: Bake the rolls for approximately 25 minutes or until the tops are golden brown, remove them from the oven, and allow them to slightly cool while making the glaze.
- Make the glaze: Add the glaze ingredients to a small bowl and whisk vigorously with a fork until smooth. Using a spoon, drizzle the glaze over the warm rolls.
- These rolls are best when consumed the day they are made. They are very soft. They are still good the next day if warmed for about 10 seconds in a microwave. I suggest eating them by the day after you make them.
- Store covered.
Notes
- *If you use imitation orange extract, you can use 1/2 teaspoon. It’s not as potent as pure orange extract. If you use pure orange oil, use 1/4 teaspoon. It’s also very potent. A little goes a long way. If you don’t have orange extract you can use orange juice but it will take quite a bit for a true orange taste. Therefore, prepare to use more powdered sugar or it will be very thin.
These are fantastic! I got rave reviews from everyone, so delicious!!! Could these be frozen once the rolls are filled and sliced before the second rise. I want to keep some on hand.
Hi Robin, Yes, they sure can. Thaw them overnight in the refrigerator, then let them rise and bake.
My great-grandma used to make orange rolls for Easter and Christmas. After hearing about them from my mom on more than one occasion, I decided to look up a recipe and give it a shot. My mom is currently working on her second roll and I think she’s told me how perfect they are twenty times! I followed the recipe almost exactly – the only difference was that I just put the zest of an entire orange into the filling because I didn’t feel like measuring. I also probably baked them an extra 15-20 minutes – not a big deal, just be aware that it might take a little longer. It’s well worth the wait – these rolls are puffy and perfectly orange and just sweet enough. Hundred percent would recommend – this recipe will be making its way into the regular rotation! Thanks so much for sharing!
Hi Ellie, I’m so glad they were a hit. Happy baking! 🙂
These are over the top delicious! I have made them so many times that I’ve lost count. They are a huge hit with everyone! I have made them and froze for hostess gifts. I freeze the assembled rolls, toss them in a zipper bag, pre-make the glaze and put it in a small snack bag and include the instructions. When I need a quick batch or need a quick hostess gift I bring a bag along. Nobody wants cinnamon rolls anymore. Thank you for the fantastic recipe!
Hi Robin,
Thank you for the great feedback. I’m glad you like these. Also, thanks for the 5-star rating and the tips on freezing them. 🙂