Description
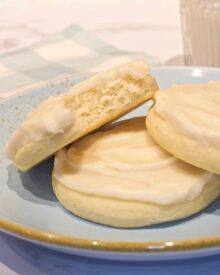
These Softbatch Vanilla Sugar Cookies are thick and soft, and finished with a buttery icing. They are a perfect “any” occasion cookie, and can also be made with sugar sprinkles on top versus icing. Kids love them!!
Ingredients
Units
Scale
COOKIES
- 3 cups all-purpose flour
- 3 teaspoons baking powder
- 1 teaspoon salt
- 1 stick unsalted butter, room temperature
- 1 cup granulated sugar
- 2 large eggs, room temperature
- 1 teaspoon pure vanilla extract
- 1 cup heavy whipping cream
- 1 stick unsalted butter
- 1/8 teaspoon salt
- 2 teaspoons pure vanilla extract
- 4 cups powdered sugar
- 5 tablespoons milk
Instructions
COOKIES
- Add the flour, baking powder, and salt to a large bowl and whisk together. Set aside.
- Add the butter and sugar to the large bowl of a stand mixer fitted with the paddle attachment, or use a hand mixer. Mix on high speed for about 2 minutes until the mixture is smooth. Add the eggs and vanilla and mix on medium speed for 2 more minutes, until mixture is very smooth and creamy. Add the dry ingredients alternately with the whipping cream, in 2 additions, starting and ending with the flour. Mix just enough to incorporate the ingredients. Do not over mix.
- Cover the bowl with plastic wrap and refrigerate for 1 hour or overnight, if you want to mix ahead of time and bake later.
- Preheat oven to 350 degrees.
- Remove 1/2 of the dough from the refrigerator and transfer to a floured work surface. Dust the top with flour. Using a rolling pin or the heel of your hand, pat the dough out to about 1/4 inch in thickness. You can actually roll the dough to 1/3 inch in thickness for even thicker cookies, but they will take longer to bake and will make less cookies. I like to pat this dough out with the heel of my hand. This dough tends to get sticky and stick to the rolling pin, unless you make sure your rolling pin is consistently dusted with flour as you go. I dip the heel of my hand in flour as needed and pat the dough out. This way works better for me with this dough.
- Cut the cookies with a cutter that’s dipped in flour after each cutting. I used a 3-inch round cutter for these, and they made 20 cookies, but you can use any cutter size you desire.
- Place the cookie cutouts about 2- inches apart on ungreased cookie sheets. They will spread. Also, you can sprinkle the cookie dough cutouts with sugar sprinkles before baking, if you prefer to make plain sugar cookies without icing.
- Bake for approximately 25 minutes, until the cookies are lightly browned on the bottoms. The tops will still be white. Transfer cookies to a wire rack to cool.
BUTTER ICING
- Add the butter to a medium saucepan over medium heat. Melt the butter and remove the pan from the heat. Add the salt and vanilla and mix together. Add 2 cups of the powdered sugar, one cup at a time, beating well with a wooden spoon or you can use a whisk. Mix in 3 tablespoons of the milk, followed by the remaining sugar, and ending with the reamaining milk. Whisk or beat with a wooden spoon until the icing is smooth.
- Using an offest spread the icing generously over each cookie. Allow the cookies to sit until the icing becomes slightly firm, at least 1 hour.
- Place cookies in single layers, with wax paper between them, in an airtight container. Cookies will stay fresh for up to 5 days.
Notes
Baked cookies can be frozen for up to 3 months. I don’t recommend freezing them with the icing. The icing tends to look blotchy after freezing it. Make sure you freeze them in single layers with wax paper between the layers.
Prep time does not include chilling time.